These beans have become a huge hit beyond what I thought was possible. I love a good plate of beans, but they aren't exactly "politically correct" if you understand my meaning. I had been passed along the starter recipe for this, I loved it, but it used baked beans and while it did a very nice job doctoring the sauce, but begged to be taken to the next level. Then Carla and I somehow got involved in three potlucks in two days - a gigantic batch of something was in order.
The first thing was to get down to basics and mix up the bean variety - I used three kinds, but by all means go for it! I would happily get some lentils and chickpeas involved, but in this case I felt I should stick to the basics. Next, being baked beans, I thought a hint of smoky chipotle would do it nice. This of course led to one of the greatest cross-border flavour combinations with the involvement of some dark maple syrup.
You will need:
4 white onions
4 cloves garlic
796ml / 28oz tomatoes (1 can)
796ml / 28oz red beans (2 cans)
1080ml / 38oz white beans (2 cans)
1080ml / 38oz black beans (2 cans)
540ml / 19oz pineapple tidbits (1 can)
160ml / 2/3C brown sugar
125ml / 1/2C molasses
125ml / 1/2C ketchup
60ml / 1/4C maple syrup (#3 dark is best)
3 large chipotle chiles (rehydrated if dried)
1 red bell pepper
1 green bell pepper
250ml / 1C corn kernels
5ml / 1tsp smoked paprika
5ml / 1tsp black pepper
2.5ml / 1/2tsp cumin
to taste kosher salt
as needed olive oil
Method:
- set the oven to 325F
- dice the onion and start it caramelizing in a large pan with some olive oil
- mince the garlic and have it ready
- split the canned tomatoes and de-seed them, saving any juice
- puree the tomato flesh
- when the onions have started to colour, add the garlic and take to a rich brown
- add the paprika, pepper and cumin and toast slightly
- drain the pineapple, use the juice to deglaze the pan and reduce slightly
- add the tomato juice, puree, molasses, ketchup, brown sugar and maple syrup
- add the chipotles and bring the broth to a simmer
- add the pineapple
- drain the beans and mix them together in a large crock pot
- add the hot broth and mix well
- put the lid on the pot and bake for 1 1/2 hours
- dice the bell peppers and have ready
- after the baking, remove the lid and mix in the peppers and corn
- return to the oven uncovered for another 1/2 hour
- cool slightly, then serve hot
Showing posts with label fruits and vegetables. Show all posts
Showing posts with label fruits and vegetables. Show all posts
Wednesday, March 12, 2014
Tuesday, July 2, 2013
Recipe: Rajas con Papas (poblanos in cream with potatoes)
 |
| dice and cook the potatoes |
 |
| peel and cut the poblanos |
You will need:
6 medium to large potatoes
3 poblanos
1 large onion
3 cloves garlic
200ml / 6.8fl oz cream
100ml / 3.4floz sour cream
as needed olive oil
as needed kosher salt
as needed black pepper
 |
| caramelize the onions |
Method:
- put a pot of water on to simmer
- peel and dice the potatoes
- simmer the potatoes in the water until almost cooked
- strain the potatoes out of the water and let air-dry, cool, and set aside
- roast corn on the grill, or pan-roast kernel corn in a pan and set aside
- burn the poblanos, sweat, then peel (or use microwave - peeling peppers - microwave method)
- cut the poblanos into thick strips and set aside - save any juice they have released
- julienne the onion and saute in oil
 |
| add the cream and poblanos |
- take the onions and garlic to a rich brown
- deglaze the onions with the poblano juice, then add the cream
- bring the cream to a simmer, then add the poblanos
- simmer some more
- add the sour cream, and season with salt and pepper
- add in the potatoes and toss well in the sauce
- check the seasoning and adjust if necessary
- toss in the roasted corn and serve
 |
| add the potatoes and corn |

Thursday, April 25, 2013
Recipe: Tomato tartare
 This recipe is not complicated, but can add a touch of elegance and freshness to a dish. At first
glance, this may look like a salsa, but a little more care goes into preparing the tomatoes and there's less emphasis on "spiciness" - the goal here is to focus on the tomato, and the other ingredients are meant to compliment it and extend the flavour profile. If you press the tartare I to. A ring mold, it makes a great landing pad for the focal item of a dish that may otherwise try to slide around on the plate. Try it with a single lamb chop, or a nice little section of pork belly. Have a look at my post for peeled tomatoes if you want a little more insight into the best way to blanch tomatoes for peeling.
You will need:
10 medium tomatoes (on the vine are great)
1 shallot
2Tbs chopped Italian parsley
2Tbs olive oil
to taste kosher salt
2Tbs chopped Italian parsley
2Tbs olive oil
to taste kosher salt
Method:
- get a pot of water on to boil and an ice bath ready
- score the bottoms of the tomatoes, blanch in the boiling water, then cool off in the ice bath
- peel the tomatoes, then open them up and remove the seeds
- pat the tomatoes dry with a paper towel
- cut the tomatoes into small dice and put in a bowl
- mince the shallot fine and add to the diced tomato
- chop the parsley and add to the bowl
- add the olive oil and mix well
- season with kosher salt
- use as needed
Monday, March 11, 2013
Recipe: Hot and sweet celery slaw
 |
| peel and julienne the celery |
This little ditty came about as Dan and I were brainstorming the hot wing burger (coming soon). We wanted celery involved in an interesting way and a slaw seemed a good direction to go. We didn't want to muddle the celery with other vegetables but still needed something to qualify it as a slaw. We finally settled on using the pickle liquid from a jar of banana peppers as the base for the dressing.
You will need:
as needed celery
250ml / 1C banana pepper pickle juice
60ml / 1/4C sugar
Method:
- peel the outer ribs of the celery with a vegetable peeler
- julienne the celery and put in a bowl
- put the pickle liquid and the sugar in a saucepan and heat to melt the sugar
- cool the liquid
- pour over the celery and mix well
- use as needed
You will need:
as needed celery
250ml / 1C banana pepper pickle juice
60ml / 1/4C sugar
 |
| melt the sugar into the pickle |
Method:
- peel the outer ribs of the celery with a vegetable peeler
- julienne the celery and put in a bowl
- put the pickle liquid and the sugar in a saucepan and heat to melt the sugar
- cool the liquid
- pour over the celery and mix well
- use as needed
 |
| dress the celery |
Tuesday, December 11, 2012
Recipe: Caramel infused apples
 |
| hot caramelized juice |
You will need:
6 apples
250ml / 1C sugar
as needed water
355ml / 12fl oz apple juice
75g / 2.6oz brown sugar
 |
| peeled and sectioned apples |
Method:
- place the sugar in a saucepan with just enough water to make a very heavy syrup
- cover the pan and bring up to heat to caramelize the sugar
- when you get a deep coloured caramel, deglaze with the apple juice
- add the brown sugar, melt it in and maintain a simmer
 |
| cover and steep |
- cut the core section away and cut each piece into 3 slices
- place all the apple pieces in a container
- pour the caramelized juice over the apples to cover
- cover and place a small weight on top to keep the apples submerged
- place in the fridge and leave overnight
- strain the juice away and use the apples as needed

Saturday, November 17, 2012
Recipe: Peeled tomatoes
Most people know the basic way to peel a tomato - blanch the tomatoes in boiling water for 30 seconds, then transfer to ice water, then peel. It works, no doubt, but somewhere along the line, somebody took the time to really think about the process and what you are trying to achieve, and adjusted the technique accordingly.
In the industry, we go through a lot of tomato concasse - basically skinless dice tomatoes. Ideally, it's a raw product, and by adjusting the way we do it, means that the flesh of the tomato doesn't even get that 30 seconds of cooking from the usual way. The two biggest changes are to ice the tomatoes first, then break that 30 seconds down to 3 or 4 stages. Incidentally, if you are going to stew the tomatoes anyway, you can keep blanching tomatoes as normal, this method is trying to keep them as raw as possible.
You will need:
tomatoes
a large pot of boiling water (you don't want the boiling to stop as you add the tomatoes)
two ice baths (lots of ice)
Method:
- as normal, score the bottom of the tomatoes with an "X"
- plunge the tomatoes in the first ice bath for five minutes
- get the water really boiling
- drop the tomatoes into the boiling water, but stop adding if the boiling slows down
- after 5 -10 seconds, pull the tomatoes out and plunge into the second ice bath
- repeat with the tomatoes that were left behind
- switch positions of the ice baths
- repeat the blanching 3 or 4 times, but the tomatoes won't need more than a total of 30 seconds cooking
- after the last blanch, leave the tomatoes in the ice bath a few minutes - this will help loosen the skin
- peel the tomatoes as normal
Tuesday, November 13, 2012
Recipe: Calabaza en tacha - candied pumpkin
 Candied pumpkin always manages to turn up somewhere among our Mexican friends every fall. Carla and I have on occasion purposely waited until the last possible moment to carve our jack 'o' lantern at halloween just so we can turn around and morning of November 1st, cut the sucker up and make candy (any extra got cooked down and pureed for pie) - hey, in Vancouver leaving the pumpkin outside for one night in the fall is just like putting it in the fridge (as long as it didn't get blown up). As the dish's origins surround the Dia de Muertos celebrations, the timing is perfect.
 The pumpkin is cooked in a syrup made from the piloncillo, but we also throw in some cinnamon, orange and guavas for flavour. At first, it's a bit surprising how little syrup is needed, but the pumpkin releases a lot of water during the cooking. Since the size of the pumpkin will always vary, it will get easier with time figuring out how much syrup is appropriate for each batch (Carla's grandmother gets fantastic results every time and even cooks it while she sleeps).
The pieces of pumpkin are generally served with the syrup (and orange and guavas), so you want to have a nice consistency flavour to it at the end. It is a syrup after all, so ideally, you have a nice viscosity without a sweetness level that will make your teeth fall out. If you find that your syrup is a bit low during the cooking, you can either add a little more water, or turn the pieces to make sure the syrup gets absorbed evenly. If you have a little too much syrup, you can always remove the pumpkin once it's done, then bring the syrup back down, then pour it over the pieces in the container you'll be storing it in if not eating right away.
 As for the latest batch we made, we found it easiest to give the guavas and orange a cook in the syrup first, then took them out before adding the pumpkin. This way, the fruit flavours got in the syrup for the pumpkin to absorb, but we didn't have to worry about trying to mix everything up during the process, and we had a little more control over how much they got cooked. Of course they were returned to the mix at the end.
You will need:
1 small to medium pumpkin
2 piloncillos (227g / 8oz each)
1 orange
 6 guavas
2-3 cinnamon sticks
125ml / 1/2C water
Method:
- start by dissolving the piloncillos in the water with the cinnamon sticks
- slice the orange and cut the guavas into wedges and add to the syrup
- simmer the orange and guavas in the syrup about 15 minutes, then remove and set aside
- cut the pumpkin open, remove the seeds, and cut into pieces
- arrange the pumpkin pieces in the pan, making sure each piece has some flesh in contact with the syrup
- slowly simmer the pumpkin until you see it has released the water into the syrup
- if necessary, turn the pieces to immerse the other side in the syrup
- cook slowly until the pumpkin has taken the dark colour of the syrup and is very tender
- return the orange and guavas to the pan and tuck them back into the syrup amongst the pumpkin
- serve the pumpkin along with the fruit with a bit of the syrup (some like a little milk on top too)

Monday, October 22, 2012
Recipe: Mango papaya chutney
 |
| sweat the onion and spices |
You will need:
1 mango - small dice
1 papaya - small dice
1/2 white onion - brunoise
 |
| add the fruit |
1 knuckle ginger - grated (about 1Tbs)
60ml / 1/4C lime juice
45ml / 3Tbs honey
5ml / 1tsp cumin
5ml / 1tsp chili powder
5ml / 1tsp cracked black pepper
2.5ml / 1/2tsp coriander
2.5ml / 1/2tsp tumeric
as needed vegetable oil
to taste kosher salt (about 5ml / 1tsp)
Method:
 |
| add liquid and cook down |
- slowly sweat the onion, garlic and ginger in a pan with some oil
- add all the dry spices (except salt) and keep sweating (to "toast" the spices and deepen the flavour)
- when the onion is very soft, add the mango and papaya and cook 5 minutes
- add the honey and lime juice
- cook the liquid out
- season with salt
- remove from the pan and cool
- store in the fridge until use
Tuesday, October 16, 2012
Recipe: French Canadian split pea "risotto"
 |
| this gives new meaning to "chunky soup" |
For the sake of the burger, I figured that if we could make a split pea saute with all the flavour components of the soup, we'd be onto something. Cooking it risotto style seemed to be the natural approach to ensure that the final product wouldn't sog out the burger - it worked like a charm. For the burger, we seasoned it at the end with some maple vinegar just to give it a bit of a "relish" characteristic and it was more than welcome. Risotto is often seasoned with lemon juice, so the maple vinegar wasn't out of line and gave a nice balance to the richness of the dish. I've included it here as a "to taste" ingredient because I think you'll find that a dash will just bring a lot of the flavours forward.
 |
| pork sweats! |
You will need:
500ml / 2C soaked yellow split peas (about 250-300ml / 8.5-10 fl oz dry)
1/2 white onion, fine dice
5ml / 1tsp minced garlic
 |
| saute the peas |
100ml / 1/3C+4tsp pork stock
as needed water
to taste kosher salt
to taste black pepper
to taste maple vinegar (cider will also work well)
Method:
- wash the yellow peas well, then soak for 24 hours
- dice the onion fine and mince the garlic
- render the bacon lardons if you need the fat
 |
| add the stock and be gentle |
- drain the water off the peas and add to the pan
- saute the peas well, then turn the heat down and add the pork stock
- like making a risotto, add water periodically (just enough to cover) and stir often
- cook gently for about 30 - 45 minutes, then test the peas
- if they are almost tender, stop adding water and reduce the mixture down to a risotto consistency
- season with salt, pepper, and vinegar (if desired)
- garnish with pork
- serve
Thursday, September 6, 2012
Recipe: Brown butter malted beer pie dough / Blackberry pie


You will need:

114g / 4oz cold brown butter
114g / 4oz cold unsalted butter (plus more for the pan and glaze)
330g / 11.5oz (2C) all purpose flour
70g / 2.5oz (1/2C) malt powder (Horlick's)
125ml / 1/2C cold stout beer
5ml / 1tsp granulated sugar
pinch kosher salt
For the filling:

as needed sugar (how sweet are the berries?)
as needed flour
Method:
- grate the butter and brown butter on a large tooth cheese grater, then tuck in the freezer

- mix in the frozen grated butter with the dry
- add the beer and mix until just combined (by hand is ok)
- divide the dough into two and form two discs
- rest the dough in the fridge for half an hour
- butter the pie plate and put in the fridge
- wash and drain the blackberries (if you haven't already)
- preheat the oven to 350F / 177C
- take the dough out and roll the bottom crust
- lay the crust in the pie plate and press in

- roll out the top crust
- cut some vent holes
- lay the crust over the pie and pinch the edges of the top and bottom crust together
- trim away any excess crust
- place on the middle rack in the oven for 50 - 60 minutes - rotating as needed
 - when the crust looks good and you can see the filling is bubbling, melt the butter
- brush the pie with the butter and sprinkle with sugar
- return to the oven for another 5 minutes
- remove and cool on a rack
- dig in


Tuesday, September 4, 2012
Blackberry time!
It's finally one of my favorite times of year - Blackberry season! Living in Vancouver, blackberries are plentiful in most of our parks and waiting to be picked, you just need to catch that perfect window between late August and early September as the prime time can be as short as two weeks. Somewhere along the line, I even made the decision that blackberries are the one food I never buy - I wait and watch (the anticipation makes them even more delicious). After a couple cautionary samples, if the time is right, we head out to our favorite patch and pick our fill. If time allows and the scratches are healed, we head to another patch another day and repeat.
If you've never taken part in this yearly tradition, it's a great way to spend a sunny day in the park and come away with free food. This year, we even saw an apple tree growing out of the middle of a blackberry bush - how's that for intimidating fruit picking? (we were focused on the berries, but helped a dad get a good pie's worth for his kids with minimal lacerations). Here's a few tips to get the most out of your picking party.
Location:
- the wilder the better. Blackberry bushes are a gnarly beast and the more groomed a park is, the less berries will be there. Shoreline areas and nature preserves are great. Anywhere nature is allowed to run amok, blackberries will be thriving.
- pick a bush with lots of sun exposure. The best ones are often shielded by a leaf, but they need the warmth to bring out the sweetness.
Equipment:
- old pants and a long sleeve shirt that are ok to get some stains and prick - holes. I break this rule constantly, but accept the scratches as a necessary evil. The best berries are always high or deep in the bush. They may be free, but there's still a price to pay - pants and a long sleeve shirt are like a coupon.
- ice cream buckets or plastic bags. Buckets are the best as they don't leak, but bags are better if you are moving from bush to bush on a bike. Bags are also good for tucking in a pocket if you happen to be going to a park where you aren't sure if there will be berries, if they will be ripe, or you may only have a couple minutes for picking. Buckets are for when you mean business and you know the timing is perfect - less squishing of ripe berries and no juice leakage.
- two good sized sticks. In a good wild park, you can find them easily enough among driftwood or forest scraps. When all the easily reachable berries are picked, lay the sticks across the thorns in an "X" or "T" formation and step on the top stick to press the thorns down an clear a path.
- sunscreen. You picked a sunny bush remember?
Technique:
- pick the ripe ones. If you found a good bush, there's plenty for everyone, so be selective and get the sweet ones (sour berries make for sour pie)- the others will be ripe tomorrow for the next pickers. The good blackberries are a bit soft to the touch, shiny, and come away from the bush easily - better test one to be sure. This is important early in the season. Don't go out and pick a bush silly just because the berries are black, if they aren't ripe yet, all you did was thin out the crop - wait for it.
- pick above the waist. File this along with "don't eat yellow snow". Dogs, animals and merry park-goers may have been by earlier to water the bush. These branches are the ones you usually end up stepping down on anyway, so no loss.
- wash the berries when you get home before cooking or eating. This washes out he little "hairs" on the berries and any of the little bugs that hitched a ride home in your bucket.
Wednesday, August 22, 2012
Green peppers
I've worked in other places where chefs are searching high and low for the most shocking proteins to serve (prairie oysters or a brain terrine), but suggest that a certain dish might benefit from some green pepper, you are met with indignant scoffs - unthinkable, shocking that you would bring such a thing up.
Nothing at all against other types of bell peppers, I just believe that everything has it's place, and to shut any ingredient out of the kitchen 100% is limiting yourself. Stay open, stay flexible, and give the mean green a chance.
Monday, August 20, 2012
Recipe: Candied tomatoes
A dish of candied tomatoes fits well alongside a platter of artisan cheeses or a selection of snacks and tapas. It's a small amount of work, but they really stand out when done. Take advantage of prime tomato season and make it with a variety of heirloom cherry tomatoes. Sungolds are exceptional and give a nice colour contrast with the usual reds.
You will need:
500ml / 2C heirloom cherry tomatoes
as needed granulated sugar (125ml / 1/2C should be enough)
pinch salt
1 lemon juice
Method:
- set some water on to boil for blanching
- have an ice bath ready
- score the tomatoes (make small "x" cuts in the skin on the bottom)
- put the tomatoes in the ice bath a couple minutes
- transfer the tomatoes to the blanching water for 15 - 20 seconds
- return to the ice bath and let cool completely
- peel the skins off the tomatoes
- put the tomatoes in a bowl and toss with sugar
- set the bowl in the fridge overnight
- drain off the excess liquid
- put the tomatoes in a pan and gently cook over low heat until softened
- add lemon juice, stir, and let cool
- refrigerate until use
Monday, June 4, 2012
Recipe: Poached apples
This recipe for poached apples isn't intended as the kind normally seen served as a dessert, rather it's a nice way to quickly add some extra character to apples destined for a salad or appetizer. It also conveniently gives enough of a cook to the surface of the apple so you don't need to worry about it browning on you. I usually cook them very quickly so the apple retains a good crunch on the interior, but if you'd like them softer, just leave them in the cooking liquid a bit longer.
You will need:
4 granny smith apples
250ml / 1C apple cider
250ml / 1C water
125ml / 1/2C white sugar
4 sprigs thyme
1 sprig rosemary
pinch salt
Method:
- in a pot, combine the cider, water, sugar and salt and bring to a simmer
- turn off the heat and drop in the herbs - let infuse for 15 minutes
- peel and core the apples and cut into serving size wedges (or any other shape)
- bring the poaching liquid back up to a simmer
- drop in the apples
- cook a couple minutes just until the outside surface starts to soften
- strain the apples out and cool on a plate - save the liquid and cool it separately
- once both the apples and liquid are cool again, you can return the apples to the liquid
- store in the fridge until serving
Sunday, June 3, 2012
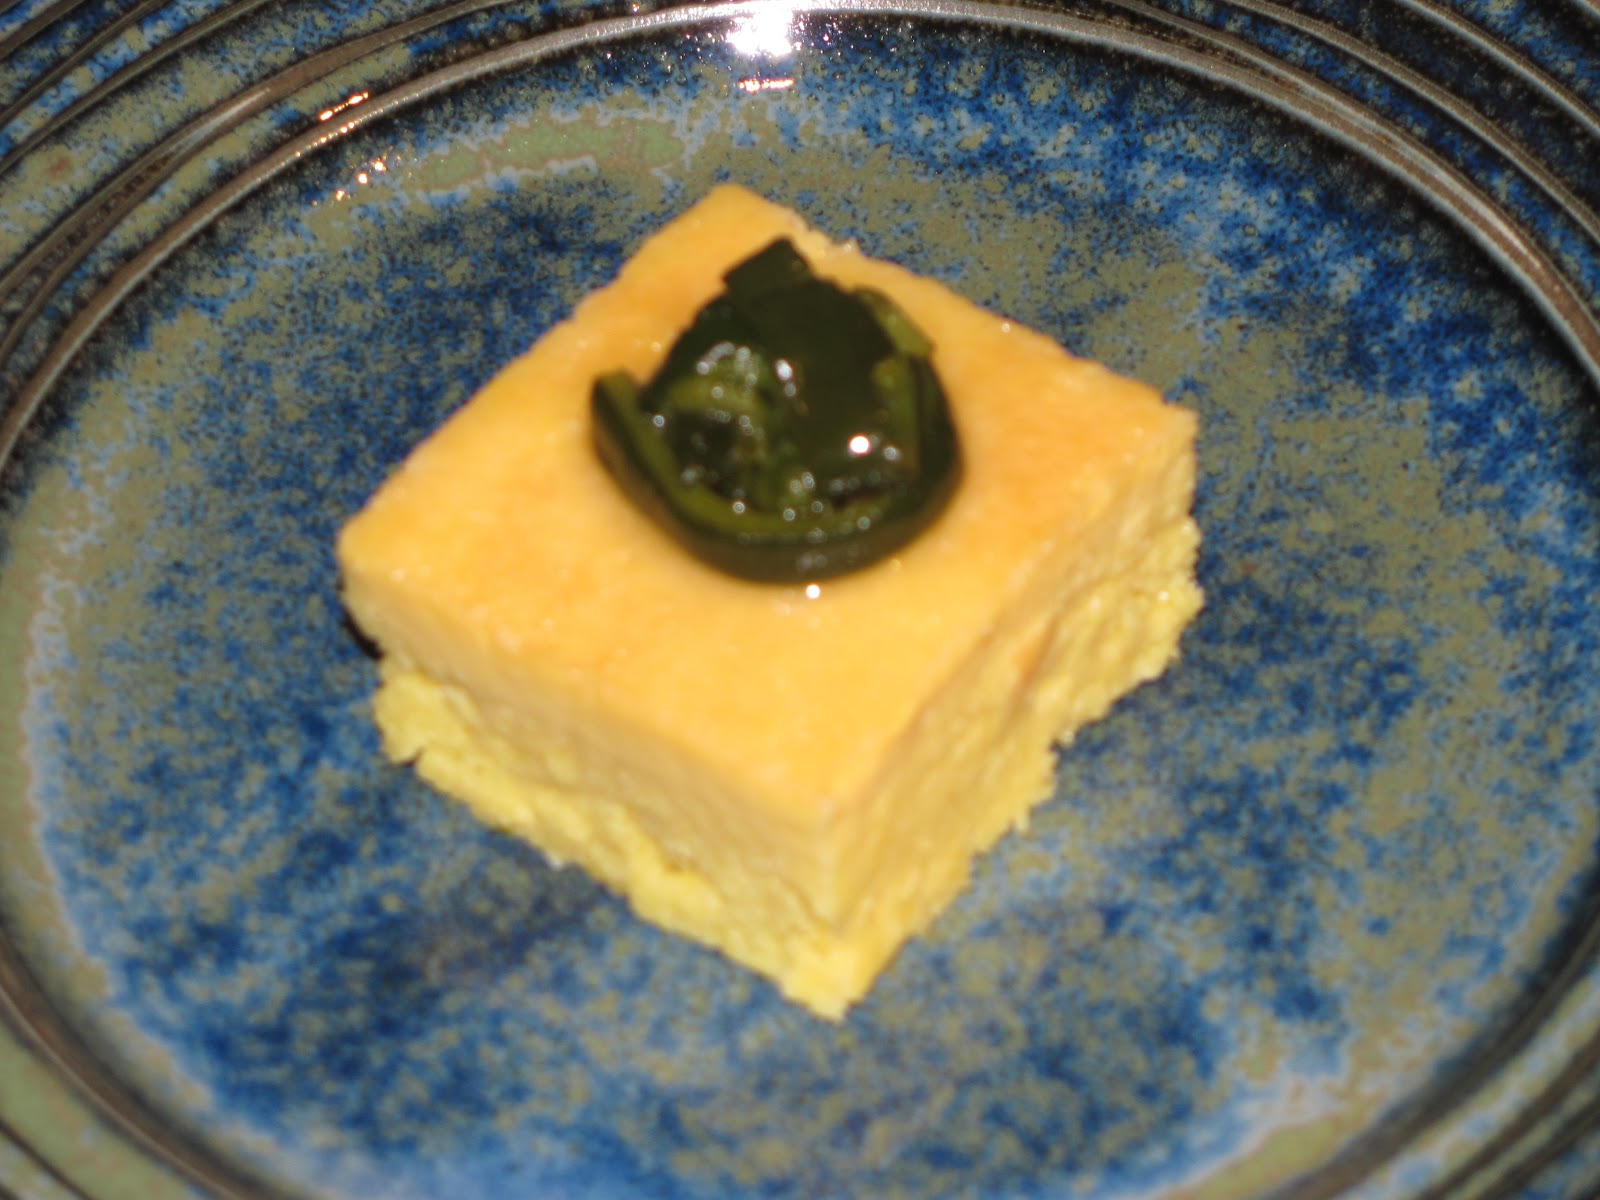
Recipe: Candied poblano peppers
As happy as I was with the corn flan, it needed a garnish. I wanted something Latin, considering its source, but also something equally versatile as a dessert or for other occasions. Poblanos are always nice with corn, but a tad spicy for some people's "dessert" preconceptions, so they needed to be sweetened up a bit. I thought of a pepper jelly, but there's a reason its usually done with red peppers - between the cooking and the vinegar, the chlorophyll of the poblanos would be lost. Luckily, I made that invert sugar a while back - it turned into a nice glaze with almost the same effect of a jelly without cooking the peppers. By using the microwave method of peeling the peppers, I kept a purer flavour and cooked them just as much as needed to soften up a bit. I was very careful in the use of vinegar to avoid a negative effect on the chlorophyll, and used rice vinegar since it has a lower acidity to start with. The result was sweet and tangy with a nice bit of zip from the poblanos. Since I wouldn't classify this as a preserve (like a pepper jelly), I would recommend making it as close to when you need it as possible, but it will store nicely in the fridge short term.

You will need:
2 poblano peppers
15ml / 1Tbs invert sugar
1.25ml / 1/4tsp rice vinegar
 pinch salt
Method:
- cook and peel the poblano peppers using the microwave method
- trim up any rough edges and cut the peppers into strips
- warm up the invert sugar slightly to soften it
- add the rice vinegar
- gently mix in the strips of poblano
- season with salt
- let cool so the glaze thickens up again
- use as desired
Saturday, June 2, 2012
Peeling peppers - microwave method

 I'm not usually one for microwave cookery, the microwave in our kitchen is more of an oversized digital clock than a crucial piece of equipment, but I recently used this method for peeling the skins off poblano peppers. Normally I would have roasted the peppers in the oven or have burned them over a flame, but for this application, I didn't necessarily want the roasted flavour or any charring of the pepper's meat in the final product. For the sake of peeling peppers, the microwave method takes a little more care when peeling than the traditional way, but to the end of detouring around the "roasted" character in the final product, it did the job just fine. The cook on the peppers also went just as far as I wanted it and the colour was still a nice dark green. I only needed to peel two peppers, so if you are doing more, you will need to cook longer in the microwave or pace the peppers though by twos.
Method:
- wash the peppers and trim the stem

 - place them in a strong plastic bag or covered microwave container
- microwave on high for 5 - 8 minutes depending on the power of the oven
- remove and let cool sealed in the bag or container - watch out for the hot steam
- once cooled, split in half, remove the seeds and lay flesh down on a cutting board
- gently peel the skin away, using the back of a paring knife to scrape any spots sticking to the flesh
Tuesday, March 20, 2012
Sprouted beans
 What announces the arrival of spring like sprouts? I'm not necessarily talking about alfalfa or bean sprouts - tasty as they are - but I want you to think a step back in time to the point when those sprouts had just popped through their shell. Then you want a bit more variety. You may have seen them in some of the better grocery stores - ironically, for something essentially cheap to make, they usually cost a premium. Back in grade school did you ever do that exercise where you put the beans or seeds between paper towel and keep them damp till they sprouted, then you put them in the soil to grow? This is basically the same thing, without the planting, just go straight to the eating part. Aside from being really healthy for you, a nice mix is really colourful and bursting with flavour. The actual mix will depend on the supplier (or you if you do it yourself), but I look for the mixes with generous amounts of the baby garbanzos - they're my favorite and they are easy to spot. Adzuki beans, mung beans and lentils are also common in the mix.
If your kitchen or pantry has the space, why not experiment with sprouting your own? All those nutrients at a fraction of the cost and you can stick to your favorite mix. To break it down to the real basics, you start with giving the beans a real good soak - overnight, then drain them well - good drainage prevents rot - then keep them at room temperature, covered and damp till they sprout. I've seen reccommendations for rinsing them well every other day or so, but the biggest alert is generally regarding drainage - some companies market perforated trays just for sprouting beans and seeds
Probably the most obvious thing to make is a sprouted bean salad - some red onion, feta cheese cracked pepper and roughly chopped herbs and you've got deliciousness written all over it. Sprinkle them into a nice brothy soup for a flavour punch and texture. I love to make a saute, especially if we're serving pork. You can actually go into a hot pan with all the things I listed for the salad (add in some garlic) and be done with it in a minute or two, or you can work it like a cassoulet, and cook the sprouts slowly with some bacon lardons, onion and garlic, then bind them at the end with a touch of cream and even some cheese (feta still works well here). They are so versatile, they can handle just about anything you want to do with them - let me know what you come up with.
Subscribe to:
Posts (Atom)