Showing posts with label sweets and confections. Show all posts

Monday, July 15, 2013

Recipe: Granola bars

Granola bars are just about the perfect food for a hike or emergency camping rations.  This recipe is a good base recipe to make the crispy kind.  I like the satisfying crunch of these and they are inherently drier than chewy ones, which makes them easier to pack and able to withstand a longer journey without refrigeration.  Like a lot of granola recipes, you can freestyle within the boundaries of the oats, seeds and nuts to create your own flavour.

You will need:

1L / 1qt                 oats
175ml / 6fl oz       slivered almonds
30ml / 2Tbs          sesame seeds
325ml / 11fl oz     corn syrup
25ml / 5tsp           water
20ml / 4tsp           vegetable oil
45ml / 3Tbs          brown sugar

Method:

 - set the oven to 280F / 138C
 - mix all the ingredients well
 - spread out on a paper lined baking sheet (two if you want thin bars)
 - pack the mix into the sheet and make it evenly flat
 - with a palette knife "cut" the bars or whatever shapes you choose
 - bake the bars until golden brown (up to an hour)
 - cool on a rack
 - break the bars off along the cuts you made
 - pack for your hike and go

Friday, May 17, 2013

Recipe: Churros - part 2 (orange)

boil the milk, sugar, and butter
As happy as I have been with the churro recipe in the previous post, I started to wonder if it could be better, and pondered a few simple substitutions and adjustments.  Much like when I was playing with the buttermilk doughnuts, I was thinking of things like the fact that milk tastes better than water, and the fact that citrus zest helps lighten an inherently "heavy" product.  I generally like to have a single "go to" recipe for things like this, but despite the fact that the recipes are very similar, the difference in the final product warrants it's own entry.  Some of you may want to use this recipe as your "go to" churro recipe - I'm seriously considering it - not only are they delicious, the citrus sets them apart as something unique.  A friend of ours even had one the day after and couldn't stop raving about it.


You will need:
work in the flour and zest


120g / 1/2C             butter
250ml / 2C              milk
60ml / 1/4C             sugar 
5ml / 1tsp                vanilla paste
2                              orange zest
500ml / 2C              flour
10ml / 2tsp              baking powder
2.5ml / 1/2tsp          kosher salt
4                              eggs


Method:
beat in the eggs


 - put the milk, sugar, vanilla and salt in a sauce pot and bring to a simmer
 - sift the flour and baking powder together
 - zest the oranges
 - when the milk comes to a simmer, drop in the zest, then the flour mix
 - work with a wooden spoon until the paste is combined and thick
 - transfer to a mixing machine with a paddle and start beating
 - beat the eggs in one at a time, completely mixing in each time
 - set up a piping bag with a star tip and fill with the batter
 - fry at 350F / 177C until golden brown
 - drain on paper towel
 - toss in sugar and serve

pipe into the fryer

Tuesday, May 14, 2013

Recipe: Churros

We had a churro party the other night.  The nice thing with churros over doughnuts is that you don't need to wait for the dough to proof, you just make the batter and start frying.  Churro batter is very similar to a choux paste - some people use just that - but I think there is a benefit to tailoring the tool to the task.  I've made the choux paste style churros before, but as good as they were, they never quite sold me 100%.  

I like this style with a little baking powder in the mix because the churros come up really fluffy.  The outside gets good and crispy while the inside stays soft and chewy.  These are the churros you want to make if you want to go the distance and fill them with chocolate, cajeta, jams etc.  

mix the paste
This recipe is a bit bigger than some others for a couple reasons - the first time we made this batter, we were making a double batch, which called for 4 eggs, but after adding the 3rd egg, the batter was getting pretty soft and I made the executive call to stop there.  The churros came out amazing, so if it ain't broke, I'm not going to fix it, and a recipe calling for 1.5 eggs is just silly.  As for the size, a "double batch" will happily do for 6 people - I wouldn't bother setting up a deep fryer for less, so double is the new single.

You will need:

2C                        flour
2C                       water
3                          eggs
1/2tsp                  salt
2Tbs                    sugar
beat in the eggs
1tsp                     vanilla paste
8Tbs                   butter
2tsp                     baking powder
as needed            sugar or cinnamon sugar for dusting

Method:

 - get a deep fryer setup warming to 350F / 177C
 - put the water, butter, sugar and salt in a pot on the stove to boil
 - sift the baking powder and flour together
 - when the water comes to a boil, add the flour and stir with a wooden spoon to bring it together
 - transfer the mix to a mixer with a paddle attachment and mix
 - add the eggs one at a time, mixing well between each one
fry
 - mix in the vanilla
 - transfer the batter to a piping bag with a star tip
 - pipe the churros into the hot oil
 - turn to colour evenly
 - remove from the oil and drain on paper towel
 - toss in sugar or cinnamon sugar
 - serve warm


Wednesday, April 24, 2013

Recipe: Buttermilk doughnuts (orange)

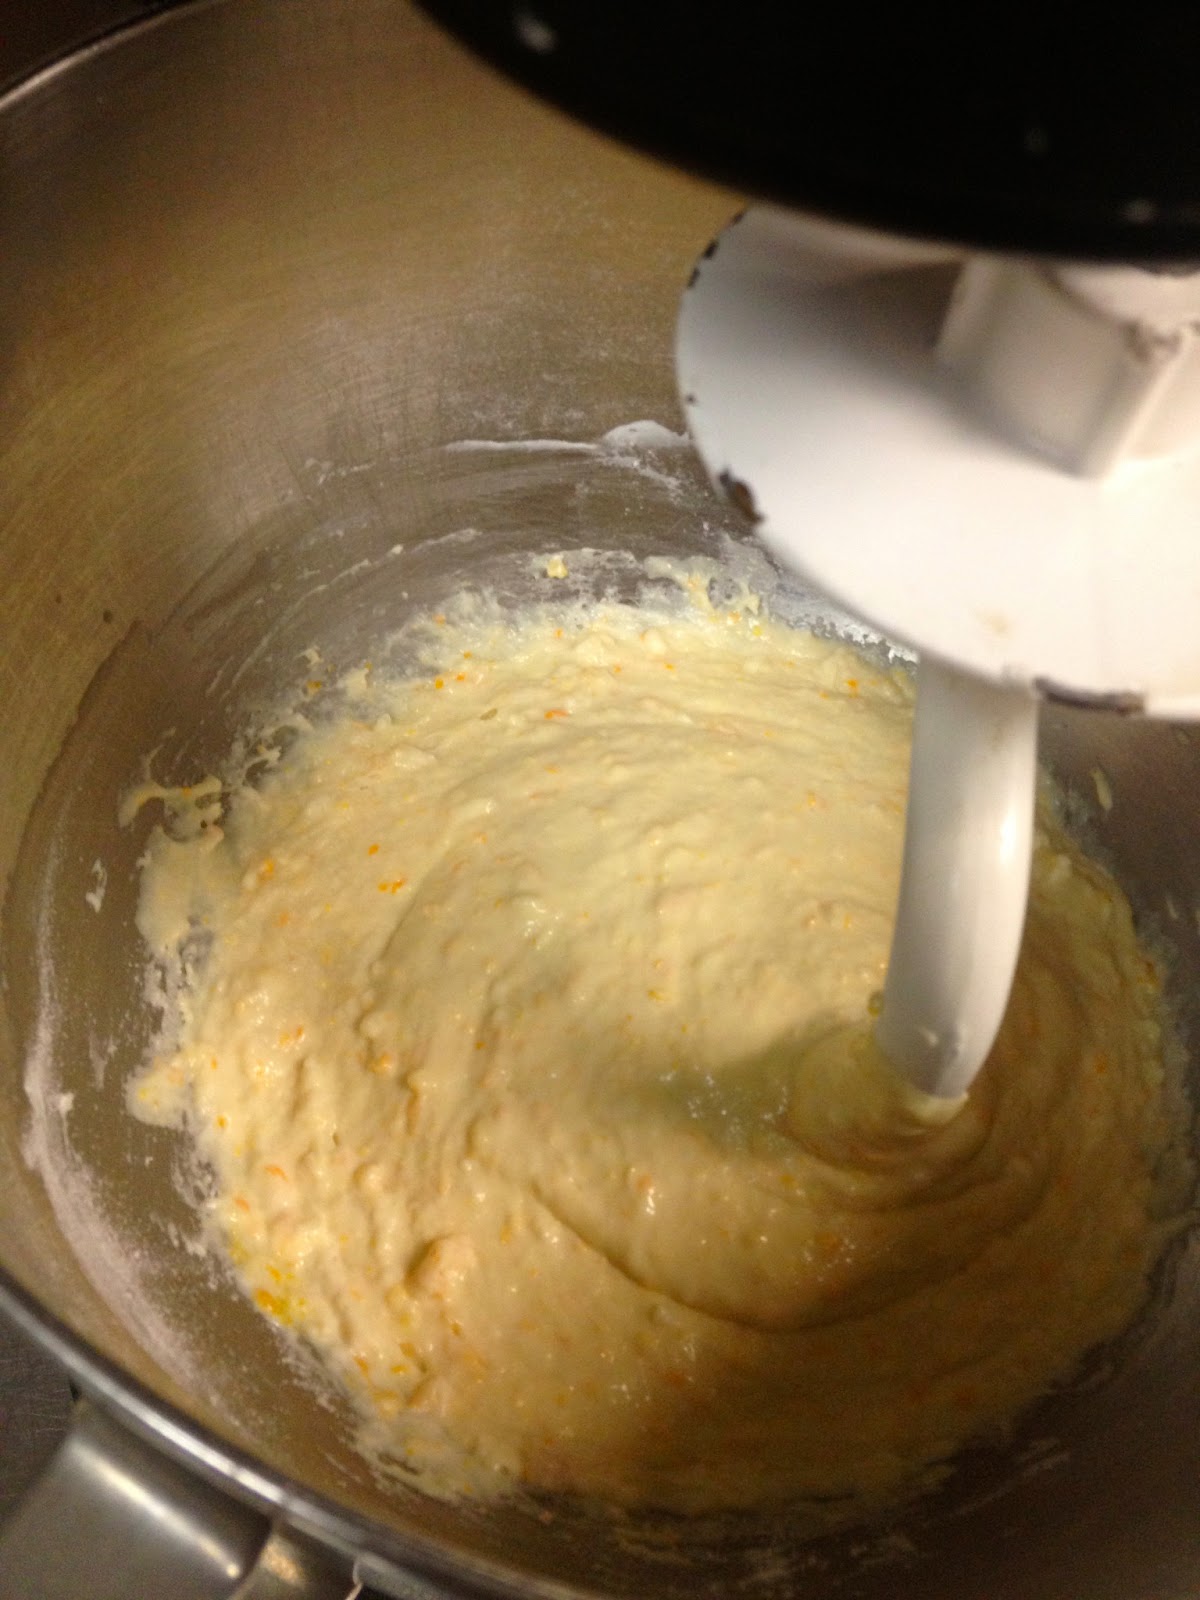
mix the wet dough
I've heard that doughnuts are one of the Canadian stereotypes.  I like them, but again there's not that many people who don't at least occasionally indulge, so why are they trying to pin it on us?  No matter, might as well be known for things people like.  I live a short ferry ride away from the birthplace of Nanaimo bars - I'm going to be proud of that too, so there.

Back to doughnuts.  When I went about sourcing out a recipe, I wanted to find a really good base recipe that would act as a go-to and would adapt itself to whatever glazes or toppings you wanted to throw at it.  I definitely wanted a yeast dough.  Doughnut doughs made with only baking powder are not doughnuts at all, they are bannock.  Now bannock, the First Nations style, is definitely Canadian, and it's wonderfully delicious, but that's not what we're making today.  Set on a yeast dough then, I thought about what angle should be taken, and buttermilk came right to my mind - nothing too wacky, but certainly an upgrade from a plain white dough.
add flour and bring it together

I got my hands on a good recipe - actually, for those Vancouverites, after a dusting of cinnamon sugar, these are dead ringers for "those little doughnuts" you get at the PNE.  Now I considered if there was any way  it could be better.  There was shortening involved - I could switch in with butter.  Butter is almost always a better way to go, and it is a buttermilk dough, so what's a little more butter?  I then used warm milk insead of water to bloom the yeast - the logic?  Simple, milk tastes better than water.  Next, I stumbled upon the idea of adding a bit of orange zest to the dough.  The effect is superb.  The citrus helps cut through the fat of the buttermilk, butter and the frying process to lighten up the flavour.  It's not that the orange is overpowering either, it just rests quietly in the background.  I list the zest here as an optional ingredient, but I'll be including it whenever I make these.

roll
Since this is a proper dough, you can get away with a gentle re-roll of the scraps.  You should get about 22 to 24 medium sized doughnuts from this recipe.  I'm quite happy just dusting these with a bit of sugar after cooking, so as yet haven't played around with too many icing varieties.


You will need:


10g / 1Tbs                     active dry yeast
125ml / 1/2C                 milk
125ml / 1/2C                 buttermilk
43g / 45ml / 3Tbs          butter
cut
39g / 45ml / 3Tbs          sugar
310-375g / 2.5-3C         all purpose flour
12g / 15ml / 1Tbs          baking powder
5ml / 1tsp                      salt
2                                    orange zest (microplane) (optional)


Method:


 - gently warm the milk up to just above room temperature
 - add the yeast to the milk with a bit of the sugar and let it bloom for 5 to 10 minutes
proofed
 - if adding zest, zest the oranges and mix the zest with the sugar
 - melt the butter and set aside
 - put 375ml / 1.5C of the flour in a mixing bowl with the yeast and milk
 - add the buttermilk, butter, sugar (and zest) and salt and mix well with a dough hook
 - add just enough flour to make a soft dough
 - turn out onto a floured table and knead a few times
 - roll about 1.5cm / 1/2" thick
 - cut out the doughnuts, lay on floured paper, and cover with plastic to proof
 - re-roll the scraps, cut more doughnuts, and add to the others
 - once the doughnuts are well proofed (double the size), fry in oil at 375F / 191C
 - turn to colour evenly
 - drain on paper towel
fry
 - dust with sugar or coat with icing while still warm
 - pour yourself a coffee
 - have at 'er


turn
dust 'er up and dig in

Friday, April 19, 2013

Recipe: Chocolate brownies

You may have read my recipe for the flourless chocolate cake/brownie, this is the no holds barred thick and rich one (ok, the other one really only held back on the flour).  The nice thing here is that you don't need any equipment, you can mix this by hand in a bowl and it turns out great.  In the industry, this recipe is intended for a 1/2 sheet pan - at home, it will be your large sheet pan (unless you have a huge home oven).

You will need:

680.4g / 24oz                        unsalted butter
1125g / 39.7oz (5C)              sugar
4                                            eggs
8                                            egg whites
453.6g / 16oz                        all purpose flour
315g / 11oz                           cocoa powder
5ml / 1tsp                              baking powder
20ml / 4tsp                            vanilla
2.5ml / 1/2tsp                        kosher salt

Method:

 - set the oven to 350F / 177C
 - line the sheet pan with parchment paper
 - sift together the flour, cocoa powder, and baking powder
 - put the eggs, egg whites and vanilla together and give them a quick whisk
 - melt the butter
 - add the sugar to the butter and whisk
 - add the egg mix and whisk smooth
 - add the flour mix and whisk smooth
 - spread evenly on the sheet pan
 - bake at 350F / 177C for 20 minutes
 - a skewer check can be a bit damp (it'll set up fine), but the surface should be dry and almost want to crack
 - remove from the oven and cool on a rack
 - dig in!

Sunday, March 24, 2013

Recipe: Baklava - West coast style

mix the fruits
I have a soft spot for baklava, but many people find it too sweet.  In order to be able to justify making some, the first time I made it, I had to think carefully about the process and make adjustments to make sure it appealed to a wider audience.  We're pretty granola out here on the west coast, so I decided to pack it full of a big variety of dried fruits and nuts so despite the inevitable sugar content, there would be some hidden food value there.  I also went with something of a slow roast to cook it, basting it with syrup periodically instead of soaking it in syrup at the end.  The final result is fruity, nutty, sweet and crispy (but not dry).  It's unmistakably a baklava, but those who were skeptical at first glance were converted at first bite and asking for seconds.  This recipe made two rolls, so you can multiply up or down accordingly.  Don't bother chopping the fruits in a food processor - you will get a paste - just chop them by hand.  The nuts can be chopped in a processor, just be careful not to make butter.  For the small difference it makes, all the measures for the fruits and nuts are made after chopping (to keep them all even with each other).
mix the nuts


You will need:


for the pastry:

4 sheets                    filo pastry
as needed                 melted butter
as needed                 sugar
as needed                 poppy seeds
as needed                 simple syrup (one cup should be enough)

lay the fruit on the buttered filo

for the filling:

60ml / 1/4C             mixed candied peel (see earlier post for recipe)
60ml / 1/4C             dried blueberries - chopped
60ml / 1/4C             dried cranberries - chopped
60ml / 1/4C             dried apricots - chopped
60ml / 1/4C             dried figs - chopped
60ml / 1/4C             hazelnuts - toasted and chopped
60ml / 1/4C             pine nuts - toasted and chopped
60ml / 1/4C             pistachios - toasted and chopped
60ml / 1/4C             pecans - toasted and chopped
60ml / 1/4C             walnuts - toasted and chopped
dust with sugar and poppy seeds
as needed                 slivered almonds - toasted and crushed by hand (save for the end)


Method:

 - set the oven to 325F / 163C
 - mix all the fruits in a bowl
 - mix all the nuts except for the almonds in a bowl
cover with the chopped nuts
 - take two of the sheets of filo, butter both sides and lay on a paper lined pan
 - divide the fruit between the two sheets and make a log at one end
 - dust the rest of the filo liberally with sugar
 - go over the sugar with the poppy seeds, stopping short at the far end of the filo
 - sprinkle the mixed nuts evenly over the sugar and poppy seeds - mind the gap
 - butter both sides of the other two sheets of filo
 - dust one side with sugar
 - lay the sugar side down over the dressed up sheets of filo and gently press down
 - carefully start rolling the filo starting at the fruit end and ending with the gap on the bottom
cover with butter and sugared filo
 - bake the rolls at 325F / 163C for 10 minutes
 - baste the rolls with the simple syrup
 - turn the oven down to 300F / 149C
 - continue to bake, rotating and basting at 10 minute intervals
 - around 45 minutes to an hour, it should be a nice golden colour
 - remove from the oven and baste one last time
 - dust with the crushed toasted almonds
 - cool completely
 - cut slices carefully with a serrated knife and serve

roll


baste with syrup
bake and coat with almonds

Tuesday, March 19, 2013

Recipe: Mixed candied peel

A lot of baking recipes call for mixed peel.  After seeing the white chunky stuff they'll try to sell you at the store, I figured I'd better go make my own.  Not only is it better tasting, it has colour and is a lot cheaper in the end (plus you get all the fruit under the peels).

You will need:

2                                 navel oranges
1                                 grapefruit
1                                 lemon
1                                 lime
675ml / 23fl oz           water
675ml / 23fl oz           sugar
pinch                          kosher salt

Method:

 - peel the fruits with a knife, leaving a bit of the pith on the peel (don't use a vegetable peeler)
 - cut the peel into small dice
 - put all the diced peel in a pot and cover with cold water
 - bring to a boil
 - strain
 - cover again with cold water and boil
 - strain again, cover with cold water and boil again
 - add the 675ml / 23oz of water and sugar (add a bit more water if the syrup doesn't cover the peel)
 - add a pinch of salt and bring to a simmer
 - simmer until the piths become translucent - about two hours (or more depending on your simmer)
 - turn off the heat, cover the pot and let rest until completely cool
 - store in an airtight container
 - use as needed

Thursday, March 14, 2013

Recipe: Candied nuts - frosted

This is probably the easiest way I know to candy nuts, and yes, it still relies on the same three ingredients - nuts, sugar and water.  There are two variations you can do depending on the coating sugar you use.  If you can find fine granulated sugar, you can get a more concentrated frosting than from granulated sugar - I just put my regular sugar through a bar blender or a spice grinder and break it down rather than buying it (icing sugar does not get the same result).

You will need:

nuts
sugar
water

Method:

 - put a pot of water on to boil
 - get one part water to 2 parts sugar together in another pot and heat to make a syrup
 - set the oven as low as it will go - or better yet set a dehydrator to about 150F / 65C
 - blanch the nuts in the water a few minutes
 - strain the water off and transfer the nuts to the syrup 
 - let the nuts get totally coated in the syrup
 - strain the syrup off and put the nuts in a bowl  - the nut syrup can be saved for other uses
 - add the granulated (or fine) sugar to the bowl and toss until the nuts no longer stick to each other
 - spread the frosted nuts evenly on a paper lined tray
 - slowly dry out in the oven or dehydrator until a hard shell is formed
 - cool completely
 - store in an airtight container until use

Monday, February 25, 2013

Recipe: Candied nuts - fried

This is probably one of the more unusual techniques to candy nuts you will see, but it works really well - the nuts resist clumping together and come out very glossy.  You may want to fry the nuts in a pot rather than a deep fryer - the icing sugar can be a bit of a pain to clean out of the bottom of a fryer.

You will need:

nuts
icing sugar and a sifter
oil to fry and a spider to lift the nuts out
blanching water
salt

Method:

 - get a pot of water on to boil and add some salt
 - get a pot of oil on and get it to 325F / 163C
 - blanch the nuts in the water for 5 minutes
 - transfer the nuts to a bowl
 - start sifting in the icing sugar while the nuts are still moist
 - add icing sugar and toss until a nice clear glaze has formed on the nuts
 - fry in the oil until golden brown
 - use the spider to take the nuts out of the oil and drain on paper towel
 - cool completely
 - store in an airtight container

Sunday, December 16, 2012

Recipe: Candied nuts - glazed

You may be surprised at how many different ways there are to candy nuts - right off the top of my head, I can think of five (without even getting into additional flavours).  More interesting is the fact that in every case, the ingredients are basically the same - nuts, sugar and water.  The water tends to be a vehicle for the sugar since by the end of the process you want to evaporate it all out.  This method is probably the healthiest way to candy nuts because the amount of sugar is completely your choice.  The heavier the syrup, the thicker and sweeter the coating will be, but you can also use a light syrup for a thinner coating and more natural flavour.  Incidentally, if you strain the syrup well after coating the nuts you get a very nice nut syrup for pancakes.

You will need:

nuts - in the picture are walnuts, but any kind will do
sugar
water
salt

Method:

 - bring a pot of salted water to a simmer
 - drop the nuts in and let them poach for about 5 minutes (this helps remove any extra husk)
 - in a sauce pan, start a heavy sugar syrup (at least 2 parts sugar to one water)
 - strain the nuts out of the water and transfer to the syrup
 - let the nuts cook at a low simmer for 5 or 10 minutes to absorb the syrup
 - if the nuts look well coated, strain them out and spread out on a paper lined tray
 - set the oven to 200F / 93C (even lower if you like)
 - place the nuts in the oven and toast completely dry
 - periodically move them around so they don't stick to each other
 - after about an hour, you can take the odd one out, let it cool, and test the crunch
 - once you have the crunch right, you can turn the oven up if you want to colour the nuts more
 - cool completely
 - store in an airtight container

Tuesday, December 4, 2012

Recipe: Maple peanut butter truffles

These truffles are among my all time favorites - they have an amazing flavour and the centres just ooze when you eat them.  I love peanut butter cups, and this takes it to the next level.  This recipe deals with the filling - I use the truffle ganache from the previous post to encase the soft filling, then coat them with a hard chocolate coating.

You will need:

100g / 3.5oz            smooth peanut butter
100g / 3.5oz            #3 maple syrup
as needed                truffle ganache
as needed                chocolate for coating
as needed                chopped toasted peanuts

Method:

 - prepare the truffle ganache
 - whisk the syrup into the peanut butter in a dish
 - put the dish in the freezer to harden up
 - when the maple peanut butter is hard enough, shape chickpea sized balls and keep in the freezer
 - take a small amount of the ganache and make a little "pancake" in your hand
 - drop the maple peanut butter ball onto the ganache and wrap it around to completely encase
 - put the truffle in the freezer to firm up
 - melt the coating chocolate
 - dip the truffles in the chocolate and place on paper
 - while the chocolate is still wet, sprinkle with the chopped toasted peanuts
 - let the chocolate set
 - serve the truffles at room temperature
 

Monday, December 3, 2012

Recipe: Truffle ganache

Think eating truffles is addictive?  Once you get the hang of making a good ganache, you'll have a hard time stopping making them.  You don't always need to make a huge batch and worry about eating too many at once, you can simply make the ganache and keep it stored in the fridge (for a reasonable amount of time), then when the inspiration hits, you are already halfway there.  The style I usually make is somewhat multi-layered - I'll dream up a centre, wrap the ganache around it, then dip it in chocolate for a hard shell, then garnish the chocolate either with a different chocolate, or nuts, coarse salt, what have you.  

While the multi-layered truffle comes off as a complex construction, really it is just a series of basic steps, most of which only take a few moments to do, but the result is always impressive.  Depending on your filling, the ganache might be the most complex part, and it may only have two ingredients - but it takes a little while to make and set up to a point where you can use it, thus making it ahead can make things easier.  Since I usually use the ganache as an inner layer, I like it a bit softer and creamier and the ratio I use is generally two parts chocolate to one part cream.  If you are making the ganache to be the truffle in its entirety, you may want to approach a three to one ratio, depending on how long they may sit out (the room can warm up during a party), and if you are adding any liqueur, which will soften the mix.  The nice part is that if you see the set ganache as too hard or too soft, you can simply warm it up again and add a touch more cream or chocolate to get it where you want it.  This is part of the reason I like a tempered chocolate coating - better temperature resistance and the ability to have a very soft centre.  Remember, of the three basic chocolate categories, dark will give you the hardest ganache and white the softest.

You will need:

200g / 7oz             good quality chocolate
100g / 7oz             cream
pinch                     kosher salt
to taste                  liqueur (optional, and your choice of variety)

Method:

 - chop the chocolate into small pieces
 - heat the cream and liqueur (if using) up to a simmer in a small sauce pan
 - pour over the chocolate and add the pinch of salt
 - stir with a spatula until the chocolate has melted and bound with the cream
 - allow to set up at room temperature
 - store in the fridge if not using right away

To use:

 - take the ganache out of the fridge if necessary and let temper up 
 - scoop a small amount and make a small "pancake" in your hand
 - place your filling in the middle and wrap the ganache around it
 - roll into a ball and place on a paper lined tray
 - place the tray in the freezer so the outer surface is very hard and cold
 - warm up your dipping chocolate
 - dip the truffles in the chocolate, and set on the paper
 - top with any garnish
 - let coating set
 - serve at room temperature

Recipe: Sponge toffee

Sponge toffee makes a great addition to a pastry platter - it has a neat abstract visual effect, and no matter how hard they try, most people eventually give in  for a piece or two.  If you want to go an extra step, take a few chunks and coat them with chocolate, then scatter them amongst some truffles.  Much of the success here is in technique - I had done it a few times before with varying levels of success, but Dan recently showed me a slightly different way of cooking the sugar which greatly improves the results.  You can use a probe or a candy thermometer, as song as you eventually get to 300F / 149C - this is hard crack stage for sugar and absolutely necessary for the sponge to hold.  Once you get to the baking soda part, you need to move fast so you get the soda well dispersed and the sugar onto the tray before it starts to set.  The pictures here are for a large batch we did recently, but the recipe is a little more reasonable in size.

cook out the sugars


You will need:


250ml / 1C           white sugar
250ml / 1C           corn syrup
15ml / 1Tbs          white vinegar
15ml / 1Tbs          baking soda
pinch                    salt


raise the heat and get ready
Method:


 - combine the syrup, sugar, vinegar and pinch of salt in a pot
 - set the stove to medium heat and heat the mixture to a simmer
 - stir occasionally with a heat proof spatula
 - measure out the baking soda, have a whisk ready
 - have a 9" X 9" (23cm X 23cm) pan paper lined and ready
 - monitor the temperature - when you get to the 250F - 290F (121C - 143C), slow it down a little
 - let the mixture cook and thicken below the 300F / 149C mark
 - when the mixture is noticeably thicker (you will feel it when you stir it), let it come up to 300F / 149C
mix the soda and pour out
 - once at 300F / 149C, add the baking soda and whisk really well as the foam rises
 - pour the foaming sugar into the pan and let cool completely
 - use a knife to break the sponge toffee into bite size chunks
 - coat with chocolate or serve as is
 - store in an airtight container


Tuesday, September 11, 2012

Recipe: Fruit marshmallow (strawberry)

coulis and gelatin
This is a quick variation on the marshmallow very similar to the regular one in the previous post.  Assuming that you don't make your coulis with any fats, any fruit will do (providing the coulis is cooked out, even those fruits that don't play nice with gelatin).  Again, it is nice to know that the flavouring is all natural.  What's more, many other recipes for fruit marshmallows are a lot more gelatin based in order to get more fruit colour, but if you try to torch them they melt.  These marshmallows are paler in colour, but the flavour is nice and they will torch - they will soften of course, but you can get the caramelization and toasted effect quite nicely.


whip the whites and coulis together
You will need:

3                           egg whites
5 sheets                gelatin
80ml / 1/3C          sugar
60ml / 1/4C          fruit coulis (strawberry)


Method:

 - hydrate the gelatin and drain
 - warm up the coulis, add the sugar, melt in the gelatin and set aside to cool to just above room temperature
 - whip the egg whites to medium firm peak
fill the mold
 - add the gelatin/coulis mix
 - whip until cool
 - line a tray or mold with plastic wrap
 - fill the tray or mold
 - allow to set completely 
 - cut desired shapes
 - torch
 - enjoy


Monday, September 10, 2012

Recipe: Marshmallows

sugar and melted gelatin
There's something inherently fun about making your own marshmallows.  You can choose your own shapes, either by cutting them or setting them in a specific mold.  It's also nice knowing everything that went into them.

You will need:

3                       egg whites
5 sheets            gelatin
whip the whites
125ml / 1/2C    sugar
60ml / 1/4C      water
5ml / 1tsp         vanilla

Method:

 - hydrate the gelatin and drain
 - bring the water to a simmer
 - melt in the gelatin, add the sugar and vanilla and set aside to cool to just above room temperature
 - whip the whites to a medium firm peak in a mixer
add syrup and whip til cool
 - slow down the mixer and while running, pour in the gelatin syrup
 - speed the mixer up again and whip until cool
 - line a mold or tray with plastic wrap
 - fill the mold or try
 - let set completely
 - cut as desired
 - torch and enjoy


enjoy

prepare the mold


fill and set


Sunday, August 5, 2012

Recipe: Pate de fruits (fruit jellies)

Pate de fruits are a delicious, light and colourful way to finish a meal, especially if you aren't serving a substantial dessert but still want something sweet at the end.  Whatever fruit puree you use, be sure to strain it before cooking because you'll never get it through the sieve after.  You will need some kind of frame to set the jelly - a square baking ring set on paper works best, but a paper lined pan used for squares works well too.  If you use citric acid, mix it with 1tsp water before using

You will need:

250ml / 1C         fruit puree
10ml / 2tsp         pectin
310ml / 1 1/4C   sugar (plus more for dusting)
5ml / 1tsp           citric acid or lemon juice
60ml / 1/4C        light corn syrup

Method:

 - mix the pectin with half the sugar
 - mix citric acid with water (if necessary) 
 - in a small sauce pan, heat up the puree, sugar and syrup to 100F / 38C
 - add the pectin mixed with the sugar
 - bring to a boil, stirring constantly and scraping the sides of the pan
 - at 225F / 107C, remove from the heat, add the acid and mix well
 - pour into frame and allow to set
 - once set, turn out on a paper sprinkled with sugar
 - cut shapes with a hot, wet knife and toss in granulated sugar
 - store at room temperature in an airtight container