Showing posts with label modern cuisine. Show all posts

Sunday, April 7, 2013

Recipe: Roast turkey - brined and sous vide

We cooked a turkey the other day and turned it into a little experiment.  I was really busy and since I am never comfortable leaving the house with something in the oven, needed a different approach to avoid eating at midnight.  Why not sous vide?  I have no problem being somewhere else if dinner is just hanging out in the hot tub.  The only issue is that any time I've sous vide turkey before has been at work where the birds are taken apart and the white and dark meat are prepared and sous vide separately - I still wanted a good old fashioned bird to carve.

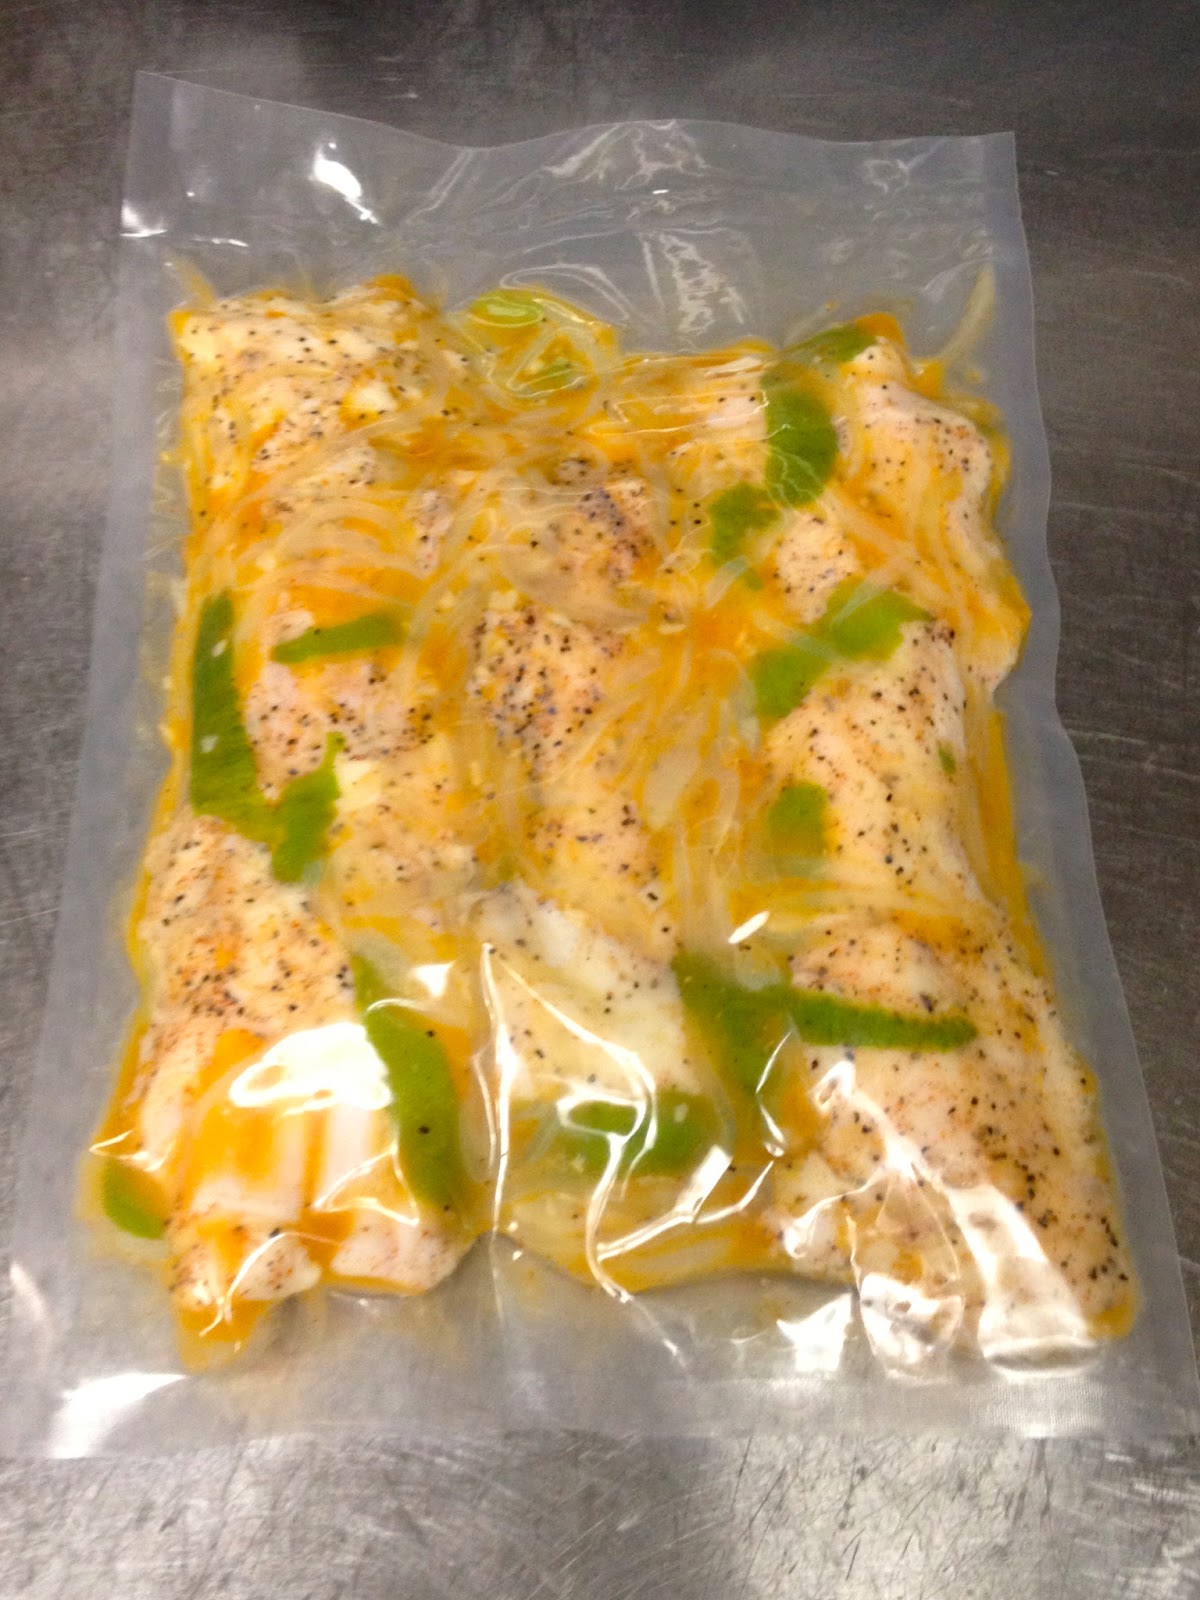
So, to proceed, it seemed logical to follow and merge the same principles it takes to both roast a whole turkey and to sous vide as I have done before, albeit in smaller pieces.  The first step was to brine it, and. I followed the same procedure as in my brined turkey breast recipe.  After brining, I rinsed the bird, patted it dry, and gave it a little coat of olive oil, followed by a seasoning mix (in the cavity too) of  smoked paprika, black pepper and powdered garlic - no salt of course since the brine gives enough.  You can season it your way, that's just what I was feeling at the time.

The next challenge was the "vacuum seal".  If you have bags big enough for your turkey, great, but I didn't, so I would have to improvise.  With the cavity, air tight wasn't going to happen anyway, so I focused on ensuring my package was watertight and as air minimal as possible.  I did happen to have a bunch of large ziplock bags that would just fit the turkey inside with a little sticking out the end, so I alternated "head" and "tail" bagging the bird until I was confident no water was getting in.

To really cowboy the operation up, the only vessel appropriate to sous vide the turkey was a large stockpot.  I used my probe thermometer to monitor the temperature - easy - but very important to note that I also put a rack in the pot to both let the water circulate all around and keep the turkey off the bottom.  Remember that even with a pot of water, the very bottom of the pot is in contact with the stove and if the product touches it, you will lose the even temperature of the sous vide and possibly melt through the bag, losing your seal and botching the whole operation - so make sure you get a rack under the bird.
the turkey is the one on the right

Confident that the mechanics were going to work, I just needed to figure out the execution.  I wasn't even sure of the weight of our turkey - it tilted my kitchen scale, so it was over 5 lbs, but by how much?  Well Isabella is almost 10 lbs, so with baby in one arm and turkey in the other, I guesstimated the turkey at about 8 lbs.  This was mostly for future reference, because the nice thing with sous vide is that you have a wide window of time to work with.  As well, since I intended to finish the bird in the oven, it was ok if  it was cooked a bit under and the oven could just finish the job.  Generally speaking, 165F is the recommended cooked temperature for poultry.  The food safe "danger zone" is cleared at 160F, so I went with 163F to make sure I was cooking the turkey, yet leaving some room for the final roast.  I figured that 3 hours should be enough to cook it, so into the hot tub it went and out I went to run errands  (remember this was all about actually freeing up my time while still producing a turkey dinner).

3 hours later, beer in hand, I turned the oven on to 450F.  I pulled the turkey out of the water - the seal worked great, no water invaded the product.  The last ziplock bag did have a nice amount of turkey stock which immediately went on the stove to reduce to a jus.  I patted the bird dry to ensure a good roast and noticed something - since the sous vide package was so tight and the turkey was essentially cooked, there was no need for trussing for the roasting stage - sweet.  Just remember that this emphasizes the importance that the bird gets sealed up "pretty" because the sous vide process will set it up the way you left it.  From here, I just put some bacon strips over the top for tradition and fired it in the oven.  I was simply cooking for skin colour now, and just watched it and rotated it now and then.  After a little over 45 minutes, she looked great.  I let it rest, then checked the temperature next to the bone on the leg and it was bang on 165F.

If you were to compare this turkey with another brined and roasted one, it would be hard to tell the difference - it was golden brown, juicy, and full of flavour.  To compare the effort, even considering the fact that this was a first off experiment, no contest - this is an absolute cinch to pull off.  Of course, in the future, I can plan a bit better and get a proper sized vacuum bag and a vessel big enough for both a turkey and a circulator, but if this crazy cowboy effort can work this way, I know I will always be able to make it happen.  Circulators aren't always around, but you can always find a thermometer and create a watertight package - just remember your food safe and make sure your turkey is sous vide above 160F and the final roast adds a few degrees on top of that.

Happy cooking!

Sunday, March 3, 2013

Recipe: Beef tendon - sous vide and traditonal

3 tough cuts
An affinity for beef tendon tends to be something you learn, and often comes by way of culture.  I came by it through my wife and our subsequent trips to Mexico.  Others my come by it through Asian cuisine.  Due to the extremely high collagen content the texture is very chewy which some people are not used to but can be very delicious and enjoyable.

Carla and I have made it the traditional Mexican way a couple times, but this time I decided to figure out a time and temperature formula for cooking it sous vide.  The result was a remarkably soft texture to the tendon while retaining its structure and retaining its integrity.  In both cases acidity is used to aid the tenderization of the tendon.  In the traditional method cider vinegar is used, but I found that since I used lime juice in the sous vide process, there was no need for vinegar and I simply used a little fresh lime juice for final seasoning.  

fully dressed
In the traditional method, much of the flavour is introduced in the seasoning stage after the tendon has been cooked, cooled and chopped.  With the sous vide version I wanted to try to bring some of those flavours into the mix right from the begining so they could get right into the tendon.  While the flavour involved in both methods are the same, the sous vide method drove the flavours deep into the tenon and the stock produced within the bag was unbelievably high in both high in flavour and gelatin content. 

As for serving, we usually serve it cold on a tostada with some crema and Valentina sauce.  With the sous vide tendon, we discovered that if you warm it up slightly at serving time in the microwave, it  comes out super tender - a good variation if you are introducing this to someone new.

You will need:

all bagged up
For cooking traditionally:

675g                            beef tendon (our package had 3 pieces)
1                                  onion
3 cloves                       garlic
as needed                    olive oil
pinch                           salt

For sous vide add:

2                                 limes (or about 4 key limes)
5ml / 1tsp                   chili powder
5ml / 1tsp                   coarse black pepper

For the final seasoning:

1/2 bunch                 cilantro (oregano is also a popular option)
after 30 hours in the hot tub
1                               small white onion
1                               lime (or two key limes)
as needed                 olive oil
to taste                     cider vinegar (optional)
to taste                     kosher salt
to taste                     chili powder
to taste                     coarse black pepper

 
Traditional method:

 - julienne the first onion and mince the garlic
 - lightly sweat the onion and garlic in some olive oil
 - add the tendon and lightly sear
 - add water just to cover the tendon and season lightly
ready for cutting
 - cover the pan with a lid and simmer until the tendon softens up
 - turn off the heat and let cool in the broth
 - chop the tendon and put it in a bowl
 - drizzle in some olive oil and toss
 - chop the second onion fine and chop the cilantro and add them in
 - squeeze the lime, add the juice and add a bit of cider vinegar (just to get a nice mild acidity)
 - season with salt, pepper and chili powder
 - cover the bowl and keep refrigerated for at least an hour
 - when the lime juice and vinegar have further tenderized the tendon it is ready to eat

Sous vide method:

 - julienne the first onion and mince the garlic
the final seasonings
 - lightly sweat the onion and garlic in some olive oil
 - place the tendon in a bowl
 - add the sweated onion and garlic and toss well
 - add more olive oil if it seems dry
 - add the chili powder and black pepper
 - zest the lime (use a vegetable peeler), squeeze the juice and add them both in
 - toss the tendons in the marinade well then seal in a vacuum bag
 - set the water bath to 78C / 172F
 - submerge the bag and cook for 30 hours
 - after 30 hours, remove the bag, transfer to an ice bath and cool completely
 - open the bag and separate the tendon from the stock (save the stock for something else)
 - chop the tendon up and put it in a bowl
 - drizzle in some olive oil and toss
 - chop the second onion fine and chop the cilantro and add them in
 - squeeze the lime and add the juice (the vinegar shouldn't be necessary)
 - season with salt (you can add more chili and pepper if you like)
 - serve

a tostada with crema, tendon, avocado and Valentina - amazing!


Monday, November 12, 2012

Recipe: Vegetable "paper" - truffle parsnip

bag it
I made this the other day on a bit of a whim.  I was trying to come up with a nice modern fall garnish.  Parsnips certainly fit the bill but it needed something extra and truffle is always a nice addition to parsnip.  I've made parsnip chips a lot of times, but I thought making a paper would be a bit more interesting as you can break it into shards.  A paper would also allow me to fully develop the flavour within the mix itself.  I considered using truffle salt, but in this case didn't want to stray from the clean visual with the black speckles.  Because I was using truffle oil, I strayed from the usual 5% egg white ratio to make sure I got a crisp result.  I also lowered the dehydration temperature as I noticed early on in the process that 140F / 60C could potentially caramelize the sugars in the parsnip more than I wanted.  The end result was a delicious and crisp product with a nice tan.  If some of the previous posts have inspired you to modernize a holiday meal with sous-vide turkey, this would be a great way to get some parsnip on the plate.

puree it


You will need:

500g / 17.6oz          parsnip (peeled and chopped)
60ml / 1/4C             truffle oil
60ml / 1/4C             cream
60g / 2.1oz              egg white
to taste                    kosher salt
as needed                water


Method:
spread it and dry it

 - peel and chop the parsnip
 - put the parsnip in a vacuum bag with the truffle oil and a pinch of salt and seal tight
 - steam or submerge the bag in boiling water until very soft (45 minutes)
 - empty the contents of the bag while still hot into a blender
 - add the cream and just enough water to get a rough puree
 - add the egg white and puree completely smooth
 - add any more seasoning to taste
 - spray a silicone mat with pan spray
flip it and dry it some more
 - spread the puree evenly over the mat - don't worry about slight ripples, they will dehydrate out
 - set a wood warmer or dehydrator to 130F / 54C
 - let the puree dry out several hours
 - when the puree is at the "leather" stage, flip it onto a sheet of paper and peel off the silicone mat
 - transfer the leather on the paper back onto the tray and return to the warmer to fully dehydrate
 - remove the paper and let it cool to room temperature and crisp up
 - break off shards and serve


Friday, November 9, 2012

Recipe: Sous-vide and smoked turkey breast

In the restaurant industry, holiday meals are cooked very differently than in a home setting.  It is impractical to roast a bunch of turkeys for a few hundred people,  there's simply too much room for error and it's too frantic at service time to be carving varied cuts from the birds.  The most efficient way to do it is to separate all the parts of the meal, cook each one perfectly, then bring them all together on the plate.  This means that white and dark meat are cooked separately and off the bone (the bones are used to make turkey stock which is then turned into gravy) and stuffing and vegetables are all cooked separately and perfectly on their own too.  While the traditional ceremony of carving the turkey still holds strong in most homes, some people are starting to take more of an industry approach to the holiday dinner in the pursuit of each dish being the best it can.  With proper organization, it also means that the cook can at least socialize a little bit as things get ready.

This is a fantastic way to cook the breast portion of the meal.  If you like turkey sandwiches throughout the year, this is definitely the way to go as the meat cuts beautifully cold and is just as juicy as fresh roasted.  Use the brine recipe from the previous post as preparation.  I've also included a smoking stage in this method - if you have the capability, it adds a bit of that "roasty" character many people would be worried about losing by straying from the traditional method.  If you don't, it's ok, the meat is still fantastic.

If you still want to have the roasted skin effect, one way to do it is to leave the skin on throughout the sous-vide process, but shorten the time (an hour would be ok), then heat the breast up for the meal in a hot oven skin side up (and patted dry, then basted with some fat).  Make sure to check the temperature in the middle of the breast to ensure it is fully cooked (165F / 74C).

If you are from the South and like to deep fry your turkey, follow the same procedure as the roasting finish, just use the deep fryer.  Again, you only need to warm it through and finish off the cooking.

You will need:

as needed           turkey breasts
as needed           turkey brine

Method:

 - clean up the breasts nicely and prepare your brine
 - brine the breasts (48 hours if using the one in the previous post)
 - rinse the breasts well under cold water and pat dry
 - cold smoke for 1-2 hours, depending how much you like to smoke
 - seal in a vacuum bag (don't squish them together in the bag, give them breathing room)
 - set the circulator to 76C / 168.8F
 - submerge in the bath and cook for 2 1/2 hours (less if you plan to finish by roasting)
 - remove from the bath - if not serving right away, plunge into an ice bath to cool
 - open the bag, put the breasts on a rack to let the extra surface juices drain away (save them as stock)
 - carve slices and serve

Sunday, October 7, 2012

Recipe: Peanut butter powder

These days it seems there's a lot more serious allergies to peanuts than there used to be - maybe it's a sign of our hyper-sterilized culture or maybe doctors are just better at diagnosing the sources of allergic reactions.  Either way, the reaction to these reactions is that despite warnings of "may contain traces of nuts", many pastry shops have just dropped anything peanut related from the menu.  If you showed up to a school picnic with a nice batch of peanut brittle, they'd probably look at you like you were some kind of monster.  It's terrible to have a serious allergy, but really, what did 'ol  peanut do?  He was just hanging out in trees, minding his own business, getting involved in all sorts of deliciousness, then BAM!  Public enemy #1.  

Well I'm going to say it.  I like peanuts.  I LOVE PEANUT BUTTER.  Ask my wife, sometimes I'll just go to the cupboard an have a spoon just to say hi.  One of my favorite desserts I ever worked with was put together by a like-minded pastry chef.  It was a chocolate and peanut mousse with peanut butter ice cream, cocoa nibs and peanut butter powder.  It was amazing, like a peanut butter cup evolved into a whole dish.  We named it "Welcome back Peanut".  Being in an ultra-safe hotel environment, we felt like such rebels.  The peanut butter powder on the dish became one of those things that just has a way of working its way back on the menu, especially if there's chocolate involved.

Peanut butter powder is fun to make, but really hard to nail down to a recipe.  It uses tapioca maltodextrin which weighs almost nothing, so it's very hard to measure it by weight.  It is also unbelievably fluffy, which makes it hard to measure by volume.  You just have to go by technique.  the best tool is some sort of blender or food processor that allows you to add ingredients while running (without removing the lid).  Then you go by feel.  A tiny bit of peanut butter will get you a fluffier powder, but not have much flavour.  More will get you a slightly less fluffy product, but still powdery and packed with flavour.  Too much and you get a paste.  Go slowly.

You will need:

tapioca maltdextrin       - a rough litre (quart) is a good start
smooth peanut butter    - you won't need more than a couple tablespoons

Method:

 - put the maltodextrin in the food processor and get it running
 - slowly add the peanut butter through the feeding hole and monitor the change in the powder
 - when you start to notice a change in the colour, stop the processor, smell, taste and feel the texture
 - if needed, start the processor again and add more peanut butter
 - when you find the sweet spot between flavour and fluffiness, stop adding the peanut butter
 - store in an airtight container until use

Saturday, July 7, 2012

Recipe: Beef tongue - sous-vide and traditional

A beef tongue gently cooked is so tender and delicious, and it's very easy too.  It's usually simmered, so you don't even have the searing stage - just mix everything together cold, let it go and let it take its time.  When I cooked this one, it actually took 3 hours to reach 80C.  The skin of the tongue comes off really easy once it's cooked, so don't even bother to do it while raw.  

The low temperature and long cooking time lends itself perfectly for sous-vide cooking, the only tricky part is after the initial cooking and peeling of the skin, you'll want to put it back in the broth so the flavour can really soak in as it cools.  I recommend wrapping the tongue in cheesecloth, then putting it in a container as close to its size as possible, turn it over a bunch of times to saturate the cloth, then let it cool in the liquid while turning over periodically.
rinse well an a light brine

Once cooked and cooled, we like to chop the tongue up, heat it up in some sauce (degreased, strained and reduced) and have tacos.  It also works great to slice it up and serve it in some sauce, or even in a sandwich.

You will need:

1                  beef tongue (1.5kg / 3.3lbs)
2                  onions
2                  serrano chilis
buried in the broth
2L / 8C        beef stock (less if sous-vide)
1                  carrot
12                garlic cloves
2                  orange zest
3                  key lime juice
3                  bay leaves
5ml / 1tsp    achiote power
5ml / 1tsp    ground black pepper
to taste        kosher salt

Method:
after 9 hours

 - wash the tongue in cold water 3 times
 - in the last rinse, lightly salt the water and let it sit for about an hour
 - slice the onions and carrot, sliver the garlic, remove the seeds and slice the serranos, and zest the oranges
 - add the vegetables to the cold beef stock and add the lime juice, pepper, bay leaves,  and achiote powder
 - lightly season the broth and add the tongue
 - bring the brew up to heat very slowly (a slow cooker works great, or set the oven for 250F / 121C and put the pot in right from cold
peel the skin

Note if cooking sous-vide:  put the tongue in the vacuum bag and surround with the vegetables.  Then add as much stock as possible (to make the skinless cooling stage easier).  Add the aromatics and seasonings and seal on a loose (soup) setting.  Set the water bath for 78C (172F) and let cook for 12 hours.  When the time is up, remove the tongue from the bag and gently remove the skin.  If you have enough broth to submerge the tongue in a small container during cooling, great.  If not, wrap it in some cheesecloth, turn it over in the broth to soak it, then let it cool in the liquid and keep turning occasionally to keep the cloth wet.  Follow the same instructions as the traditional method after the cooling stage.
peeled

 - cook for about 9 hours, turning over occasionally and paying attention to the softness of the meat
 - when the meat's fibres are soft and separate when squeezed, take the tongue out of the broth
 - gently peel the skin away
 - return to the broth and let cool completely overnight
 - degrease the broth and remove the tongue
 - warm up the broth
 - strain out the vegetables
 - reduce the broth to a sauce
after cooling in the broth
 - slice or chop the tongue and warm up in the sauce
 - serve


tacos de lengua


Friday, July 6, 2012

Recipe: The 64 degree egg

Feeling pretty good about your poaching skills?  Ready for the next level?  The 64 degree egg utilizes a circulator to poach an egg in its shell with the result having a tenderness you may not have thought possible.  The name comes from the fact that egg whites cook at 63C while the yolks cook at 65C.  

Cooking an egg at 64C theoretically gives you a properly cooked egg white and a creamy yolk - in reality however, since the yolk is approaching cooking temperature, it usually winds up firmer than most people like.  Shortening the cooking time does soften the yolk, but then the whites are very soft, bordering on unstable and unsuitable for presentation.  The 64 degree egg is still a good product, but most places using it on a menu will actually have found a different temperature and time combination that works for them.

I've come across two combinations that work well, so you can try them and pick the one you like.  In either case, you will want to cover the eggs in a towel while in the circulator basin to keep them from bouncing around and breaking in the circulator's current.  You will then need to ice them down completely to stop the cooking.  A common temperature for restaurants to keep a circulator at during service is 52C - this works perfectly to warm the eggs up again without cooking them further.  then when serving, just crack the egg as normal and watch a beautifully poached egg come out.

The first combination is to cook the eggs at 62.5C for 75 minutes.  The yolk will be creamy and the whites will be tender.  If you find the whites a bit too tender for your taste, you can either give them a quick dunk in simmering water to firm up the outer edge of the whites, or try the next combination.

The second combination is to cook the eggs at 64.5C for 30 minutes.  The shorter cooking time is definitely more convenient and is short enough to keep from cooking the yolks too much.  The higher temperature will give you a firmer exterior on the whites while still maintaining the tenderness we are after.  Of course, at the higher temperature, timing becomes more crucial to stop the cooking while the yolks are creamy - definitely use a digital timer.

Thursday, June 28, 2012

Recipe: Carrot orange paint

Plating a dish is often referred to as painting a picture, well we should get some paint into the mix.  Along with the various coulis, purees, gels and foams you might find on a dish, a broad brushstroke of paint can set a nice backdrop as you build the dish up.  Just don't spill anything unintentionally onto the paint because it stays wet and you won't be able to remove it without leaving a mark.  on the other hand, think back to grade school and making potato stamps, maybe you want to use something to leave an impression in the paint - the veined underside of a leaf pressed in and gently lifted off can leave a striking design.

You will need:

500ml / 2C          carrot juice 
500ml / 2C          orange juice (pulp strained out)
2.5ml / 1/2tsp      vegetable oil
5ml / 1tsp            glucose
to taste                kosher salt
Method:

 - put the juices in a small sauce pan and gently reduce down to a syrup - careful not to burn the sugars
 - once syrupy, you should have between 125 - 250ml (1/2 - 1C)
 - with a small hand blender, blend in the glucose and vegetable oil
 - season with salt
 - let cool completely 
 - use just like paint with a pastry brush

Sunday, June 24, 2012

Recipe: Red pepper and mirin sheets

These Sheets made from Red bell peppers and mirin really dressed up a tuna tataki dish I made recently.  You could just use red peppers if you like, but the mirin complemented the Asian nature of the dish and also diluted the colour a bit so that the final sheets were almost transparent when done.  You may notice that the gelling proportions are higher than the chorizo sheets I did - the chorizo sheets tend to be thicker, so thinking vertically, you end up with a similar level of binding for the same surface area on the sheets.  You will get the most dramatic effect with these if you can get them as thin as possible, so I put more gelatin in.  Whereas with the chorizo sheets, you could use a stencil to spread the mix out, you will be pouring this one, so I've made the recipe for 500ml of mix to make sure you will have enough to cover the pan (you can make a gel with the rest).  The importance of both a flat pan and a level setting surface is even more important as this mix will follow the gravity until it sets.  Once you get the hang of this recipe, take things a step further and make cannelloni with the sheets - the effect is stunning.

You will need:

2 - 3                  red bell peppers (to make at least 375ml / 1.5C of juice)
125ml / 1/2C    mirin
10 sheets          gelatin
5g / 0.18oz       agar agar
pan spray

Method:

 - stem the peppers and cut out the pale ribs
 - puree the peppers down to a liquid (use a juicer if you have one)
 - "season" the juice with mirin - you may use more or less than the 125ml according to your taste
 - measure out 500ml / 2C
 - soak the gelatin leaves
 - weigh out the agar and mix with the juice
 - pan spray a smooth plastic tray or 1/2 size silicone mat inside a 1/2 size sheet pan
 - bring the mix up to a simmer
 - set the tray on the level surface
 - drain the gelatin and melt it into the mix
 - pour the mix into the pan so you have a thin even layer
 - torch or pop any air bubbles
 - let set at least an hour
 - use the edge of a palette knife to cut your shapes
 - peel off and use

Sunday, June 17, 2012

Recipe: Chorizo sheets

This is a really fun one to pull on people, and a great way to incorporate the nice spiciness of chorizo into a dish.  Wouldn't you want to tuck into a seared scallop all cozy in its chorizo blanket?  Of course you would!  The flavour will depend on the quality of sausage you use and the density of your puree.  The sausage needs to be cooked ahead, then pureed as smooth as you can get it - you probably won't be able to get it perfectly smooth, but that's ok, you want it to retain something of a meaty texture.  If you keep it thick, you will have more of a pure chorizo flavour, but you may want to make something of a stencil and spread it like a tuille - if you make it thin you sacrifice a little flavour, but you can pour it onto a tray, level it out with a palette knife and cut it once it has set.  I've found that those cafeteria trays with the smooth surface work great with a bit of pan spray - they are usually more consistently flat and they give you the option of a glossy side or a rough side when the sheets are set.  The agar agar will allow you to use the sheets on a hot dish, but be aware that enough heat will eventually begin to melt it.

You will need:

2 - 3                      uncooked chorizo sausage (depending on size)
2.5g / 0.09oz        agar agar
2.5 sheets             gelatin
as needed             tomato juice
pan spray

Method:

 - peel the casing from the chorizo, crumble it up and cook in either a fry pan or by roasting in the oven
 - drain the fat and puree the meat with enough tomato juice to get the texture you want - make sure you get 250ml / 1C
 - measure out the agar agar
 - soak the gelatin
 - apply pan spray to a smooth plastic tray or silicone mat
 - mix the agar with 250ml / 1C of puree
 - bring the mixture to a simmer in a small pan
 - melt in the gelatin
 - either use a tuille stencil or a palette knife to spread the mix on the tray as thin as possible and even
 - let set in the fridge for at least an hour
 - if you spread the mix freestyle, cut your shapes
 - gently peel the sheets from the tray and use warm or cold

Saturday, June 16, 2012

Recipe: White soy "caviar" (pearls)

Another product that doesn't follow the usual formula for caviar is soy sauce.  I suspect its the salinity that affects the gelatin because the first time I made it, I used the usual formula, and it looked like it worked when I looked at the caviar through the oil, but when I strained it out, it all passed right through the chinois in a thick oily mess.  The solution was to use more agar agar and less gelatin and everything held together fine.  White soy sauce is a premuim product, so you definitely don't want to waste any on a recipe that won't hold together.  It also has the extra surprise in that you aren't only serving soy sauce as a caviar, but its also not black, rather its almost a light golden colour.  Aside from colour, it has a very refined flavour and is less salty than most other soy sauces.

You will need:

1L / 1qt                    canola or grapeseed oil
200ml / 6.76fl oz     white soy sauce
5g / 0.18oz               agar agar
1sheet                      gelatin

Method:

 - put the oil in a tall, thin cylinder and place in the freezer for a few hours before using
 - mix the agar and the soy sauce cold
 - soak the leaf of gelatin
 - bring the soy sauce and agar up to a simmer
 - drain and melt in the gelatin
 - let cool slightly, then pour into a squeeze bottle
 - pull the oil out of the freezer
 - drop the mixture from the bottle into the oil until it's finished
 - let everything set up for a few minutes
 - strain through a chinois or fine mesh sieve - let all excess oil drain off
 - store in a dry container until use

Sunday, June 10, 2012

Recipe: Sous-vide chicken

Chicken breastChicken (and other poultry) is a great way to observe the benefits of utilizing sous-vide as a cooking method.  Even the most experienced cook would be hard pressed to turn out a juicier, more tender product with such consistency and in large numbers when necessary.  Indeed I've even seen some more timid customers ask for their chicken to be cooked more as they find it hard to believe that a cooked chicken breast can be so soft - but fear not, it really is fully cooked.  Thicker cuts (fat free range birds) may need more time, but the same rules apply - check the middle, and if it's all white, it's all good.  Even if you were off a bit, the fact that you used sous-vide most of the way will shine through in your product, in fact, if you are prepping for a hot dish, it's advisable to err on the under side as you will probably want to grill or sear the meat at service, and letting the secondary method finish it off will ensure that you won't overcook it in the rechaud.  If you are cooking for cold sandwiches or chicken salad, then cook fully.  Once you are used to the character of sous-vide chicken, you will be able to feel the meat in the bag and judge the cook as well as you can with traditional methods.

You will want to marinate or brine the chicken in advance (the first stages of my fried chicken recipe would so just fine) and you may want to add some aromatics into the bag as well.  Except in the case of brining, save the salt for just before cooking - if you brined, you shouldn't need any more.  Always line the breasts up in the bag in flat rows - if they are stacked up or overlapping, they won't cook evenly.  Always ice down the bags right after cooking to cool as quickly as possible.  If you finish the breasts off on the grill or in a pan, make sure you pat them dry to get proper caramelization and a crispy surface.


Method:

 - marinate or brine the chicken breasts as you would normally (skin on or off is your choice)
 - set the water bath for:   135F / 57C   (if you will finish with another cooking method)
                                         145F / 63C   (if you want to cook fully)
 - season if necessary, add any aromatics and seal the chicken in the vacuum bag
 - cook in the bath for:     45 - 50 minutes at 135F / 57C
                                         1 hour at 145 / 63C
 - check the firmness of the meat, cook a little more if needed
 - remove from hot bath and cool down completely in an ice bath
 - the chicken will store well in the bag in the fridge until you are ready to use it 

Chicken on grill
yes, sous-vide can still lead to this


Wednesday, June 6, 2012

Recipe: Braised beef knuckle - sous-vide and traditional

Got beef?  How'd you like a big fat knuckle sandwich?  I always wanted to say that, and at the moment at our house we're dishing out knuckle sandwiches like Burt Reynolds at a cowboy bar.  When I set my mind to doing it the other day, I didn't anticipate the difficulty in getting the knuckle itself with the meat on it - most butcher shops cut the meat for stew and save the bone for stock.  I had to take my car to the shop, so I was on foot, no matter since I was close to downtown and it would be easier to hit multiple butchers than if I was driving.  I gave three of the major supermarkets a try just because they were right there - nothing.  I tried two of the "trendy" butchers - best suggestion was buy an oxtail and some stew meat.  I then hit the T&T Asian supermarket and about five butchers in Chinatown - that was a shocker, I thought one of them would hook me up for sure - no.  I made my way back to our neighborhood where we've got a couple old school butchers - I thought if I have to order it special, it might as well be close by.  

I got to the very last shop just in time - he had just split a knuckle on the bandsaw and was about to strip it for stew meat and stock bones.  Of course I saved him the work.  He was pretty excited to see me buy it as he hadn't sold one in about five years and was interested in my plans for it.  He was expecting a traditional English style roast, but was intrigued by the thought of Latin inspired pulled meat.  Butcher shops have to be one of the only places you can get a good laugh saying that your wife is in for a knuckle sandwich.  Moral of the story - order the knuckle from your butcher, but you can rest assured you are serving something your guests haven't had in a while, maybe never.  You don't need to make sandwiches (this would make a lovely terrine or presse) but if you do, I recommend getting as close to a Latin torta bun as you can - Portugese buns are closest, ciabattas are nice - I went to our local Latin bakery and got the buns they make.

smoking gun at work
Getting down to it, I made this recipe special for the occasion, and it's best done with a couple days to prepare.  I wanted something aggressive, so it's a bit spicy.  Considering what usually fuels a knuckle sandwich, it's also got coffee, whiskey and smoke in it.  I don't have a smoker, but I do have a "smoking gun", so I filled the sealed marinating bowl with smoke a bunch of times to replicate it.  A quality liquid smoke can also be added to the broth if you like.  I decided to do a traditional braise because I wanted to get a good amount of broth out of it and used my slow cooker (it can hold a nice sub 200F temperature) but I've included the methods if you choose to use the oven or sous-vide.  The knuckle has a lot of cartilage in it - it's delicious.  If you aren't used to cartilage, give it a try, you may want to eat it on it's own - I chopped it up and put it back in the mix with the meat once it was pulled.

You will need:
1                       beef knuckle (2-2.5kg / 5lbs)
4                       medium onions
2                       carrots
2                       stalks of celery
4                       cloves of garlic
2L / 8qt            beef stock
796ml / 28oz    canned tomatoes (1 can)
45g / 1.6oz       Oaxacan chocolate (it's spicier)
1                       pack Starbucks "Via" instant coffee
60ml / 4Tbs      whiskey
2                       bay leaves
to taste             kosher salt
as needed         olive oil

spice rub: (feel free to be generous, all measurements are "at least")

5ml / 1tsp          cumin
5ml / 1tsp          smoked paprika
2.5ml / 1/2tsp    cayenne
5ml / 1tsp          ground black pepper
5ml / 1tsp          garlic power
10ml / 2tsp        brown sugar
you will also need a smoker, smoking gun, or liquid smoke

Method:

 - rub the meat with a bit of olive oil
 - apply the spices evenly to all sides - massage them in
 - if you have a smoker - smoke two hours
 - julienne two of the onions
 - place the meat in the bowl with the onions and toss around for coverage
 - if you didn't have a smoker, but have a smoking gun - seal the bowl with plastic wrap and pipe smoke in  and re-seal - repeat process a few times over a few hours
 - let the meat marinate overnight
 - clean the onions off the meat (save them) and season well with salt
 - sear the meat well in a hot pan and set aside
 - unless the pan is excessively burnt, julienne the other two onions and caramelize along with the originals in the same pan
 - peel and chop the carrots and celery, mince the fresh garlic
 - when the onions are browned, set aside and caramelize the carrots and celery, adding the garlic at the end
 - return the onions to the pan
 - deglaze with whiskey
 - puree the can tomatoes and strain the seeds out
 - add the tomato puree to the pan
 - add the chocolate and coffee and dissolve both
 - add the bay leaves

Note if cooking sous-vide:  at this point, turn off the heat, cool, then add the cold stock and mix well.  Set the water bath for 183F / 84C for a six hour cook (or 172F / 78C for a 12 hour cook).  If you are pulling the meat, you can even go longer for a softer product.  Put the meat in a bag and surround it with all the vegetables and some of the broth (the rest of the broth can be reduced for sauce) and seal on a looser setting to prevent blowout.  Set the bag in the bath, cook for the prescribed time, then ice down to cool and rest one day.  Pick up the rest of the procedure after the days rest in the traditional method.

 - set the oven to 250F / 121C
 - bring the broth to a simmer
 - return the meat to the broth
 - cover and place in the oven and cook for 5 -6 hours (slow cooker was about the same)
 - check the meat - it shouldn't feel tight and the fibers should separate when squeezed
 - remove from the oven and cool on a rack in the liquid
 - rest in the liquid overnight in the fridge
 - remove from fridge and remove fat cap from the broth
 - gently warm up the broth - this helps pulling the meat apart
 - remove the meat from the broth
 - strain the vegetables out of the broth and set it to reduce to a sauce
 - separate the meat from the bone, remove the fat and set aside the cartilage
 - put the bone in some water and make a remouillage stock - there's still flavour in it
 - pull the meat apart with your fingers
 - chop the cartilage and add to the meat
 - put the meat in a pan and keep warm
 - moisten with the reduced sauce to taste and desired juiciness
 - dish out some knuckle sandwiches!

the knockout punch
note:  the final sandwich was dressed with our pickled red onions, candied poblanos, cheddar cheese and some of the adobo from Abuela's chipotles - pure goodness!


Monday, May 28, 2012

Recipe: Sous-vide polenta

I have thought about cooking polenta sous-vide for a long time, but only recently got around to experimenting with it.  To cook polenta properly the traditional method is a lot of work, and the potential for burning it if you don't scrape the bottom well (or turn your back on it for a second) is high.  I used polenta as a starch in a contest once and blistered my blisters during my daily practices - without a better option, such is the nature of the beast - you suck it up and keep going.  If you are in a hurry, make it the stove top method, it is faster, but if you've planned ahead, your life just got a whole lot easier.  You can have the polenta simmering on the stove in a holding pattern until the very moment you need it.

My goal was to produce a super creamy polenta, and I got it.  To that end, I did soak the cornmeal overnight in a portion of the water but I'm not convinced it was 100% necessary, but it couldn't have hurt.  I also stuck to the most basic formula to focus on the cornmeal - you will probably want to involve some cheese at least, and maybe some onion, garlic, aromatics or what have you.  Obviously, any sweating of onion or garlic will have to be done outside the bag, and it's your choice to mix it with the cornmeal before or after cooking - before will infuse the flavours better, but garnishes will retain their character better mixed in after cooking.  Other good news, you don't need a water bath.  I threw my batch in the industrial steamer at work, but you could also put it in boiling water.  The ratio below will give you a nice soft product with some room for adding butter or cream if you like, but if you were planning to set the polenta for frying later, you would want to cut the water down.

You will need:

250ml / 1C             cornmeal
1L / 4C                   water
2.5ml / 1/2tsp         salt (this leaves room for a salty cheese)

Method:

 - heat up 500ml (2C) of the water and pour it over the cornmeal - mix it up and let it soak overnight in the fridge (optional step)
 - mix in the rest of the water, salt, and anything else going into the cooking process
 - seal it all in a bag - not too tight - leave room to expand without excessive air 
 - steam 2 hours, if boiling, a bit longer (steam is hotter)
 - once cooked, remove from the bag, mix in garnishes and serve - or set in a pan for cutting and frying later

Friday, May 25, 2012

Recipe: Red pepper espuma (foam)

Espumas (or foams) are a great way to add a different visual effect to a plate along with an innovative texture on the palate.  For those unfamiliar with espumas, the simplest comparison is that you are putting a flavoured foam similar to a whipped cream on a dish as a garnish.  Some espumas will have some milk or cream in them for body, but to maximize the effect, many use a highly flavoured base lightly set with gelatin to mimic the body that is provided by the fat content in whipping cream.  The most common way to aerate the mixture to a whipped cream consistency is to use a pressurized whip cream canister and Nitrous Oxide cartridges.  With respect to this recipe, if you like you can roast the peppers before pureeing as different flavour option.  It is also very important to strain the mixture through a fine mesh sieve to ensure the canister doesn't clog.

You will need:

8 - 10            red bell peppers
5ml / 1tsp     honey
to taste          kosher salt
2 - 3              sheets gelatin (depending how firm you want the foam)
2 - 3              NO2 charges (depending how light you want the foam)
1                   whip cream canister (ISI is the most common brand)

Method:

 - seed and devein the peppers
 - you will need 500ml (2C) of puree, so puree the peppers one at a time in a blender until you see you have enough
 - let the blender puree really well, add the honey and season with salt
 - rehydrate the gelatin
 - pass the puree through a sieve and measure out the 500ml (2C)
 - heat 3/4 the mixture and melt the gelatin into it
 - mix the rest of the mix in and let cool
 - load the canister and charge with the NO2 - shake well with each charge
 - chill down completely and store in the fridge a few hours before use
 - shake well before dispensing

Saturday, May 19, 2012

Recipe: Duck confit - sous-vide and traditional

Ducks are maybe my favorite bird.  I love to watch them come in for a landing on a glassy lake, I like to eat them.  A perfectly cooked duck breast is a thing of beauty, but you really can't do much with it other than let it bask in its own beauty.  Duck legs however, open doors everywhere.  You can roast them of course, but I prefer to gently confit them.  Once done, you can serve them whole, roasting the outside to crisp up the skin, or you can pull the meat apart and use it as a filling for won-tons, spring rolls and tacos.  You can move up a level and make a beautiful terrine or delicious rillette.  Always save the skin for something devious - it's too good to waste.

Some chefs like to confit in olive oil - it's just fine, but if you have the duck fat, I'd recommend it.  If you store it well in the freezer, it actually gets better with each successive batch of confit as it absorbs more flavour.  You'll have to get a bit creative after the cooking, as you will accumulate a wonderful layer of duck jelly below the fat.  I usually remove the legs and aromatics and chill the fat right down in the fridge, then it's easy to dig through the fat to the jelly and gently remove it.

You will need:

4              duck legs
1              small onion
1              large shallot
4              cloves garlic
4              cloves
12            whole black peppercorns

1              cinnamon stick
1              star anise
1              orange zest (use a vegetable peeler, not a microplane)
1 sprig     rosemary
4 sprigs    thyme
to cover   duck fat (or enough to coat if sous-vide)

Method:

 - slice the onion, shallot and garlic and mix all the aromatics together
 - make a bed of most of the aromatic mixture in a container, lay the legs flesh side down, and cover the skin with the rest
 - marinate one day

Note:  If cooking sous-vide, set the water bath for 85C / 185F.  Lightly season the legs and place in the bag, disperse the aromatics around and scoop in a spoon or two of cold duck fat (or oil if you choose).  Make sure the fat is relatively spread around, but it will spread as it warms up.  Seal the bag and cook the legs for 6 hours.  If you know you will pull the meat apart, you can cook it longer.  Once cooked, cool the legs down in an ice bath completely.  Pick up the rest of the procedure from the point where the traditional method has cooled down.

 - select a good heavy pot for the confit
 - set your oven to 200F / 93C
 - spoon a bit of duck fat in the bottom
 - lay the aromatics down on the bottom (this is insurance against excessive direct heat)
 - lightly season the legs and lay on top of the aromatics evenly
 - spoon the rest of the duck fat over to cover - top up with oil if you need
 - slowly bring the heat up to barely a simmer
 - cover and transfer to the oven
 - cook for 4 hours, then check the legs - if the meat is just starting to stretch away from the end of the bone, move the pot to a rack on the counter
 - remove the cover and let the legs cool in the fat
 - let the legs rest in the fat in the fridge overnight
 - gently remove the legs from the fat
 - if serving as legs, roast skin side up at 350F / 177C till crispy
 - if pulling the meat apart, start pulling
 - warm up the fat till liquid again
 - strain off the aromatics and cool down in a container (glass will let you see the jelly)
 - when the fat is somewhat solid again, you can dig out the fat and get at the jelly
 - use the jelly as a binder in your pulled meat, or add it to the sauce for the roasted legs
 - save the fat and store it in the freezer for next time


Friday, May 4, 2012

Recipe: Balsamic "caviar" (pearls)

While the recipe I gave for the sour cream caviar can in many ways be adapted to almost any flavour, there are some exceptions - balsamic vinegar being one of them.  Balsamic caviar is very popular these days partly because it visually looks very much like true caviar.  Unless you are using a premium aged balsamic, you will probably want to reduce it a bit so the flavour mellows a bit.  As well, due to the acidity, the formula is ever so slightly altered so the pearls hold together better.  After reduction, a bit of honey adds some nice sweetness, but if you are a purist, you can use glucose (or some of the invert sugar we made a few posts ago).

You will need:

1L / 1qt              vegetable oil
500ml / 2C         balsamic vinegar
30ml / 2Tbs        honey / invert sugar
5 sheets              gelatin
3g                       agar agar
1                         squeeze bottle

Method:

 - put the oil in a tall cylinder and place in the freezer for a few hours
 - reduce the balsamic vinegar by 1/2
 - add the honey or invert sugar
 - let cool
 - make sure you have 250ml of base mixture - adjust if necessary by taking out some mix or adding water
 - whisk the agar agar into about 3/4 of the mix until smooth
 - bring up to a simmer
 - hydrate your gelatin
 - when the mixture simmers and thickens, take off the heat
 - melt in the gelatin
 - add back the last 1/4 of the mix (this just speeds up the cooling process)
 - cool slightly and pour into the squeeze bottle
 - while still warm and fluid, drop randomly into the cylinder of oil
 - when the bottle is empty, give the caviar a few minutes to set, then strain the caviar out of the oil
 - when the oil is completely drained off, store in a dry container and keep in the fridge

Thursday, April 19, 2012

Recipe: Strawberry consomme - gelatin clarification

The real topic here is actually the gelatin clarification process, but it in itself is not very appetizing.  Strawberries however, are very much so, and are a perfect example of a situation you would want to use this technique.  Sure you could clarify a strawberry soup using egg whites, but your consomme would taste more cooked as it simmered away on the stove, and it's a pain straining a consomme anyway.  Using the gelatin clarification process uses minimal heat, and therefore lends itself splendidly to fruit soups - and it's really easy.  Conversely, if you have a nice savory broth, there's no reason not to use this technique with it as well since it is probably already right where you want it flavour-wise already. 

If it's not quite strawberry season, you may want to cheat a bit, put it on the stove and work a little sugar and love into the flavour before pureeing, but if the berries are prime, you can start from fresh, either as a puree or run through a juicer.  The clarification process will take out the solid matter, so remember that and don't be surprised when the resulting consomme is significantly reduced in volume from what you started with - if you use a puree, you may want to add some water to give you volume without watering it down (your soup should be delicious before clarification).  I'm going to pick up the process with the ready to work puree / juice / stock as it's the following steps which are more important.

As an additional note, strawberry consomme is a great starting point for a dessert cocktail.

You will need:

strawberry puree / juice / stock
gelatin - sheet or powder
cheesecloth
a scale 
room in the freezer

Method:

 - weigh your puree / juice / stock
 - calculate 0.5% as your measure for gelatin - eg.  1kg stock will need 5g
 - bloom your gelatin
 - heat the stock just enough to melt the gelatin
 - dissolve the gelatin in the stock
 - set in a container you can either:   a)  invert onto a straining apparatus lined with cheesecloth
                                                          b)  turn a frozen block out to cut up (carefully) on the counter
 - once the gelatin is set, place in the freezer and freeze solid
 - line your straining apparatus with cheesecloth, and place the frozen consomme inside
 - transfer to the fridge and let the stock slowly thaw through the cloth into the catch basin
 - the resulting liquid should be beautifully clear and ready to use