Tuesday, April 30, 2013

Cookbook review: Aroma by Mandy Aftel and Daniel Patterson

The sense of smell is one of the most powerful senses, as well as one of the easiest to overlook.  Chef Daniel Patterson and perfumer Mandy Aftel teamed up to compile a facinating book.  They discuss the importance of considering the aromas emanating from your food and their effects.  Some aromas work together in harmony while others compete for attention, and you need to realize how to use each smell to its greatest effect and to achieve the desired response from your guest.

The recipes here are unique and use thought provoking flavour combinations.  Beyond that, you will find instruction on creating your own flavoured oils and essences, invaluable if you want to develop an original arsenal in your pantry.  You can even go beyond the kitchen and throw together some aromatic bath salts, body oils and perfumes.  CHECK IT OUT HERE.

Recipe: Preserved egg yolks

Looking for an unusual garnish?  How about grating an egg yolk on a microplane?  Preserved egg yolks are very tasty and can add a great colour to a plate.  What do they go with?  For starters, things that already go with eggs - charcuterie, salads, beef tartare, and more.  Once you taste them, see where your inspiration takes you.  Some people like to stop the process short after the salt curing, at which point, the yolk isn't firm enough for grating, but has it's own semi-firm and creamy quality.  By all means, give one a sample at this stage, but we're going to take it all the way through the hanging process as well.  If you want to mix things up a bit, add a few spices to the salt mix to infuse into the yolks.  This is very easy to do, just give yourself a few weeks to let things happen at their own speed.

You will need:

2 parts                   kosher salt
1 part                     sugar
as needed              eggs


Method:

 - mix the sugar and salt together 
 - put the mix in a non-reactive container
 - make a divot for each egg yolk you will cure
 - separate the whites from the yolk without breaking them
 - gently lay the yolks into the divots and cover with the salt mixture
 - store the container in the fridge and let cure for about two days
 - remove the firm yolks from the cure and brush off any extra salt
 - wrap the yolks individually in cheesecloth and hang in a cool and dry place (the fridge if you must)
 - after about two weeks, the yolks should be hard enough to grate
 - unwrap and use as needed

Recipe: Mayonnaise

Let's take a moment to cover one of the most essential basic recipes.  Yes it's basic, but like I said, it's also essential.  If you can't make mayonnaise, you won't be able to make a Caesar dressing or any other of a wide variety of emulsified egg dressings.  Even Hollandaise works in almost the same way - the idea that egg yolks have the ability to hold a certain amount of fat in an emulsion (actually, a large egg yolk can hold 200ml / 7oz of oil).  Once you get a feel for how much fat a yolk can handle, you can just about throw the recipe out the window and get crazy.  For precisely that reason, this recipe is intentionally as plain Jane, basic and no monkey business as I can make it - no garlic, no strange oils, fancy vinegars, herbs or seasonings - all that you can do yourself once you start to have fun with it.  This recipe is scaled down to one yolk for simplicity and you will have to whisk it by hand at this size - scale it up a few times and you can use a blender or mixer to make things easier.  Once you've got this down, the substitutions are endless (see my recipes for brown butter mayonnaise and pancetta mayonnaise) - learn to handle the emulsion first, then go nuts.

Some tips:

 - have all your ingredients a room temperature - it makes for easier emulsion
 - add the majority of your seasoning to the beaten yolks, then they disperse easier as the oil is added
 - gradually adding the oil is very important - just do it
 - watch the mayonnaise as you make it - if the fat starts to separate, it's split and you need to stop
 - if the emulsion gets too thick, it will split, add a bit of the vinegar or even a tiny bit of water to loosen it
 - if it splits, whisk up a new egg yolk and add the split mayonnaise the same as you added the oil the first time

You will need:

1                                 egg yolk
1.25ml /  1/4tsp          dry mustard
10ml / 2tsp                 white wine vinegar
200ml / 7oz                vegetable oil
to taste                        lemon juice
to taste                        kosher salt
to taste                        white pepper
as needed                   water (room temperature)

Method:

 - have all ingredients at room temperaure
 - separate the egg and whisk the yolk until light and pale
 - add the mustard, a pinch of salt and a pinch of pepper and whisk
 - add a little of the vinegar and whisk
 - very slowly, start adding the oil, making sure the emulsion holds continuously
 - continue adding the oil, occasionally alternating with more of the vinegar
 - once all the oil and vinegar are added, season with lemon juice, salt and pepper
 - adjust the consistency with more liquid if needed
 - store in the fridge until use


 -

Monday, April 29, 2013

Recipe: Pumpkin spice

Pumpkin spice is one of those things that may show up on a recipe as an ingredient, but then you go to the store and it's hit or miss whether they will stock it.  No worry, it's an easy mix of things you either already have on hand or can easily get a hold of.  You don't have to just use it with pumpkin either, it's a nice blend of earthiness, coziness and aromatics that use can use in a lot of recipes.  The ratios are not set in stone either, but this is the blend that I use.  It's a small recipe - this way I tend to mix it each time I need it with little left over - this way the individual spices keep to their own until the mix, making for a more vibrant character when mixed.  By the same token, the more you can grind the spices yourself from whole, the bigger the flavour.

You will need:

1tsp                       ground cinnamon
1/2tsp                    ground nutmeg
1/4tsp                    ground ginger
1/4tsp                    ground clove
1/4tsp                    ground allspice

Method:

 - grind
 - mix 
 - use

Thursday, April 25, 2013

Recipe: Tomato tartare

This recipe is not complicated, but can add a touch of elegance and freshness to a dish.  At first
glance, this may look like a salsa, but a little more care goes into preparing the tomatoes and there's less emphasis on "spiciness" - the goal here is to focus on the tomato, and the other ingredients are meant to compliment it and extend the flavour profile.  If you press the tartare I to. A ring mold, it makes a great landing pad for the focal item of a dish that may otherwise try to slide around on the plate.  Try it with a single lamb chop, or a nice little section of pork belly.  Have a look at my post for peeled tomatoes if you want a little more insight into the best way to blanch tomatoes for peeling.

You will need:

10                   medium tomatoes (on the vine are great)
1                     shallot
2Tbs               chopped Italian parsley
2Tbs               olive oil
to taste           kosher salt

Method:

 - get a pot of water on to boil and an ice bath ready
 - score the bottoms of the tomatoes, blanch in the boiling water, then cool off in the ice bath
 - peel the tomatoes, then open them up and remove the seeds
 - pat the tomatoes dry with a paper towel
 - cut the tomatoes into small dice and put in a bowl
 - mince the shallot fine and add to the diced tomato
 - chop the parsley and add to the bowl
 - add the olive oil and mix well
 - season with kosher salt
 - use as needed

Wednesday, April 24, 2013

Recipe: Buttermilk doughnuts (orange)

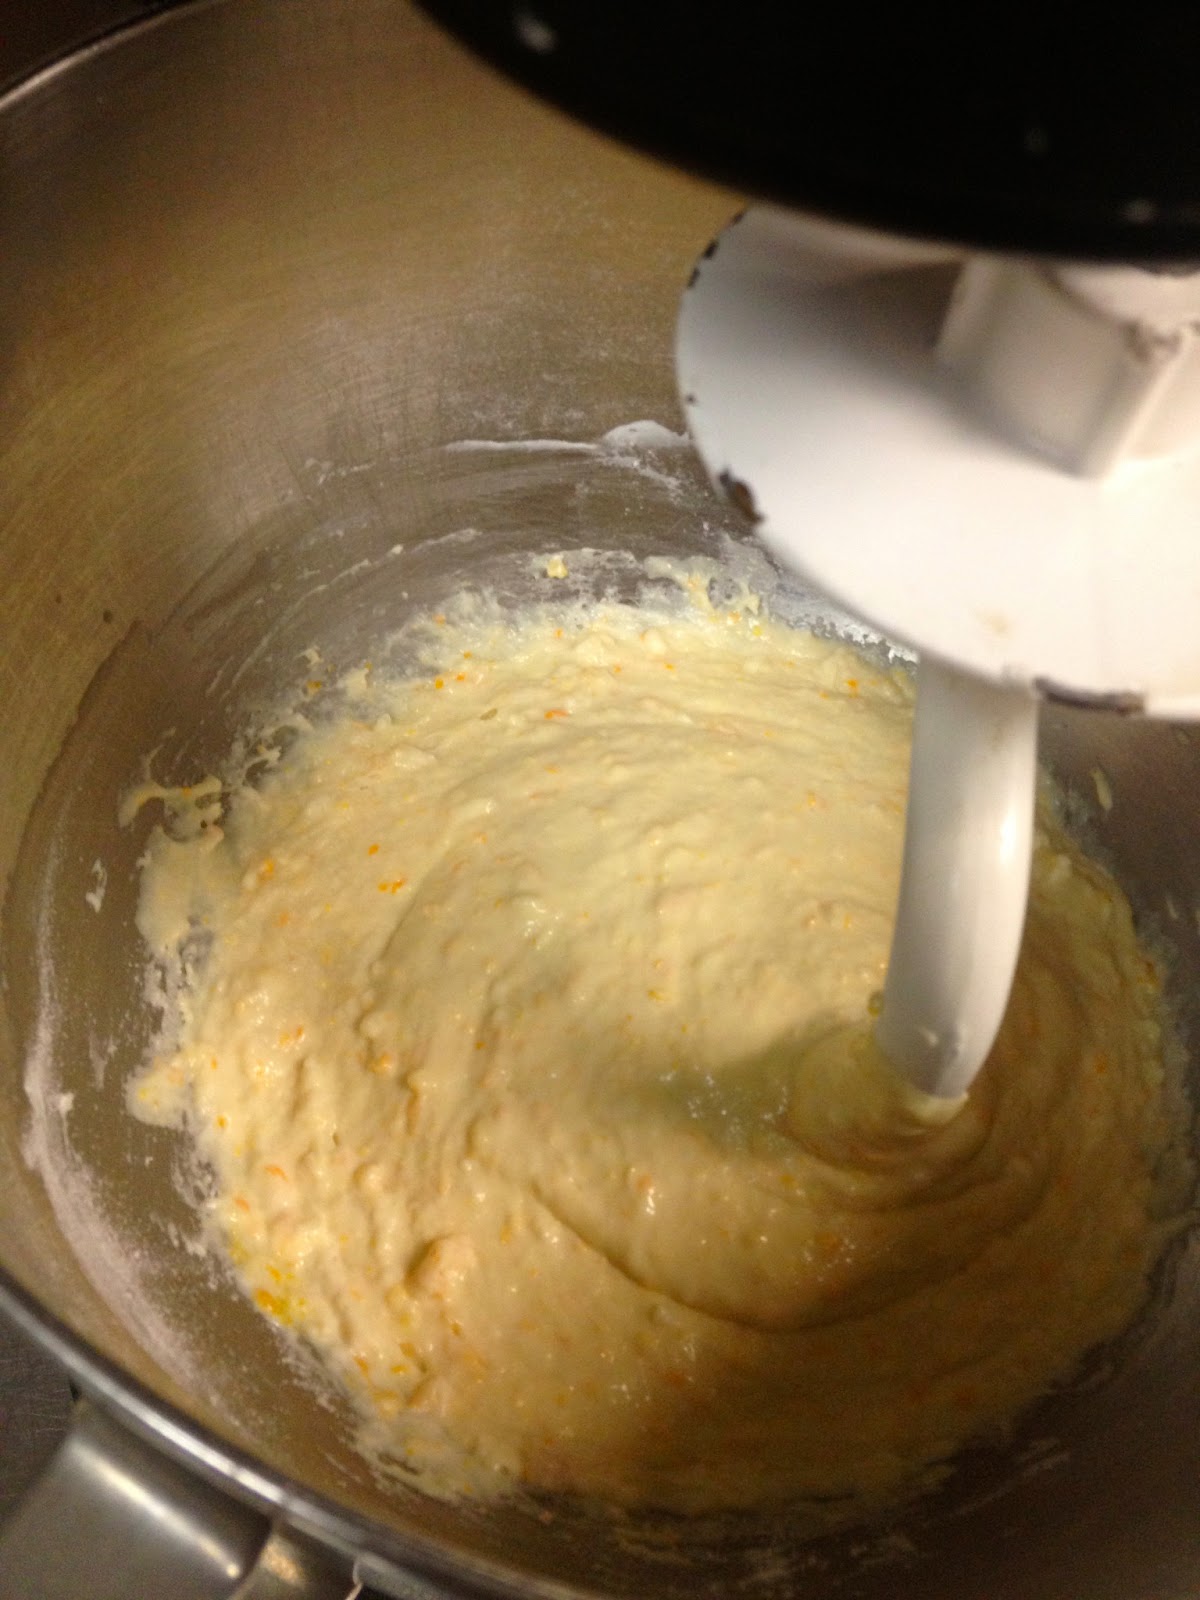
mix the wet dough
I've heard that doughnuts are one of the Canadian stereotypes.  I like them, but again there's not that many people who don't at least occasionally indulge, so why are they trying to pin it on us?  No matter, might as well be known for things people like.  I live a short ferry ride away from the birthplace of Nanaimo bars - I'm going to be proud of that too, so there.

Back to doughnuts.  When I went about sourcing out a recipe, I wanted to find a really good base recipe that would act as a go-to and would adapt itself to whatever glazes or toppings you wanted to throw at it.  I definitely wanted a yeast dough.  Doughnut doughs made with only baking powder are not doughnuts at all, they are bannock.  Now bannock, the First Nations style, is definitely Canadian, and it's wonderfully delicious, but that's not what we're making today.  Set on a yeast dough then, I thought about what angle should be taken, and buttermilk came right to my mind - nothing too wacky, but certainly an upgrade from a plain white dough.
add flour and bring it together

I got my hands on a good recipe - actually, for those Vancouverites, after a dusting of cinnamon sugar, these are dead ringers for "those little doughnuts" you get at the PNE.  Now I considered if there was any way  it could be better.  There was shortening involved - I could switch in with butter.  Butter is almost always a better way to go, and it is a buttermilk dough, so what's a little more butter?  I then used warm milk insead of water to bloom the yeast - the logic?  Simple, milk tastes better than water.  Next, I stumbled upon the idea of adding a bit of orange zest to the dough.  The effect is superb.  The citrus helps cut through the fat of the buttermilk, butter and the frying process to lighten up the flavour.  It's not that the orange is overpowering either, it just rests quietly in the background.  I list the zest here as an optional ingredient, but I'll be including it whenever I make these.

roll
Since this is a proper dough, you can get away with a gentle re-roll of the scraps.  You should get about 22 to 24 medium sized doughnuts from this recipe.  I'm quite happy just dusting these with a bit of sugar after cooking, so as yet haven't played around with too many icing varieties.


You will need:


10g / 1Tbs                     active dry yeast
125ml / 1/2C                 milk
125ml / 1/2C                 buttermilk
43g / 45ml / 3Tbs          butter
cut
39g / 45ml / 3Tbs          sugar
310-375g / 2.5-3C         all purpose flour
12g / 15ml / 1Tbs          baking powder
5ml / 1tsp                      salt
2                                    orange zest (microplane) (optional)


Method:


 - gently warm the milk up to just above room temperature
 - add the yeast to the milk with a bit of the sugar and let it bloom for 5 to 10 minutes
proofed
 - if adding zest, zest the oranges and mix the zest with the sugar
 - melt the butter and set aside
 - put 375ml / 1.5C of the flour in a mixing bowl with the yeast and milk
 - add the buttermilk, butter, sugar (and zest) and salt and mix well with a dough hook
 - add just enough flour to make a soft dough
 - turn out onto a floured table and knead a few times
 - roll about 1.5cm / 1/2" thick
 - cut out the doughnuts, lay on floured paper, and cover with plastic to proof
 - re-roll the scraps, cut more doughnuts, and add to the others
 - once the doughnuts are well proofed (double the size), fry in oil at 375F / 191C
 - turn to colour evenly
 - drain on paper towel
fry
 - dust with sugar or coat with icing while still warm
 - pour yourself a coffee
 - have at 'er


turn
dust 'er up and dig in

Tuesday, April 23, 2013

Product review: The Polyscience Smoking Gun

PolyScience The Smoking Gun Portable Food SmokerIf you've read a fair amount of my recipes, you'll know that I use my Smoking Gun quite a bit at home.  As with most people, there's nowhere to put a smoker in our apartment, so the Gun is a genius way to incorporate smoke into cooking without a huge stinky cabinet taking up space.  It comes in a tidy little box that works great for storage and even holds a few spots for wood chips.  In practice at home, you may need to smoke an item a few times to get the result you want, but it's a small sacrifice.

At work, tasks are usually much larger and I generally use a full size smoker, but even there, occasions arise that are impractical for the big beast.  The Smoking Gun is often used for delicate amuse bouche and appetizers that get the smoke treatment right at the point of service.  You can compose a carefully stacked little item on a plate, grab an overturned glass, fill it with smoke, and send it out.  Customers love the presentation as their dish gives off smoke signals and the food picks up just the right amount of smokiness during the transport to make a difference, yet without dominating the overall flavour profile.

Polyscience has their own line of very nice smoking chips, but the nice thing is you aren't limited to them.  I've used brands designed for the large smokers with great results - if you use one that comes in compressed disks, just break it up so it fits into the Smoking Gun.

Polyscience has long been at the head of the pack when it comes to specialty modern cooking equipment, and the Smoking Gun certainly won't let you down.  CHECK IT OUT HERE.

Monday, April 22, 2013

Recipe: Key lime pie

pack the crumb in the molds
This is a real southern classic, and considering how much I love tangy citrus desserts, immediately gained top shelf ranking in my books.  The custard is really easy to make (once you got all the limes squeezed), the only tricky part is the crust if you are going to go the traditional route and make it with graham crumbs.  Not that the crust is hard - it's graham crumbs and butter basically - but it takes a bit of time and patience to pack it in the mold.  If you need to pack the crumb mixture into a bunch of individual fluted molds as in the pictures, it takes a little more patience.  Top it with meringue or not?  That's your call - it almost seems a shame to hide that glossy custard.  With these ones, we actually made a marshmallow to serve with the pies and burned them as we went.  This recipe made 15 individual pies, and so should do for a couple larger pies.  I would divide the recipe down, but that would leave you with a half can of condensed milk lingering in the fridge - I would rather do the full recipe and make more later - it's that good.  The custard lasts well for a couple days in the fridge, just give it a good whisk before using as there may be some separation during storage.  Try to use molds with removable bottom plates - it makes unmolding a lot easier.
bake the crusts


You will need:


For the crust:

400g / 14oz (1 box)                    graham crumbs
283g / 10oz                                 melted butter
pinch                                           cinnamon
as needed                                    pan spray
whisk the yolks with the condensed milk


For the custard:

900ml / 30.4fl oz (3 cans)          condensed milk
8                                                 egg yolk
375ml / 1.5C                              key lime juice


Method:

 - set the oven to 350F / 177C
whisk in the lime juice
 - pan spray the molds really well and set on a sheet pan
 - mix the cinnamon and graham crumbs
 - melt the butter and mix with the crumbs well
 - bake 5 minutes at 350F / 177C
 - rotate the pan
 - bake another 5 minutes
 - let cool on the sheet pan
 - reset the oven to 300F / 149C
 - whisk the yolks with the condensed milk
 - whisk in the key lime juice
 - fill the pies
 - bake for 10 minutes at 300F / 149C
 - rotate 
 - bake another 5 minutes
 - remove from oven and cool completely
fill the pies
 - transfer to the fridge to chill down
 - to unmold, carefully torch the outside of the mold to loosen the butter in the crust
 - carefully push the bottom plate to free the pie from the sides of the mold
 - remove the bottom plate and serve


bake the pies
torch the mold to release


Saturday, April 20, 2013

Recipe: Brown butter peach pie

blind bake the shells
By now, many of you have come to the conclusion that I like my brown butter.  Guilty!  I love how it adds a nuttiness to the mellow deliciousness of butter.  In this case it makes a nice complement to the fresh and crisp flavour of the peaches in the pie filling.  As far as the pictures go, I made 12 individual pies with this recipe (minus sampling), so you could get two regular pies or really load up a deep dish crust.  I didn't use my brown butter malted beer pie crust recipe in this case, but you certainly could, the flavour power of the peaches could handle the job.  It is important that you use a wide bottom pan and quite high heat when preparing the filling as you want the peach juices to reduce fast as they get released - this way you retain the firmness in the peach slices and avoid just making a cooked compote pie filling.


prepare the peaches
You will need:

2kg / 70.5oz                       peaches (peeled and pitted)
15ml / 1Tbs                        unsalted butter
60ml / 1/4C                        brown sugar
30ml / 2Tbs                        honey
150ml / 5.1oz                     brown butter (just melted)

Method:

 - prepare your pie crusts - dock and blind bake them and set aside
 - peel and pit the peaches, then cut them into wedge slices
 - get a wide bottom pan good and hot (a non-stick would work well here)
 - add the unsalted butter and follow in with the peaches
 - as the peaches start to release juice, keep the temperature high and toss lightly
fill the pies
 - once the juices start to reduce out, add the brown sugar and toss
 - add the honey and toss
 - when the juices are almost gone, add the brown butter
 - toss and let the brown butter emulsify the sauce
 - remove from the heat and let cool so the sauce thickens up
 - toss the cooled peaches so they are coated with the sauce
 - set the oven to 350F / 177C
 - scoop the peaches into the pie shells - let excess sauce fall away (it's great on ice cream!)
 - vent your pie tops and cover the pies
 - egg wash and dust the tops with sugar
 - bake for 15 - 20 minutes until top crusts are cooked and golden brown
 - cool on a rack
 - serve
add the top crust and bake


Friday, April 19, 2013

Recipe: Chocolate brownies

You may have read my recipe for the flourless chocolate cake/brownie, this is the no holds barred thick and rich one (ok, the other one really only held back on the flour).  The nice thing here is that you don't need any equipment, you can mix this by hand in a bowl and it turns out great.  In the industry, this recipe is intended for a 1/2 sheet pan - at home, it will be your large sheet pan (unless you have a huge home oven).

You will need:

680.4g / 24oz                        unsalted butter
1125g / 39.7oz (5C)              sugar
4                                            eggs
8                                            egg whites
453.6g / 16oz                        all purpose flour
315g / 11oz                           cocoa powder
5ml / 1tsp                              baking powder
20ml / 4tsp                            vanilla
2.5ml / 1/2tsp                        kosher salt

Method:

 - set the oven to 350F / 177C
 - line the sheet pan with parchment paper
 - sift together the flour, cocoa powder, and baking powder
 - put the eggs, egg whites and vanilla together and give them a quick whisk
 - melt the butter
 - add the sugar to the butter and whisk
 - add the egg mix and whisk smooth
 - add the flour mix and whisk smooth
 - spread evenly on the sheet pan
 - bake at 350F / 177C for 20 minutes
 - a skewer check can be a bit damp (it'll set up fine), but the surface should be dry and almost want to crack
 - remove from the oven and cool on a rack
 - dig in!