Saturday, April 28, 2012

Recipe: Abuela's chipotle


The last time Carla and I were in Mexico city, we found dried and smoked jalapenos at the Central de Abastos (the world's largest wholesale and retail food market).  As it's a stone's throw away from Carla's grandmother's house, who better to ask the best way to use them? "Has chipotles" she said, and gave us the rundown.  Of course, Abuelita Luz is an amazing cook and knows by instinct what a recipe needs when it needs it, and the resulting instructions while clear, still amounted to "a little this, let it sit, a little that, cook it up".  It takes about a week to make, so we had to wait till we were back in Canada - probably for the best since bringing dried chilis across the border is probably easier than a jar of homemade chipotle.  It took a little time to get the courage up to do the task, but we finally did, and the result is stellar.  As I followed Abuelita's instructions, I took note of what I did so if it worked out well, it could be replicated.  It did, so here it is.


You will need:

150g / 1/3lb    dried and smoked jalapenos
325ml / 11oz  cider vinegar
1                     carrot
2                     onion
13                   cloves garlic
2                     8oz / 227g piloncillos (Mexican cane sugar shaped like a cone)
1                     28oz / 796ml can good whole tomatoes in juice
2                     bay leaves
1tsp / 5ml       thyme
1tsp / 5ml       marjoram
1tsp / 5ml       oregano


Method

 - make a 50/50 mixture of cider vinegar and water - about 650ml / 22 fluid oz
 - cover the jalapenos with the brine and seal in a jar
 - wait 1 week
 - strain the jalapenos out of the brine and keep both aside
 - julienne the onions, slice the carrot and 6 of the garlic cloves
 - saute the onions in a sauce pot till they have a bit of colour
 - add the carrot and garlic and sweat lightly
 - add the jalapenos
 - add in the brine and both piloncillos
 - blend the can of tomatoes - strain it if it has a lot of seeds, otherwise add it in
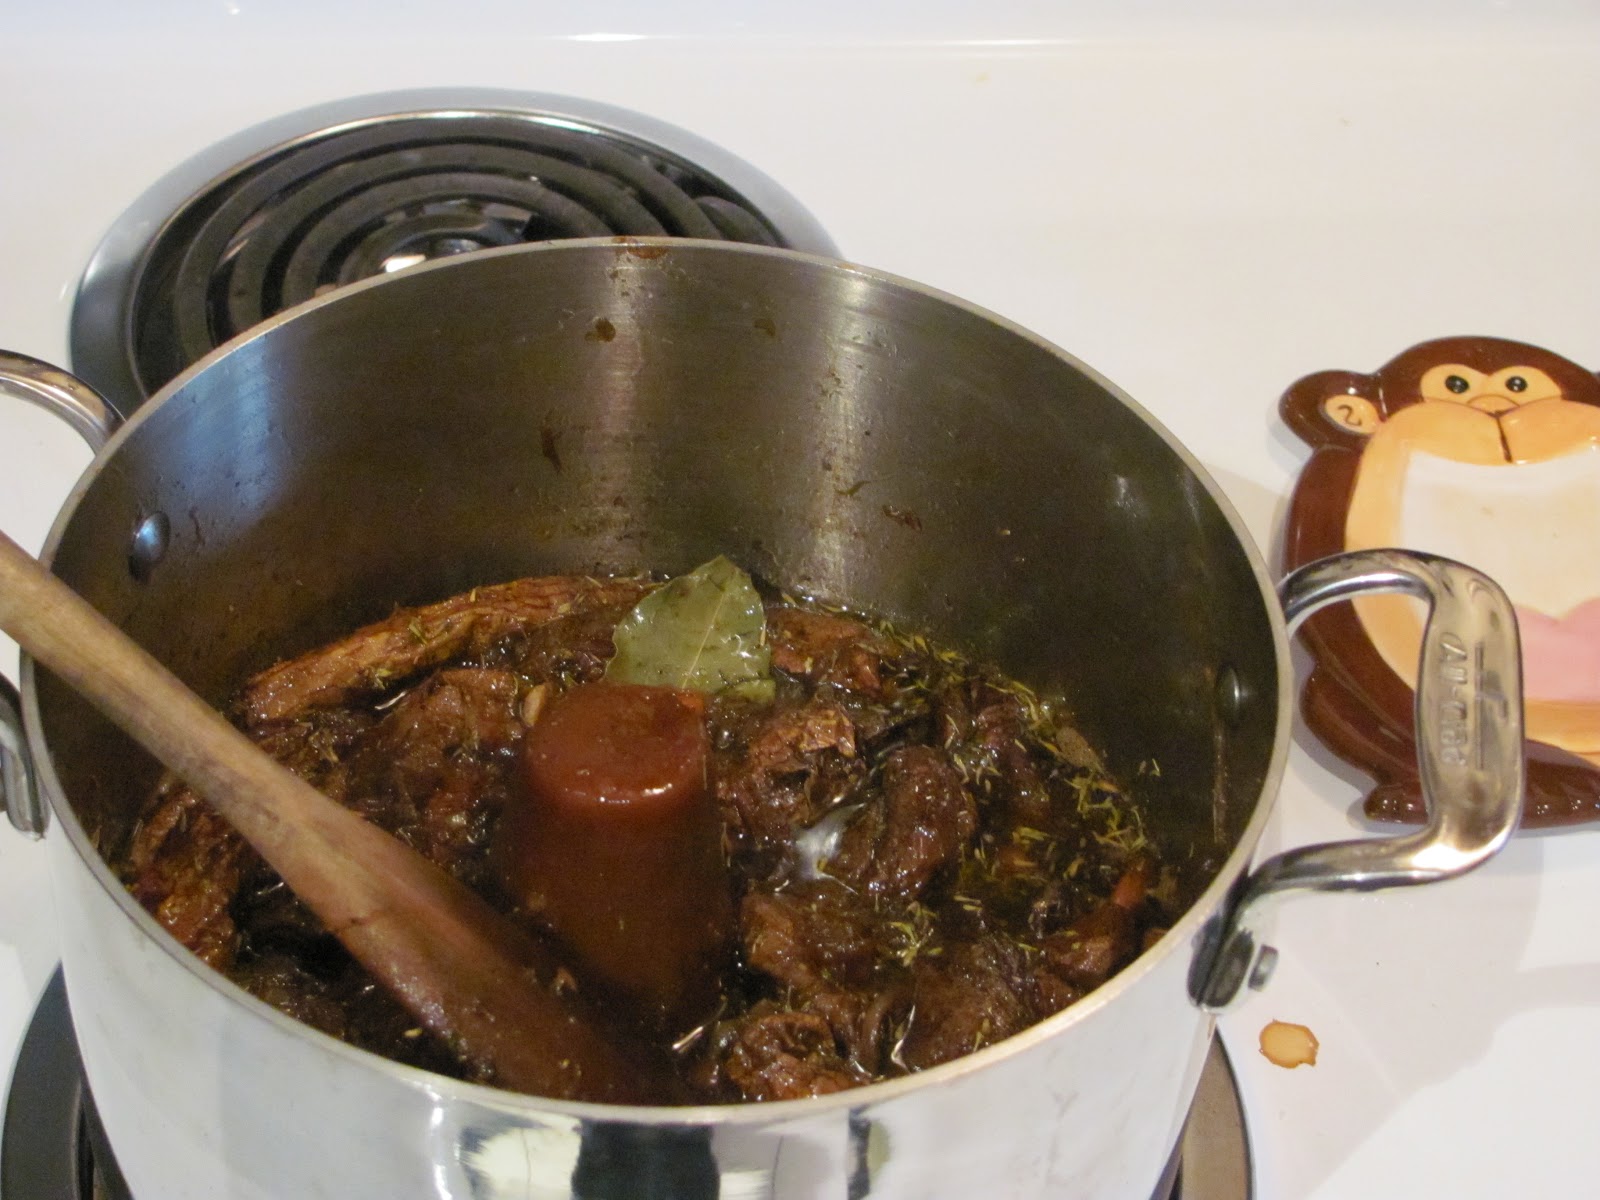
 - add bay leaf, thyme, marjoram, oregano and the rest of the garlic cloves whole
 - bring up to a low simmer, stirring occasionally 
 - cook until the sauce has a nice consistency and the chilis are nice and plump
 - cool completely and store in the fridge - I got almost exactly 2 mason jars (after sampling)




Friday, April 27, 2012

Recipe: Caramelized onion hummus

 A nice hummus is always welcome at a party.  A while back I changed the way I did it, and got such rave reviews, I just kept doing it.  The caramelized onions add a nice sweetness and mellowness, the paprika a bit of spiciness, and the lime juice is a nice switch-up from the traditional lemon.  I also caramelize the chickpeas a bit for a richer colour, then mix in black sesame seeds and kalonji at the end for contrast.  The pictures here are from a double batch I did recently of the recipe that follows.


You will need:

1 can (540ml)         chickpeas
3                             small onions, julienne
3 - 4                        cloves garlic, minced
1/4C / 60ml            tahini
1/4C / 60ml            lime juice
2tsp / 10ml             black sesame seeds
2tsp / 10ml             kalonji
1tsp / 5ml               smoked paprika
as needed               olive oil
to taste                   kosher salt
to taste                   cracked black pepper


Method:

 - julienne the onion and slowly caramelize in a large pan with olive oil
 - drain the chickpeas and mince the garlic
 - when the onions are nice and dark, remove them and set aside
 - in the same pan, start sauteing the chickpeas
 - when the chickpeas start to colour, add the garlic
 - season with salt and pepper
 - when the chickpeas have taken on some nice colour, add the paprika
 - add back the caramelized onion
 - add a generous amount of water to the pan and loosen all the flavour from the bottom
 - let the mixture simmer about 10 minutes
 - turn off the heat and mix in the tahini
 - add everything into a blender or food processor and add in the lime juice
 - puree chunky or smooth as you like it and empty into a bowl
 - lightly toast the sesame seeds and kalonji in a dry pan
 - fold the seeds into the mixture and add any final seasoning
 - let cool before serving

Monday, April 23, 2012

Recipe: Vegetable stock

Vegetable stock may seem kind of basic, but I've seen people just ruin it, so it's worth it to take a moment to go over how to make a good one.  We'll pretend that we're making a stock for the purpose of making a soup suitable for a vegetarian guest.  You often won't go to the trouble to specifically make a stock unless for that purpose - often a vegetable stock just sort of happens when you have enough vegetable trim and you'd rather use it than waste it.  Some basic principles:

 - other than basic mirepoix, most clean trim will be suitable - asparagus peelings, broccoli stems, tomato tops, etc
 - you aren't making a stock out of garbage, so make sure all the vegetables are clean, no dirty roots, no rotten bits
 - avoid overly bitter or starchy vegetable trimmings - no turnip, radish, parsnip, potatoes, etc.
 - never boil a stock

You will need:

basic mirepoix:         2 parts                onion
                                 1 part                  carrot
                                 1part                   celery
any other suitable vegetables
aromatic herbs (optional)

Method:

 - this is a quick stock, so chop your vegetables small
 - cover them in a pot with cold water
 - bring stock up to a simmer, not a boil
 - simmer 5 - 10 minutes, then turn off the heat
 - add the herbs and cover the pot with plastic wrap
 - let steep for 20 - 30 minutes
 - strain and use or cool and store

Sunday, April 22, 2012

Recipe: Whole grain granola

Like making your own granola?  This recipe will really shake things up.  I actually used this once as a plate element on an appetizer, so if it seems a bit savory for breakfast, try thinking of it in other ways - sprinkle some over a nice piece of grilled venison - it's crunchy, delicious, nutritious, full of flavour and wild, just like the meat.  Granola is very much something you can play with, so no need to weigh everything exactly, and don't worry if you don't have one thing on hand, substitute another.  I highly recommend investing in quality honey for this, if only in portion, but regular table honey will do. When frying the rice, have a metal basin and metal strainer handy as the easiest way to get the rice out of the oil is to strain it.

You will need:

1C / 250ml          wild rice
1C / 250ml          quinoa
1C / 250ml          farro
1C / 250ml          hemp hearts
1C / 250ml          pumpkin seeds
1C / 250ml          sunflower seeds
2C / 500ml          fireweed honey
2C / 500ml          butter
2Tbs / 30ml        fennel seed
2Tbs / 30ml        mustard seed
2                         star anise
4                         allspice
4                         cloves
pinch                  kosher salt

Method:

 - toast the star anise, allspice and cloves - add to the honey and butter with a pinch of salt - melt together and let steep
 - toast the fennel seed and mustard seed - keep aside
 - cook quinoa and farro separately, cool and let dry (not completely)
 - put a generous amount of oil in a fry pan and get very hot - almost smoke point - fry the wild rice so it pops and puffs - let drain on paper towel when cooling
 - set the oven to 300F / 149C
 - lightly toast the pumpkin seeds, sunflower seeds and hemp hearts
 - mix all the grains together with the fennel and mustard seed
 - strain the honey and butter mixture
 - mix the spiced honey butter into the grain mix - you don't need to use it all if you don't like
 - spread the granola out on sheet pans and place in the oven
 - stir occasionally while toasting to cook evenly
 - toast until crunchy and delicious - 20 minutes or more depending on your taste
 - let cool on the sheet pans
 - store in an airtight container

Saturday, April 21, 2012

Recipe: Potato chive gnocchi

Delicious potato gnocchi are always a welcome sight.  Saute them for a nice outer crust - start them in butter so that by the time they are done the butter has started to brown.  Serve them with something saucy so they can soak it up.  It doesn't get much better.  Gnocchi isn't hard to make, but there are a few tricks to make sure they are the best they can be.  

 - You don't want your dough to be too wet, which is why many people bake the potatoes rather than boil - also split the potatoes once they come out of the oven to let some steam evaporate.  Professionals often have a baking sheet layered with pickling salt (very coarse) just for baking potatoes - your call - of course the salt can be saved for future baking.

 - You want to always make your dough while the potatoes are still warm because the starch will get sticky as they cool down.

 - To avoid over-activating the starch, always mix the dough with a bench scraper with a vertical chopping motion - resist the temptation to scrape the ingredients toward the middle, this isn't a dough to knead.  By chopping the dough from the outside to the middle, you can keep things from spreading all over the counter.

 - Cook the gnocchi in gently simmering water , not boiling - delicate dumplings are the most satisfying, but boiling water will tear them apart.

 - Gnocchi is a pasta, so cool it like one - spread out on a lightly oiled sheet pan so the steam can evaporate.

This recipe is very versatile, so I've kept it fairly simple, but you can easily leave the chives out, substitute another herb, add some black pepper.  Cheese is always welcome, but the harder varieties such as parmesan will affect the moisture content less and resist leaking out during cooking better.   By the way, if you have some cream around, take the potato skins and put them in it - vacuum seal even better.  Next time you make mashed potatoes, keep the skins involved right up until you strain your infused cream before adding to the potatoes - baked potato mash!

You will need:

2lbs / 900g         russet potatoes
2                         egg yolks - lightly whisked
1C / 125g           flour (plus more for working with)
to taste               kosher salt
pinch                  nutmeg
to taste               chopped chives

Method:

 - set your oven to 350F / 177C
 - start some water on to simmer
 - pierce the potatoes with a fork and bake about a hour - make sure they are well cooked
 - cut the potatoes to let steam escape
 - scoop the flesh out of the skins and pass through a ricer (or mash VERY gently)
 - generously flour your board or counter top and set the potatoes down
 - add the yolks and flour and start vertically chopping with a bench scraper
 - if the dough seems a bit wet, add more flour
 - season with salt, nutmeg, and add your chives (or other seasonings)
 - when the dough is almost together, stop chopping - and bring it just together by hand
 - take a small amount and test it in the simmering water - if it doesn't hold, it may need a little more bench work
 - divide the dough into pieces and roll each one into logs about as thick as your thumb
 - cut the gnocchi with the scraper - if you like, give them a dimple with your finger or roll them along the back of a fork for texture
 - at this point, gnocchi freeze very well - freeze first on a sheet pan separately, then pack together
 - when cooking, get the water at a simmer, season with salt and lightly oil a sheet pan
 - cook the gnocchi a few at a time - when they float, they are cooked - take them out and spread out on the pan
 - when they are all cooked, let them cool unless they are going right into a sauce
 - if sauteing, a non-stick will help but a good hot pan will do too
 - get the pan hot - medium high heat
 - add a generous amount of butter
 - add the gnocchi - give it a shake to make sure they don't stick, then let them colour
 - as they colour, you can toss them to form a crust
 - if you like, glaze them with more butter (yes), shallots and chives then drain on paper towel
 - serve

Thursday, April 19, 2012

Recipe: Strawberry consomme - gelatin clarification

The real topic here is actually the gelatin clarification process, but it in itself is not very appetizing.  Strawberries however, are very much so, and are a perfect example of a situation you would want to use this technique.  Sure you could clarify a strawberry soup using egg whites, but your consomme would taste more cooked as it simmered away on the stove, and it's a pain straining a consomme anyway.  Using the gelatin clarification process uses minimal heat, and therefore lends itself splendidly to fruit soups - and it's really easy.  Conversely, if you have a nice savory broth, there's no reason not to use this technique with it as well since it is probably already right where you want it flavour-wise already. 

If it's not quite strawberry season, you may want to cheat a bit, put it on the stove and work a little sugar and love into the flavour before pureeing, but if the berries are prime, you can start from fresh, either as a puree or run through a juicer.  The clarification process will take out the solid matter, so remember that and don't be surprised when the resulting consomme is significantly reduced in volume from what you started with - if you use a puree, you may want to add some water to give you volume without watering it down (your soup should be delicious before clarification).  I'm going to pick up the process with the ready to work puree / juice / stock as it's the following steps which are more important.

As an additional note, strawberry consomme is a great starting point for a dessert cocktail.

You will need:

strawberry puree / juice / stock
gelatin - sheet or powder
cheesecloth
a scale 
room in the freezer

Method:

 - weigh your puree / juice / stock
 - calculate 0.5% as your measure for gelatin - eg.  1kg stock will need 5g
 - bloom your gelatin
 - heat the stock just enough to melt the gelatin
 - dissolve the gelatin in the stock
 - set in a container you can either:   a)  invert onto a straining apparatus lined with cheesecloth
                                                          b)  turn a frozen block out to cut up (carefully) on the counter
 - once the gelatin is set, place in the freezer and freeze solid
 - line your straining apparatus with cheesecloth, and place the frozen consomme inside
 - transfer to the fridge and let the stock slowly thaw through the cloth into the catch basin
 - the resulting liquid should be beautifully clear and ready to use

Wednesday, April 18, 2012

Recipe: Italian meringue

Just so you can finish off your lemon meringue pie, here's a recipe for Italian meringue.  Italian meringue is very versatile and can be used all over the place - lightening buttercreams, pavlovas, macaroons, plate garnishes, and many others.  It's very easy to make, very hard to over whip and very stable as the egg whites have been cooked during the process.  Although I'm giving you a recipe, it's also one of those things you can wing it on once you are familiar with it.  The syrup does need a certain sugar content and viscosity, but beyond that, if you have a sweet tooth, you can make the syrup heavier.  You can get a nice effect if you take the syrup to a light caramel stage, add a bit of water back so it's a syrup again then add it in.  Timing the whipping of the whites to the temperature of the syrup can be a bit tricky, but it gets easier with practice

You will need:

4           egg whites - no yolk traces
200ml  water
200g     sugar

Method:

 - start cooking the syrup in a clean saucepan
 - start whipping the whites at a slow to medium speed
 - if you have a thermometer, take the syrup to 250F / 121C (hard ball), if not, a good rolling boil and thick
 - speed up the mixer to bring the whites to a medium firm peak
 - drizzle the hot syrup between the bowl and the whip in the mixture
 - the meringue should get very glossy and thick
 - slow the mixer down and let the meringue cool - at this point it shouldn't over whip
 - once cool, use at will

Tuesday, April 17, 2012

Recipe: Lemon tart filling

Now that we have our tasty tart shells, we should fill them.  How about lemon?  I'm such a fan of lemon just about anything, I once as a kid didn't want a birthday cake, I wanted lemon meringue pie.  Something about this recipe sets it apart from the rest (which I still love) - the balance of sweet to tart I think is perfect, the cream helps carry the flavour and shaves just an edge off the lemon.  I also like the fact that it's a custard rather than cornstarch based - there's no interference in the flavour or texture in the final product.

Of course you can give these tarts a meringue or leave them naked - personally, I would use an Italian meringue (hot syrup into egg whites) - it is more stable as it has been cooked during the whipping, has more of a marshmallow texture, and if you have a torch, you can play with it as a plate garnish - smear it on the plate, torch it, put the tart down - voila - mixed up lemon pie!  Another favorite option is to brulee the tart and leave the meringue right out - just don't burn the tart shell in the process.

A note on custards of all sorts - anglais, ice cream bases, creme brulee bases - if you let them rest in the fridge overnight then stir them up before using, you get a better, more consistent product - the water content has a tendency to slightly settle, so a quick stir re-emulsifies the mix, and the overnight rest before lets the flavours develop.  This recipe should do two deep dish pies or multiple tarts - I couldn't make it smaller without splitting eggs and that would alter a recipe that needs no changes.

You will need:

5                      whole eggs (large - not extra large)
10                    egg yolks
350g / 12.3oz  sugar
350g / 12.3oz  cream
250g / 8.8oz    fresh lemon juice, strained

Method:

 - crack all the eggs and yolks together and whisk up
 - measure out the sugar and whisk into the eggs
 - whisk in the cream
 - whisk in the lemon juice
 - strain to take out any of the chords of the eggs
 - wrap with the plastic right on the surface of the custard and let rest in the fridge overnight
 - set your oven from 250F-300F / 121C-149C - lower temp, longer time, better custard
 - give the mix a quick stir and fill the tart shells
 - place in the oven and cook about 20 minutes or more depending on the depth of the custard - jiggle the tray - the surface should be firm and set
 - remove from the oven and let cool before serving

Monday, April 16, 2012

Recipe: Shortbread tart dough

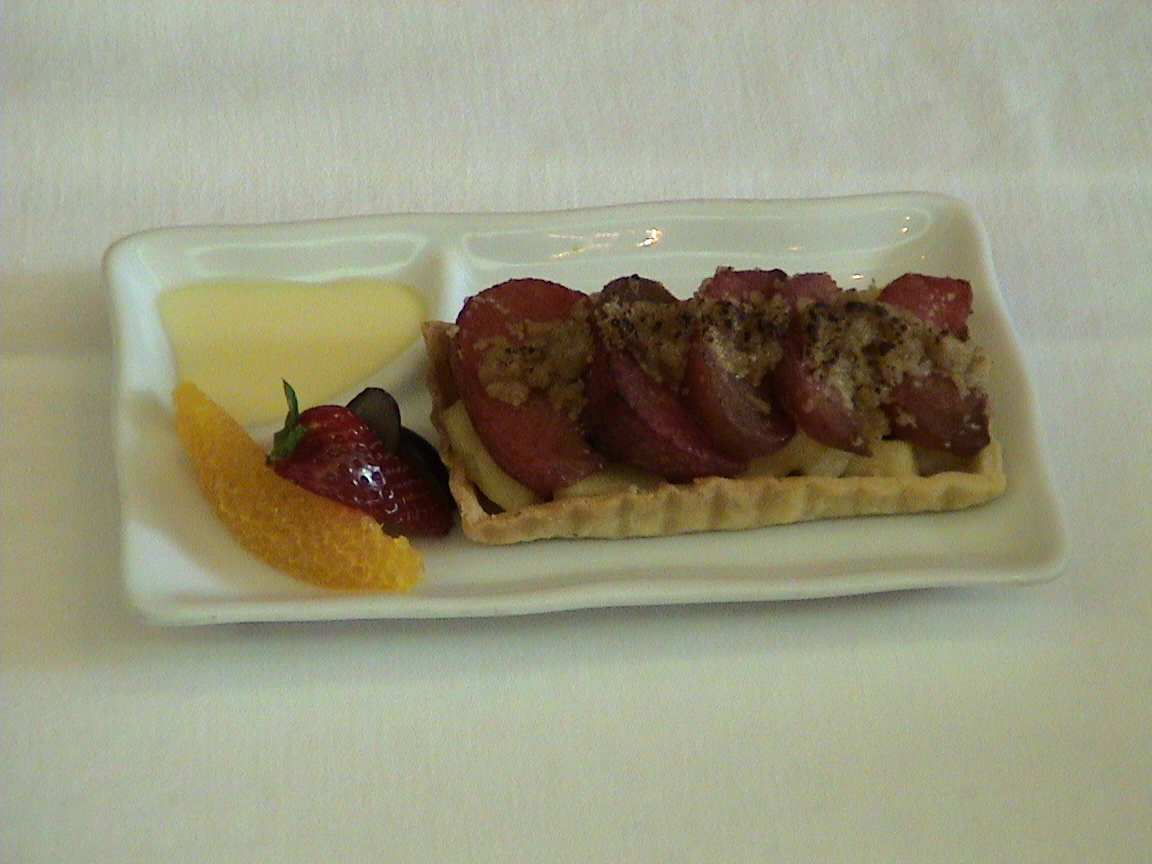
warm apple and plum shortbread tart
This recipe is called shortbread tart dough because it is more or less that - it's not 100% shortbread nor 100% tart dough.  I developed it when I was working in Hong Kong.  I had recalled times in Vancouver we had used a shortbread recipe for the bases on a modernized tarte tatin and wanted a similar effect for a tart shell that could actually hold something in.  On my first attempt I just used my shortbread recipe, but it was way to soft once you started cooking and the sides were inconsistent or fell apart.  I started comparing the shortbread recipe to a tart dough recipe, trying to find a middle ground with the qualities I wanted from each.  The end result was a super crisp cookie-like dough I could reliably produce in good numbers and could even hold up to filling with a moist a la minute compote, topped with streusel and a flash in the oven.  Because of the crispness, this is probably best suited to individual sized portions rather than a tart you intend to cut portions from.  These proportions should give you about 2 dozen individual sized shells, but the dough stores well in the fridge or freezer.

You will need:

490g / 17.3oz    flour, sifted
120g / 4.2oz      sugar
5.5g / 1tsp         salt
250g / 1C          unsalted butter, cold and cubed
2                        egg yolk
120ml / 1/2C     cold water

Method:

 - mix the flour, sugar and salt
 - cut in the butter to small pea-sized crumble
 - whisk the yolks and water together
 - mix the wet and dry together just enough to form a dough
 - divide the dough into 4 (6 portions each), pat out flat for easy tempering, wrap and store what you aren't using
 - oil, butter or pan spray your tart molds
 - roll the dough out thin, shape into the molds and dock well
 - blind bake (line with paper and fill with rice or beans) 15 minutes at 350F / 175C
 - drop the oven to 300F / 150C, remove the blind and bake another 15 minutes
 - let rest a few minutes before removing from molds, then cool completely before using

Sunday, April 15, 2012

Recipe: Vegetable "paper" - carrot

Vegetable "paper" can be a striking garnish to a dish.  Though closer to a wafer, paper is the term that has stuck.  It can also be done with fruits, mustard, horseradish, just about anything you can puree smooth - green products will probably be too problematic due to extended exposure to heat.  It definitely has its appeal to modern chefs, but remains approachable to everyone since it basically requires no special equipment.  A silicone mat will go along way to making your final product more polished, and sous-vide capabilities can elevate your colours and flavours - but you aren't lost if you don't have them.  For this example, we'll use carrot.

The recipe up to the puree part isn't exact, since everyone's puree will have a slightly different water content - what's more important is the ratio of the egg white to the finished puree, then a gentle dehydration process.  140F/ 60C is a great dehydration temperature as it doesn't burn the food, but moves it along nicely.  If you have a dehydrator, great, but an oven with the door cracked will do.  Professional cooks will probably have the use of a food warmer you can set the temperature on and get a full silicone lined sheet pan on the racks.  The "flipping" step  is very important because if you let the puree dry too much, it will try to stick to your mat or paper and will be too brittle to remove cleanly - try to catch it at the "leather" stage - the point of dehydration when it holds together but is still pliable - if you flip it and peel off the mat or paper at this point, you can dry the underside completely and you will end up with a clean sheet you can later break the way you want to.

You will need:

carrots
aromatics - your choice, but thyme and tarragon are nice - cardamom gives a nice spicy effect
salt to taste
sugar to taste
egg whites
sheet pans
silicone mats or parchment paper

Method:

 - wash, peel, and chop the carrots
 - if sous-vide, bag them up with a pinch of salt and sugar and aromatics and cook soft - temperature isn't crucial
 - if cooking stove top, steaming is best, or simmering in a small amount of water so at the end you can puree the contents of the pot without sacrificing any colour or flavour - cook with the aromatics as well
 - once soft, remove the aromatics from the carrots and puree smooth  - season with salt and sugar - pass trough a seive if not completely smooth
 - weigh your puree
 - calculate 5% of the puree weight as your measure for the egg whites
 - return the puree to the blender and blend in the egg whites
 - lightly oil or pan spray your parchment paper or silicone sheet on your tray (sometimes silicone does need a little help)
 - spread the puree as thinly and evenly as possible
 - put in the oven, warmer, dehydrator - and set for 140F / 60C - crack the oven if it doesn't go that low
 - the process will take a few hours - watch for the shiny puree to give way to a duller finish and start to get dry to the touch - rotate occasionally to even it out
 - the middle will probably be the last part to dry - take a small palette knife and see if the edges are starting to come away from the pan cleanly
 - when the whole sheet seems dry, see if you can run a palette knife all around the edges cleanly, then take it out
 - cover the carrot paper with another silicone mat or parchment, place another sheet pan, cutting board or similar sized surface and carefully and quickly turn everything upside down and place on the counter
 - remove what was the bottom sheet pan
 - very carefully peel off the silicone mat or paper from the carrot paper
 - return to the oven and finish drying the paper - there will be no risk of sticking to the pan at this point
 - when completely dry, remove and let cool on the counter
 - to use, break abstract pieces off and arrange on the dish