Showing posts with label meats. Show all posts

Thursday, July 4, 2013

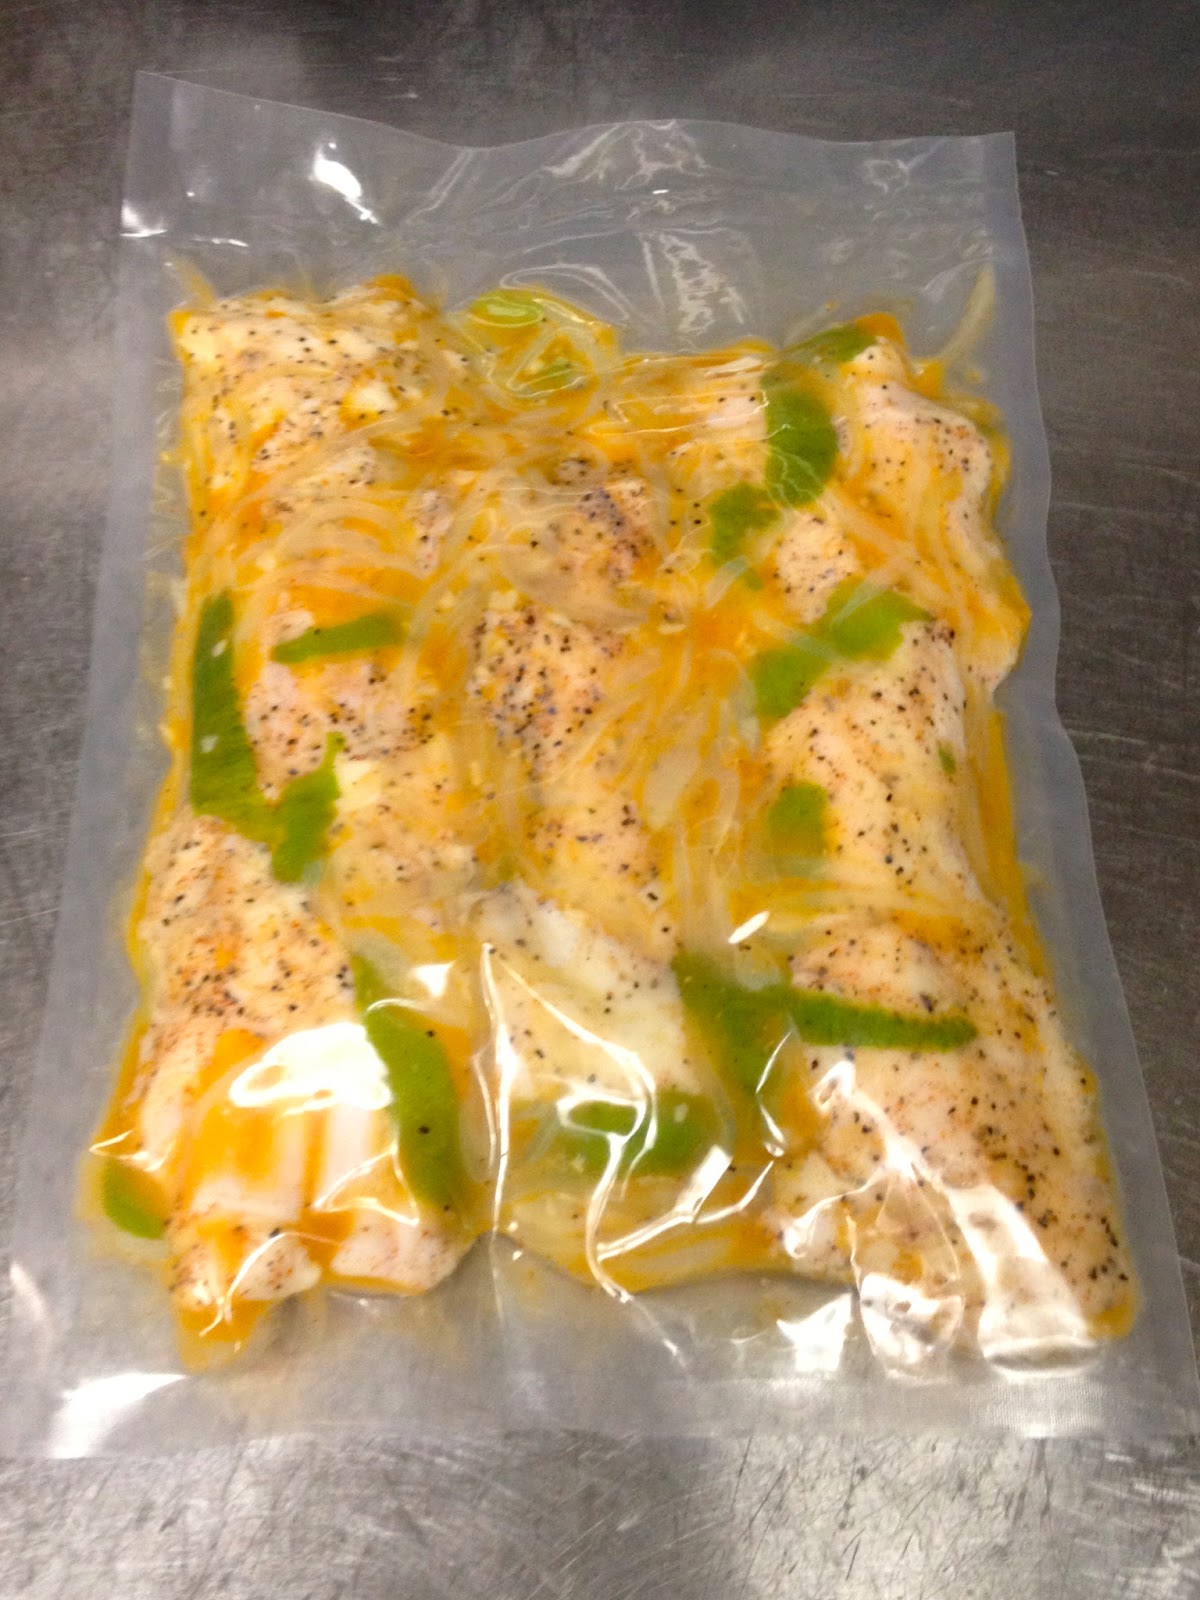
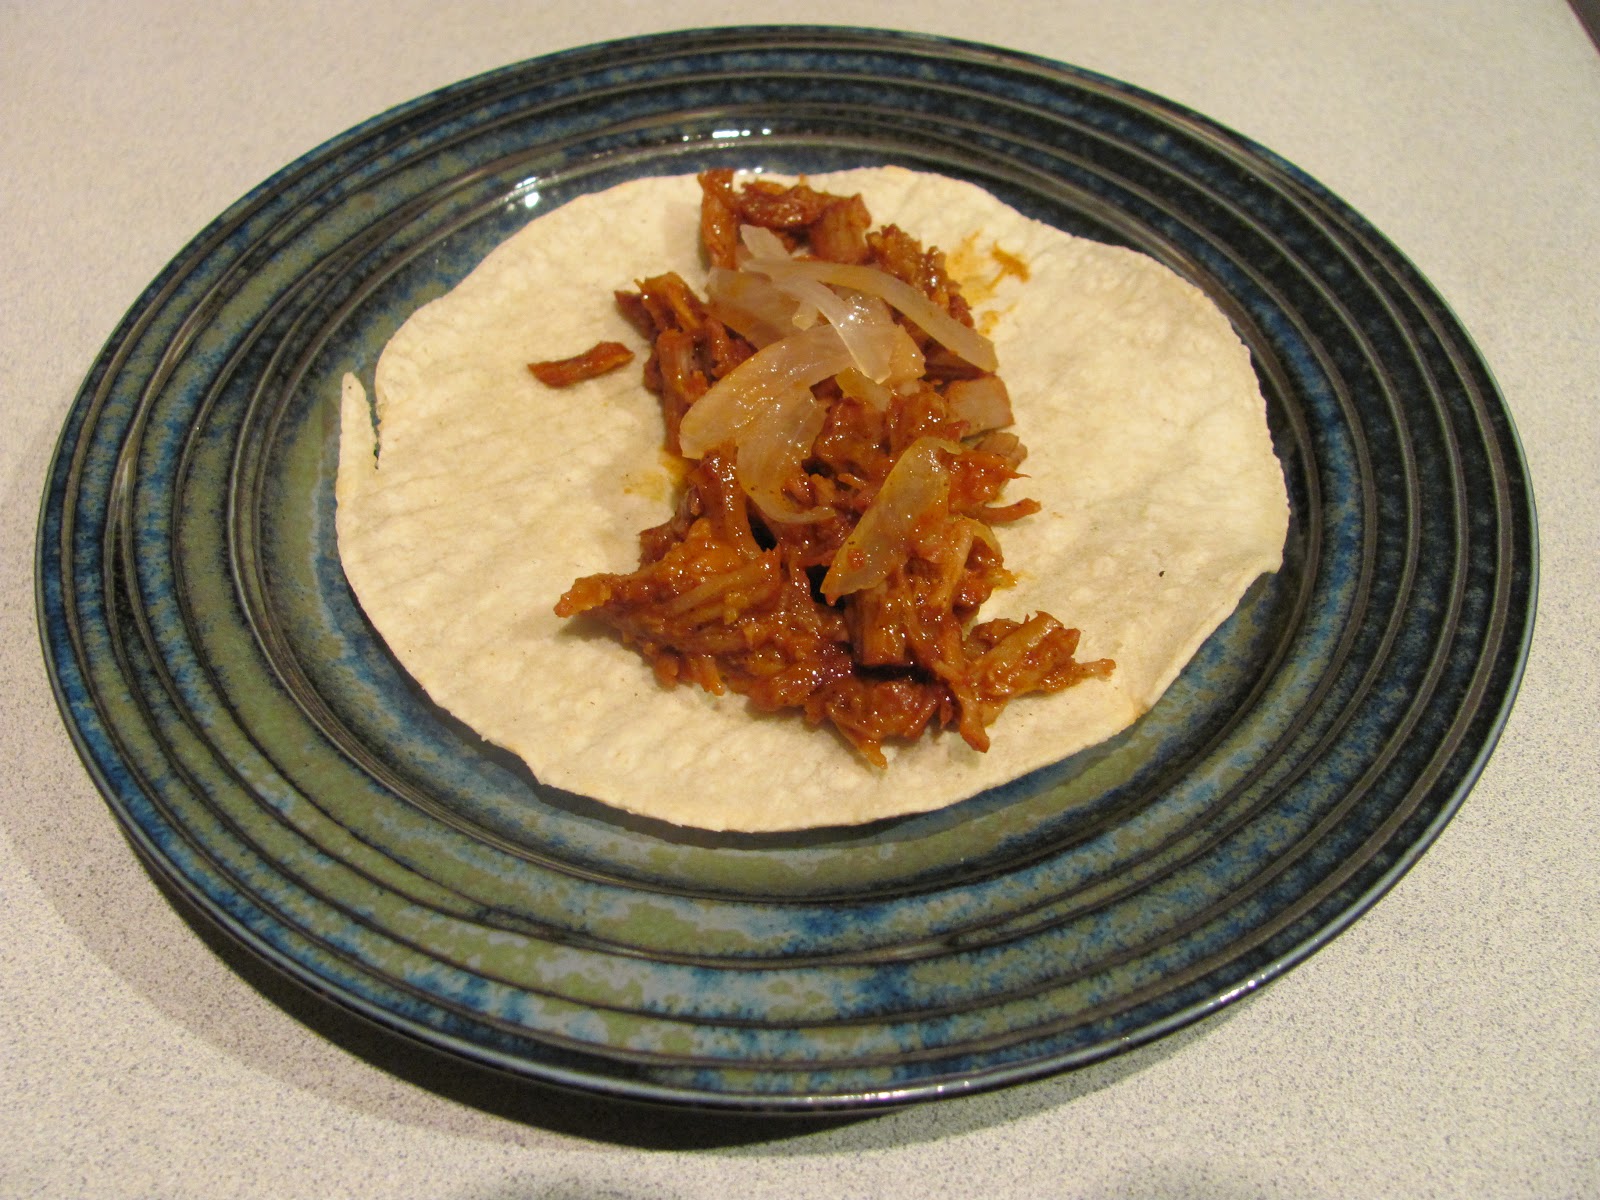
Recipe: Chicken tinga (pulled chicken in tomato sauce)

Tinga is a great Mexican dish that within its own boundaries is very versatile.  The pulled chicken meat has a great texture, and the tomato sauce can range from mild to rip-roaring hot depending on your treatment of the seasoning.  I would use canned whole tomatoes if possible for the puree - they usually have a better taste than other canned products.  If you happen to be making this in the prime of tomato season, you bet use fresh, but that's a short window of time, so this recipe goes with canned.  If you want to add some basic mirepoix to the simmering chicken thighs, go ahead, but you'll get some nice broth out of it regardless.

You will need:

1kg / 2.2lbs              boneless and skinless chicken thighs
1                               large white onion
300ml / 10fl oz         tomato puree
30ml / 2Tbs              chipotle puree (see Abuela's chipotle)
15ml / 1Tbs              brown sugar
4 cloves                    garlic 
5ml / 1tsp                 ground cumin
5ml / 1tsp                 smoked paprika
2.5ml / 1/2tsp           chili powder
to taste                      kosher salt
to taste                      black pepper
if needed                   vegetable oil

Method:

 - put the chicken thighs in a pot and cover with cold water - add mirepoix if you like
 - bring to a simmer and cook the chicken completely 
 - strain off the chicken and chill the broth
 - pull the chicken meat into shreds and set aside
 - julienne the onion, mince the garlic, and puree the tomatoes and chipotle
 - skim any chicken fat off the broth and use it to saute the onion - add oil needed
 - bring the onion to a golden brown and add the garlic
 - add the cumin, chili, and paprika and saute some more
 - add the brown sugar, tomato puree and chipotle puree and simmer
 - add the pulled chicken to the sauce and cook until the sauce just coats the chicken
 - season with salt and pepper
 - serve


Saturday, May 25, 2013

Recipe: Ultimate hamburger patties - or meatballs

The sunshine brings out the barbeques, which in turn brings out the burgers.  As we've explored in the Ultimate Burger Series, by investigating the fixings, and even the buns used, some amazing burgers result.  As with everything, a solid foundation is a very good place to start, so it's about time we got around to a rock solid burger patty - or as it says in the title, this recipe makes dynamite meatballs.  Depending on the rest of the burger, or your mood that day, you may add a few more spices, but this is a very good starting point that can stand on its own with the basic toppings on a moment's notice.  This is the kind of recipe you can make a large number of patties and store a few in the freezer for later (make sure you have one or two fresh though).  Carla and I even have one of those goofy plastic burger presses with the teflon dividers - they are gold for serious burger production - you may even know someone with one tucked away in the back of a tupperware cupboard - see if you can adopt it and use it.

When buying the meat, tough cuts have the best flavour.  This recipe uses chuck and brisket as an example, but you can get creative.  If you have a meat grinder, you can get even more creative.  Feed the meat in with the grain lined up so the grinder cuts across it for the most tenderizing effect.  It may seem counter-intuitive to buy extra lean meat, then add in pork fat, but fat carries flavour and pork fat is delicious.  By switching the animal, you also add a complexity to the flavour beyond going with pure cow.  If you have pork issues, no problem, just go with a regular or lean meat instead of the extra lean.  As an additional note, even though there is salt and pepper in the recipe, I still season the patties before grilling for that extra surface flavour.

You will need:

500g / 1.1lbs              extra lean ground chuck
500g / 1.1lbs              extra lean ground brisket
200g / 7oz                  ground pork fat
200g / 7oz                  onion
30g / 1oz                    confit garlic - drained of oil (see post "Garlic oil / roasted garlic vs confit garlic)
10ml / 2tsp                 Dijon mustard
5ml / 1tsp                   Worcestershire sauce
11g / 0.4oz                 kosher salt
9g / 0.3oz                   black pepper
6g / 0.2oz                   smoked paprika
6g / 0.2oz                   cumin

Method:

 - grind the meat and fat if necessary
 - take half of the meat and cold smoke it for 1 hour
 - puree the onion with the confit garlic
 - if working by hand, add all the ingredients and mix until meat gets "sausagey"  and sticks together well
 - if using a mixer, add all ingredients into a bowl with a paddle and mix on slow speed for 20 seconds
 - raise the speed to mid and mix another minute and check the texture
 - take a small amount, make a mini patty, cook it up and check the taste and texture
 - adjust seasonings and mix more if necessary
 - form patties (170g / 6oz or 227g / 8oz are good sizes)
 - start grillin!

Friday, May 24, 2013

Foie gras - "Oh, the humanity!"

Foie gras has a real knack for stirring up a hornet's nest of trouble, especially out here on the West coast.  Since the last post, I thought I might be able to help those who love foie gras but hate the hate.  I'm not even going to venture into the issue of animals for consumption, that's your business, and this discussion is going on the assumption that if you are preparing foie gras, you must be ok with eating animals.

I love foie gras, and I love animals - I even love some animals I love to eat.  When Carla and I were in Peru, we loved running into the gentle and loveable alpacas, hanging out with them and petting them.  If I saw alpaca on the menu in a restaurant, no question I was going to order it - they are way too delicious and just not available at home.  So where does this leave my morality?  Well, the way I see it, if an animal is going to give its life for our consumption, the least we can do is treat it nicely while it's alive, and slaughter it when the time comes with a little compassion - besides, the adrenalin that is released when an animal realizes the end is near doesn't taste good and compromises the texture of the meat.  I always put a lobster to sleep before doing the deed - it's just good cooking.  In this respect, I am in full agreement with those that oppose the traditional force feed method of raising the geese for foie gras, what with the tiny cages, funnels and "acceptable" numbers of blown out gullets.  But there is an alternative.

True Kobe beef cattle are regularly checked by physicians, generally coddled and treated like one of the family.  There is a farmer on Vancouver Island known for having his Berkshire pigs follow him about he property as he goes about his daily business - you can imagine they must be shown a little respect once their time comes.  More and more geese farmers are following a similar tactic.  The geese have a free reign to move about the farm and are treated to a non- stop buffet of nutritious food they love.  Sure they overeat, that's the point isn't it?  The difference is as far as they are concerned, their life (albeit shortened) is one of abundance.  As you might guess, the livers produced are smaller, but this also has a way of servicing the consumer.

Ideally, you would always research your farmers before you buy foie gras, but sometimes you might just have to take a stab at it.  It has been observed that in cases of voluntary overeating, goose livers max out around the 500 gram mark - some restaurants have actually taken the policy of not accepting any livers larger than that.  If you are comparing suppliers, see if one is predominantly 500 grams and below, as opposed to others that tend to be 750 grams and up.  If you have no other information available, go with the smaller lobes.  Have a heart, and vote with your wallet.

Tuesday, May 21, 2013

Recipe: Foie gras parfait (sous vide)

A well made foie gras parfait is a beautiful sight, and even nicer to eat.  There are a few good ways to make it, but the techniques differ a fair bit, so I will keep them separated.  This is the sous vide method I have used.  Obviously this method requires a bit of equipment, but the results are golden.  One thing to note is that you still use a terrine mold, so you will need vacuum bags that are big enough to hold the mold and still seal.  If the recipe is too large for a single mold you have on hand, you can use two and seal each one separately.  If you have only one mold, you can cook the other half after unmolding the first, but you will want to vacuum seal the uncooked parfait in the interim to avoid oxidization.  You can also use this recipe with chicken livers - it's a simple one for one substitution.

Depending on your usage - basically, will you serve the entire terrine in one meal - you may opt to coat the finished and unmolded terrine with a seasoned butter, which will help defend against oxidization (and is delicious).  The technique is simply to put the finished parfait on parchment paper in the freezer until the outside is extremely cold.  Then take some very soft (but not separated) butter, season it (olive oil, herbs, salt and pepper), and paint it on in a very thin layer with a pastry brush.  You can smooth it out with a palette knife or leave it rustic.  Then, after the cold terrine has set the butter, carefully roll it over on the parchment paper and paint the underside of the terrine.  It can then be stored in the fridge until service, or once the butter is fully set, vacuum sealed (on a loose setting) and stored longer - it even freezes well if you handle it gently and don't rush the thaw.

You will need:

500g / 17.6oz                    foie gras
500g / 17.6oz                    unsalted butter
4                                        eggs
100ml / 3.4fl oz                 Madeira wine
100ml / 3.4fl oz                 Port wine
3                                        shallots
1 clove                              garlic
1                                        bay leaf
3 sprigs                             thyme
splash                                brandy
to taste                              kosher salt
pinch                                 nitrate (optional)

Method:

 - seal the foie, eggs and butter in separate bags and put in warm (not hot) water - this aids emulsification
 - set an oven with a generous water bath for 260F / 127C
 - line a terrine mold with parchment paper (use pan spray to help it stick to the sides) and leave flaps to cover the top
 - chop the shallot, smash the garlic, and put them in a saucepan with the herbs and two wines
 - reduce the wines to almost dry, then strain and set aside
 - put the foie gras in a food processor and pulse to puree
 - add the eggs and incorporate
 - add the butter and incorporate
 - add the reduction and brandy and season with salt
 - mix in the nitrate - this helps with that charcuterie "pink" look
 - strain the mix through a chinois, fill the mold, and fold the top flaps over
 - place the mold in a vacuum bag and seal tight (carfeful it's not so tight it squishes the parfait)
 - place the parfait in the water bath and cook for about 45 minutes to an hour (depending on mold size)
 - transfer the parfait to an ice bath and cool completely
 - open the bag and remove the parfait
 - use a palette knife to loosen the paper from the mold and turn the parfait out
 - if coating with butter, chill in the freezer
 - prepare your delicious, very soft seasoned butter
 - paint your terrine on all sides and set aside in the fridge
 - use a hot, wet knife to slice portions
 - serve cold - brioche and jelly make for nice accompaniments

Tuesday, May 14, 2013

Recipe: Arrachera (Mexican style skirt or flank steak)

meat
Expat Mexicans are often prone to homesickness at dinnertime, and coming from one of the best eating countries in the world, it's hard to blame them.  In an effort to help, as well to learn some new things myself, I always encourage Carla to call home for recipes so we can make some proper food here in Vancouver.  Arrachera has long been a bit of a holdout in our repetoire.  There was initially a bit of a language barrier deciding which cut of beef it actually is - classically, it is a skirt steak, but a flank will do in a pinch.  The biggest confusion however, came from the fact that in Mexico the final product is much more tender than the same cuts prepared Canadian style - did we have the right cut after all?  We did, but a key element in the process was not quite there - the tenderizing and marinating stage.
blend the first part of the marinade

If you've done a bit of pastry work, you know that some fruits don't get along with gelatin desserts - there is an enzyme called protease that breaks down the proteins in the gelatin.  Apply this to a cut of meat, which has a lot of protein, you have a tenderizer.  For this reason, many preparations for arrachera call for pineapple juice.  The trick here is to get unpasteurized pineapple juice or while you will get a nice marinade, you will miss out on the tenderizing effect as the pasteurizing process will have killed the enzyme.  To make sure, you can puree fresh pineapple in a blender and add that to the marinade.  If you choose to strain the juice out of the puree or not is up to you.

Beyond the marinade, the desire is to get a very fast and high heat sear on the meat - you want some good caramelization on the surface while maintaining a nice medium rare inside.  The first of our steaks were done on a hot grill, but we actually got a better result the second round by getting a cast iron grill pan as hot as we could on the stove, then got and even faster, more effective sear.  After resting, by slicing the steak thin and across the grain, you effectively tenderize the meat some more by cutting the fibres shorter.
blend in the cilantro

You will need:

1.36kg / 3lbs                       skirt steak (or flank)
375ml / 2.5C                       fresh pineapple juice / puree
1                                          medium onion
4 cloves                               garlic
20ml / 4tsp                          black pepper
20ml / 4tsp                          smoked paprika
20ml / 4tsp                          ground cumin
30ml / 2Tbs                         brown sugar
15ml / 1Tbs                         adobo sauce from chipotles (see recipe for abuela's chipotle)
2 bunches                            cilantro
add the meat to the marinade
10ml / 2tsp                          kosher salt

Method:

 - if needed, trim the meat of any fat and silverskin
 - poke the steaks all over with a fork
 - if using fresh pineapple, roughly chop up and puree in a bar blender
 - strain the pineapple juice if desired and set aside
 - roughly chop the onion and garlic and put in the blender
 - add the spices and adobo and blend with half of the pineapple juice
smother it but good
 - roughly chop the cilantro and blend into the mix along with the other half of the juice
 - completely smother the steaks with the marinade
 - marinate up to 48 hours, turning and rotating periodically
 - when ready to cook, remove from the marinade, wipe the steaks clean and pat dry
 - get a grill or frying pan very hot
 - season with salt and pepper
 - sear the steaks quickly, colouring both sides
 - let rest
 - slice thin and across the grain
 - enjoy
sear it hard


Monday, April 15, 2013

Recipe: Barbeque meat loaf

The last time I made this, a friend told me it was one of the tastiest and juiciest meat loaves they had ever tasted.  Even among career chefs, a good meat loaf is cherished and loved.  As far as the cooking goes, sometimes it's those things that have been done time and time again that give the greatest challenges to push it to the next level.  If you have the ability to wrap the loaf up in plastic and steam it for the initial cook, you will maintain the juiciness better than cooking in the oven (I cooked this last one in a combi oven - steam first, then dry heat).  You could sous vide it, but maybe that's going too far - or not.  I list both bread crumbs and croissants here - seriously consider the croissants, and get the ones made with butter.  Since I always use good quality ground beef, I never hesitate to taste the raw mix to check the spices and seasoning - when it tastes good, the cooked product will be incredible.  You will likely see some juices in the pan after cooking, but they are what keep the moisture in the loaf during the process - drain them off before glazing with the barbeque sauce (save them for something else).

You will need:

1.5kg / 3.3lbs                     lean ground beef
1                                         egg
1                                         onion
2 cloves                              garlic
250ml / 1C                         good quality beef stock
500ml / 2C                         chopped up croissants (or 250ml / 1C breadcrumbs)

seasoning to taste:             kosher salt
                                          ground black pepper
                                          cumin
                                          paprika
                                          Worcester sauce

as needed                          vegetable oil
as needed                          barbeque sauce (see previous post)

Method:

 - dice the onion and mince the garlic
 - sweat the onion and garlic well in a pan with a little vegetable oil, then cool
 - chop the croissants into small pieces
 - put the meat in a mixer with a paddle and start on slow speed
 - lightly whisk the egg and add it in 
 - add the onion and garlic
 - add the croissants
 - add the seasonings
 - slowly add the beef stock so it is absorbed into the meat
 - check the flavour
 - lightly oil a loaf pan and pack in the meat
 - wrap the pan tight with plastic wrap and steam for one hour
 - if you can't steam, set the oven to 325F / 163C
 - cover with paper and a layer of tin foil and bake for 1 hour
 - prepare your barbeque sauce
 - remove the pan from the oven / steamer
 - reset the oven to 350F / 175C
 - remove plastic wrap / foil from the pan
 - drain off any excess juice
 - glaze with the barbeque sauce
 - return to the oven and bake about 15 minutes until loaf is firm and the glaze is nicely coloured
 - eat!


Sunday, April 7, 2013

Recipe: Roast turkey - brined and sous vide

We cooked a turkey the other day and turned it into a little experiment.  I was really busy and since I am never comfortable leaving the house with something in the oven, needed a different approach to avoid eating at midnight.  Why not sous vide?  I have no problem being somewhere else if dinner is just hanging out in the hot tub.  The only issue is that any time I've sous vide turkey before has been at work where the birds are taken apart and the white and dark meat are prepared and sous vide separately - I still wanted a good old fashioned bird to carve.

So, to proceed, it seemed logical to follow and merge the same principles it takes to both roast a whole turkey and to sous vide as I have done before, albeit in smaller pieces.  The first step was to brine it, and. I followed the same procedure as in my brined turkey breast recipe.  After brining, I rinsed the bird, patted it dry, and gave it a little coat of olive oil, followed by a seasoning mix (in the cavity too) of  smoked paprika, black pepper and powdered garlic - no salt of course since the brine gives enough.  You can season it your way, that's just what I was feeling at the time.

The next challenge was the "vacuum seal".  If you have bags big enough for your turkey, great, but I didn't, so I would have to improvise.  With the cavity, air tight wasn't going to happen anyway, so I focused on ensuring my package was watertight and as air minimal as possible.  I did happen to have a bunch of large ziplock bags that would just fit the turkey inside with a little sticking out the end, so I alternated "head" and "tail" bagging the bird until I was confident no water was getting in.

To really cowboy the operation up, the only vessel appropriate to sous vide the turkey was a large stockpot.  I used my probe thermometer to monitor the temperature - easy - but very important to note that I also put a rack in the pot to both let the water circulate all around and keep the turkey off the bottom.  Remember that even with a pot of water, the very bottom of the pot is in contact with the stove and if the product touches it, you will lose the even temperature of the sous vide and possibly melt through the bag, losing your seal and botching the whole operation - so make sure you get a rack under the bird.
the turkey is the one on the right

Confident that the mechanics were going to work, I just needed to figure out the execution.  I wasn't even sure of the weight of our turkey - it tilted my kitchen scale, so it was over 5 lbs, but by how much?  Well Isabella is almost 10 lbs, so with baby in one arm and turkey in the other, I guesstimated the turkey at about 8 lbs.  This was mostly for future reference, because the nice thing with sous vide is that you have a wide window of time to work with.  As well, since I intended to finish the bird in the oven, it was ok if  it was cooked a bit under and the oven could just finish the job.  Generally speaking, 165F is the recommended cooked temperature for poultry.  The food safe "danger zone" is cleared at 160F, so I went with 163F to make sure I was cooking the turkey, yet leaving some room for the final roast.  I figured that 3 hours should be enough to cook it, so into the hot tub it went and out I went to run errands  (remember this was all about actually freeing up my time while still producing a turkey dinner).

3 hours later, beer in hand, I turned the oven on to 450F.  I pulled the turkey out of the water - the seal worked great, no water invaded the product.  The last ziplock bag did have a nice amount of turkey stock which immediately went on the stove to reduce to a jus.  I patted the bird dry to ensure a good roast and noticed something - since the sous vide package was so tight and the turkey was essentially cooked, there was no need for trussing for the roasting stage - sweet.  Just remember that this emphasizes the importance that the bird gets sealed up "pretty" because the sous vide process will set it up the way you left it.  From here, I just put some bacon strips over the top for tradition and fired it in the oven.  I was simply cooking for skin colour now, and just watched it and rotated it now and then.  After a little over 45 minutes, she looked great.  I let it rest, then checked the temperature next to the bone on the leg and it was bang on 165F.

If you were to compare this turkey with another brined and roasted one, it would be hard to tell the difference - it was golden brown, juicy, and full of flavour.  To compare the effort, even considering the fact that this was a first off experiment, no contest - this is an absolute cinch to pull off.  Of course, in the future, I can plan a bit better and get a proper sized vacuum bag and a vessel big enough for both a turkey and a circulator, but if this crazy cowboy effort can work this way, I know I will always be able to make it happen.  Circulators aren't always around, but you can always find a thermometer and create a watertight package - just remember your food safe and make sure your turkey is sous vide above 160F and the final roast adds a few degrees on top of that.

Happy cooking!

Sunday, March 3, 2013

Recipe: Beef tendon - sous vide and traditonal

3 tough cuts
An affinity for beef tendon tends to be something you learn, and often comes by way of culture.  I came by it through my wife and our subsequent trips to Mexico.  Others my come by it through Asian cuisine.  Due to the extremely high collagen content the texture is very chewy which some people are not used to but can be very delicious and enjoyable.

Carla and I have made it the traditional Mexican way a couple times, but this time I decided to figure out a time and temperature formula for cooking it sous vide.  The result was a remarkably soft texture to the tendon while retaining its structure and retaining its integrity.  In both cases acidity is used to aid the tenderization of the tendon.  In the traditional method cider vinegar is used, but I found that since I used lime juice in the sous vide process, there was no need for vinegar and I simply used a little fresh lime juice for final seasoning.  

fully dressed
In the traditional method, much of the flavour is introduced in the seasoning stage after the tendon has been cooked, cooled and chopped.  With the sous vide version I wanted to try to bring some of those flavours into the mix right from the begining so they could get right into the tendon.  While the flavour involved in both methods are the same, the sous vide method drove the flavours deep into the tenon and the stock produced within the bag was unbelievably high in both high in flavour and gelatin content. 

As for serving, we usually serve it cold on a tostada with some crema and Valentina sauce.  With the sous vide tendon, we discovered that if you warm it up slightly at serving time in the microwave, it  comes out super tender - a good variation if you are introducing this to someone new.

You will need:

all bagged up
For cooking traditionally:

675g                            beef tendon (our package had 3 pieces)
1                                  onion
3 cloves                       garlic
as needed                    olive oil
pinch                           salt

For sous vide add:

2                                 limes (or about 4 key limes)
5ml / 1tsp                   chili powder
5ml / 1tsp                   coarse black pepper

For the final seasoning:

1/2 bunch                 cilantro (oregano is also a popular option)
after 30 hours in the hot tub
1                               small white onion
1                               lime (or two key limes)
as needed                 olive oil
to taste                     cider vinegar (optional)
to taste                     kosher salt
to taste                     chili powder
to taste                     coarse black pepper

 
Traditional method:

 - julienne the first onion and mince the garlic
 - lightly sweat the onion and garlic in some olive oil
 - add the tendon and lightly sear
 - add water just to cover the tendon and season lightly
ready for cutting
 - cover the pan with a lid and simmer until the tendon softens up
 - turn off the heat and let cool in the broth
 - chop the tendon and put it in a bowl
 - drizzle in some olive oil and toss
 - chop the second onion fine and chop the cilantro and add them in
 - squeeze the lime, add the juice and add a bit of cider vinegar (just to get a nice mild acidity)
 - season with salt, pepper and chili powder
 - cover the bowl and keep refrigerated for at least an hour
 - when the lime juice and vinegar have further tenderized the tendon it is ready to eat

Sous vide method:

 - julienne the first onion and mince the garlic
the final seasonings
 - lightly sweat the onion and garlic in some olive oil
 - place the tendon in a bowl
 - add the sweated onion and garlic and toss well
 - add more olive oil if it seems dry
 - add the chili powder and black pepper
 - zest the lime (use a vegetable peeler), squeeze the juice and add them both in
 - toss the tendons in the marinade well then seal in a vacuum bag
 - set the water bath to 78C / 172F
 - submerge the bag and cook for 30 hours
 - after 30 hours, remove the bag, transfer to an ice bath and cool completely
 - open the bag and separate the tendon from the stock (save the stock for something else)
 - chop the tendon up and put it in a bowl
 - drizzle in some olive oil and toss
 - chop the second onion fine and chop the cilantro and add them in
 - squeeze the lime and add the juice (the vinegar shouldn't be necessary)
 - season with salt (you can add more chili and pepper if you like)
 - serve

a tostada with crema, tendon, avocado and Valentina - amazing!


Saturday, December 1, 2012

Recipe: Bacon (maple smoked) - sous vide and traditional

Do I really need to get into benefits of making bacon?  I doubt it.  If you have the use of a slicer, you can control the thickness of the slices, which is fantastic if you want to wrap a terrine with an ultra thin layer of bacon (or maybe you just like a fat slice for breakfast).  Lardons are always nicer two or three times thicker than store-bought thickness.  The list goes on, so we'll get right down to it.  

This recipe comes down to method more than anything since the amounts will depend on how much belly you are working with.  The salt and the nitrate are the most important elements - the rest is really determined by flavour preference.  While you will want some sugar involved, the type of sugar is up to you.  Same with spices - you don't really need to add any if you don't like, or you can switch it up.  With this recipe, we're going for a nice breakfast style bacon, but the technique is applicable to any style you end up going with.  Remember that it is always best to use gloves when in direct contact with nitrate.

You will need:

1                     pork belly
as needed       bacon cure
as needed       #3 dark maple syrup

 For the bacon cure, you will need:

450g / 15.9oz      kosher salt
250g / 8.8oz        sugar
50g / 1.76oz        nitrate
30ml / 2Tbs         ground fennel seed
30ml / 2Tbs         ground star anise

Method:

 -  trim the belly up if necessary
 -  cold smoke the belly for 3 hours
 -  mix all the cure ingredients together
 - weigh the belly
 - multiply the weight by 0.035 - this is the weight of the cure you need
 - if you have a skin, brush the flesh side of the belly with the maple syrup, otherwise brush it all
 - pack the measured amount of cure onto the flesh side (or all over if no skin)
 - either vacuum seal in a bag, or put in a non-reactive container and place in the fridge
 - store at least two or three days or until the belly has released some juices and has firmed up a bit
 - rinse the belly of the cure under cold water and pat dry

 - if cooking sous-vide, seal in a bag and set the bath to 150F / 65.5C
 - cook in the bath about 6 hours
 - cool in the fridge on a try with a weighted tray on top (so it stays flat when cool)
 - remove from the bag, and carefully remove the skin if necessary
 - use as needed

 - if finishing in the oven, set it to 200F / 193C
 - insert a probe into the belly and set it in the oven on a rack
 - when the internal temperature reaches 150F / 65.5C, remove (about 2 hours)
 - cool on the rack
 - remove the skin if necessary
 - use as needed

Friday, November 9, 2012

Recipe: Sous-vide and smoked turkey breast

In the restaurant industry, holiday meals are cooked very differently than in a home setting.  It is impractical to roast a bunch of turkeys for a few hundred people,  there's simply too much room for error and it's too frantic at service time to be carving varied cuts from the birds.  The most efficient way to do it is to separate all the parts of the meal, cook each one perfectly, then bring them all together on the plate.  This means that white and dark meat are cooked separately and off the bone (the bones are used to make turkey stock which is then turned into gravy) and stuffing and vegetables are all cooked separately and perfectly on their own too.  While the traditional ceremony of carving the turkey still holds strong in most homes, some people are starting to take more of an industry approach to the holiday dinner in the pursuit of each dish being the best it can.  With proper organization, it also means that the cook can at least socialize a little bit as things get ready.

This is a fantastic way to cook the breast portion of the meal.  If you like turkey sandwiches throughout the year, this is definitely the way to go as the meat cuts beautifully cold and is just as juicy as fresh roasted.  Use the brine recipe from the previous post as preparation.  I've also included a smoking stage in this method - if you have the capability, it adds a bit of that "roasty" character many people would be worried about losing by straying from the traditional method.  If you don't, it's ok, the meat is still fantastic.

If you still want to have the roasted skin effect, one way to do it is to leave the skin on throughout the sous-vide process, but shorten the time (an hour would be ok), then heat the breast up for the meal in a hot oven skin side up (and patted dry, then basted with some fat).  Make sure to check the temperature in the middle of the breast to ensure it is fully cooked (165F / 74C).

If you are from the South and like to deep fry your turkey, follow the same procedure as the roasting finish, just use the deep fryer.  Again, you only need to warm it through and finish off the cooking.

You will need:

as needed           turkey breasts
as needed           turkey brine

Method:

 - clean up the breasts nicely and prepare your brine
 - brine the breasts (48 hours if using the one in the previous post)
 - rinse the breasts well under cold water and pat dry
 - cold smoke for 1-2 hours, depending how much you like to smoke
 - seal in a vacuum bag (don't squish them together in the bag, give them breathing room)
 - set the circulator to 76C / 168.8F
 - submerge in the bath and cook for 2 1/2 hours (less if you plan to finish by roasting)
 - remove from the bath - if not serving right away, plunge into an ice bath to cool
 - open the bag, put the breasts on a rack to let the extra surface juices drain away (save them as stock)
 - carve slices and serve

Thursday, November 8, 2012

Recipe: Turkey brine

With the holiday season upon us, there are a lot of turkeys destined for tables everywhere.  One method of getting the turkey ready for cooking is to brine it.  It helps get some flavour into the meat the same way a marinade does, but more importantly, it helps the bird retain a lot more moisture within the meat once cooked.  Hate dry turkey?  This is one of the best defenses.  This recipe starts with 4 litres (1 gallon) of water - test by placing the bird in your brining container, then pouring the water over it.  If the bird isn't covered, you will need to multiply the recipe.  For efficiency, you want your brining container to be close to the size of the bird with room to allow brine to freely circulate around - no squeezing it in against the sides.  In our family, we bought a new plastic garbage pail, and it has and only will ever be used for brining.  And yes, this recipe will work nicely with other poultry as well.

You will need:

4L / 1gal               water
220g / 7.8oz          kosher salt
80g / 2.8oz            sugar
25g / 0.9oz            black peppercorns
small handful        fresh thyme
2                            oranges

Method:

 - place the water, sugar, salt and peppercorns in a pot on the stove 
 - bring to a simmer until the salt and sugar have dissolved
 - turn off the heat and add the thyme 
 - peel the oranges, then segment the flesh (we just don't want the bitter white pith)
 - add the orange to the brine
 - allow the brine to cool completely
 - if the bird came tied up in any way, untie it and remove any of the goodies inside you don't plan to roast
 - place the bird in the brining container and cover with the brine
 - brine in the fridge (or garage if it's cold enough outside) for 48 hours
 - remove the bird from the brine
 - rinse the bird under cold water - this removes any excess salty brine
 - pat dry
 - you won't need any more salt, but anything other surface seasonings are up to you
 - roast as you would normally

Tuesday, October 23, 2012

Recipe: Tandoori chicken

Tandoori chicken is one of the great roasted meats of the world.  As with the chutney in the last post, the key to a superb tandoori marinade is in the careful blend of flavours and spices.  In this recipe, you have some acidity from the yogurt and lime juice, sweetness from the honey, floral notes from the cilantro, heat from the chili, the coziness of the spice blend, and even a hint of smokiness from the paprika.  A lot going on, I know, but it's all in the balance.  What's missing?  Artificial food colouring, boo, sorry.

In the execution, make sure the chicken gets about 24 hours marination to get all the flavour in possible.  Want to go a couple days?  Sure, even better.  Also, tandoori ovens are insanely hot, so the roasting temperature in a regular oven will be high.  I cooked these at 450F (232C), but as long as you are right by the oven, go as high as you feel comfortable - some colouring on the residual marinade is ideal.  I used 4 chicken breasts here, which are pretty easy to cook through at a high temperature - if you go with some bone in cuts, it will take a little longer in the cooking.

You will need:
4 - 6                       chicken breasts
250ml / 1C            yogurt
1/2                         white onion - grated on a cheese grater (really)
45ml / 3Tbs           lime juice
30ml / 2Tbs           honey
4 cloves                 garlic - minced
small knuckle        ginger - grated on a microplane (about 5ml / 1tsp)
1 handful               whole cilantro - just wash it, don't cut it
15ml / 1Tbs           smoked paprika
5ml / 1tsp              cumin
5ml / 1tsp              coriander
5ml / 1tsp              chili
5ml / 1tsp              ground black pepper
to taste                   kosher salt

Method:

 - trim up the chicken if needed
 - grate the onion and ginger and mince the garlic
 - combine all the ingredients (except for cilantro) for the marinade and mix well (how's that for easy?)
 - toss the chicken in the marinade with the whole cilantro until well coated
 - cover and marinate in the fridge for a day
 - preheat the oven to 450F / 232C - convection if you have it
 - drain excess marinade from the chicken - some residue is ok
 - place chicken on a paper lined pan
 - roast for 7 - 10 minutes until cooked and coloured
 - serve

Thursday, August 2, 2012

Recipe: Cochinita pibil (achiote pulled pork) / trozos (chunky)


simmer
This dish is always a favorite when we go to Mexico.  It's not difficult to make and can be served like a chunky stew or cooked right down and pulled and served as the ever popular filling for tacos, cochinita pibil, or pulled pork.  Many people are aware of the presence of oranges, but overlook the fact that plantains are just as important.  Some people cook the dish with banana leaves while others get the flavour by slicing plantains right into the broth - some even use both. 

You will need:

900g / 2lbs        pork butt
trozos
500ml / 2C        fresh squeezed orange juice
35g / 1.2oz        achiote paste
2                        plantains
1                        banana leaf (optional)

Method:

 - cut the meat into thick slices
 - if using banana leaf, cover the bottom of a pan with half the leaf and lay the pork on top
 - slice the plantain (peel and all) over the meat
pibil
 - add about a cup of water, lightly salt, and cover with the other half of the leaf
 - slowly simmer the meat until cooked through - about 15 minutes - then remove the meat
 - mix the orange juice and achiote paste
 - if eating chunky, cut the meat into cubes, otherwise leave as slices
 - mix the orange and achiote mix to the cooking liquid
 - return the meat to the pan and bring back to a simmer
 - cook slowly until the liquid has a sauce-like consistency
 - if eating chunky, you are ready to serve
 - if you want to pull the meat, you can cook it further - add a bit more water if it's getting dry
taco
 - remove the meat and pull apart
 - remove the peels of the plantains
 - return the pulled meat to the pan and cook down until the sauce has been completely absorbed
 - serve


Saturday, July 7, 2012

Recipe: Beef tongue - sous-vide and traditional

A beef tongue gently cooked is so tender and delicious, and it's very easy too.  It's usually simmered, so you don't even have the searing stage - just mix everything together cold, let it go and let it take its time.  When I cooked this one, it actually took 3 hours to reach 80C.  The skin of the tongue comes off really easy once it's cooked, so don't even bother to do it while raw.  

The low temperature and long cooking time lends itself perfectly for sous-vide cooking, the only tricky part is after the initial cooking and peeling of the skin, you'll want to put it back in the broth so the flavour can really soak in as it cools.  I recommend wrapping the tongue in cheesecloth, then putting it in a container as close to its size as possible, turn it over a bunch of times to saturate the cloth, then let it cool in the liquid while turning over periodically.
rinse well an a light brine

Once cooked and cooled, we like to chop the tongue up, heat it up in some sauce (degreased, strained and reduced) and have tacos.  It also works great to slice it up and serve it in some sauce, or even in a sandwich.

You will need:

1                  beef tongue (1.5kg / 3.3lbs)
2                  onions
2                  serrano chilis
buried in the broth
2L / 8C        beef stock (less if sous-vide)
1                  carrot
12                garlic cloves
2                  orange zest
3                  key lime juice
3                  bay leaves
5ml / 1tsp    achiote power
5ml / 1tsp    ground black pepper
to taste        kosher salt

Method:
after 9 hours

 - wash the tongue in cold water 3 times
 - in the last rinse, lightly salt the water and let it sit for about an hour
 - slice the onions and carrot, sliver the garlic, remove the seeds and slice the serranos, and zest the oranges
 - add the vegetables to the cold beef stock and add the lime juice, pepper, bay leaves,  and achiote powder
 - lightly season the broth and add the tongue
 - bring the brew up to heat very slowly (a slow cooker works great, or set the oven for 250F / 121C and put the pot in right from cold
peel the skin

Note if cooking sous-vide:  put the tongue in the vacuum bag and surround with the vegetables.  Then add as much stock as possible (to make the skinless cooling stage easier).  Add the aromatics and seasonings and seal on a loose (soup) setting.  Set the water bath for 78C (172F) and let cook for 12 hours.  When the time is up, remove the tongue from the bag and gently remove the skin.  If you have enough broth to submerge the tongue in a small container during cooling, great.  If not, wrap it in some cheesecloth, turn it over in the broth to soak it, then let it cool in the liquid and keep turning occasionally to keep the cloth wet.  Follow the same instructions as the traditional method after the cooling stage.
peeled

 - cook for about 9 hours, turning over occasionally and paying attention to the softness of the meat
 - when the meat's fibres are soft and separate when squeezed, take the tongue out of the broth
 - gently peel the skin away
 - return to the broth and let cool completely overnight
 - degrease the broth and remove the tongue
 - warm up the broth
 - strain out the vegetables
 - reduce the broth to a sauce
after cooling in the broth
 - slice or chop the tongue and warm up in the sauce
 - serve


tacos de lengua


Sunday, June 10, 2012

Recipe: Sous-vide chicken

Chicken breastChicken (and other poultry) is a great way to observe the benefits of utilizing sous-vide as a cooking method.  Even the most experienced cook would be hard pressed to turn out a juicier, more tender product with such consistency and in large numbers when necessary.  Indeed I've even seen some more timid customers ask for their chicken to be cooked more as they find it hard to believe that a cooked chicken breast can be so soft - but fear not, it really is fully cooked.  Thicker cuts (fat free range birds) may need more time, but the same rules apply - check the middle, and if it's all white, it's all good.  Even if you were off a bit, the fact that you used sous-vide most of the way will shine through in your product, in fact, if you are prepping for a hot dish, it's advisable to err on the under side as you will probably want to grill or sear the meat at service, and letting the secondary method finish it off will ensure that you won't overcook it in the rechaud.  If you are cooking for cold sandwiches or chicken salad, then cook fully.  Once you are used to the character of sous-vide chicken, you will be able to feel the meat in the bag and judge the cook as well as you can with traditional methods.

You will want to marinate or brine the chicken in advance (the first stages of my fried chicken recipe would so just fine) and you may want to add some aromatics into the bag as well.  Except in the case of brining, save the salt for just before cooking - if you brined, you shouldn't need any more.  Always line the breasts up in the bag in flat rows - if they are stacked up or overlapping, they won't cook evenly.  Always ice down the bags right after cooking to cool as quickly as possible.  If you finish the breasts off on the grill or in a pan, make sure you pat them dry to get proper caramelization and a crispy surface.


Method:

 - marinate or brine the chicken breasts as you would normally (skin on or off is your choice)
 - set the water bath for:   135F / 57C   (if you will finish with another cooking method)
                                         145F / 63C   (if you want to cook fully)
 - season if necessary, add any aromatics and seal the chicken in the vacuum bag
 - cook in the bath for:     45 - 50 minutes at 135F / 57C
                                         1 hour at 145 / 63C
 - check the firmness of the meat, cook a little more if needed
 - remove from hot bath and cool down completely in an ice bath
 - the chicken will store well in the bag in the fridge until you are ready to use it 

Chicken on grill
yes, sous-vide can still lead to this


Wednesday, June 6, 2012

Recipe: Braised beef knuckle - sous-vide and traditional

Got beef?  How'd you like a big fat knuckle sandwich?  I always wanted to say that, and at the moment at our house we're dishing out knuckle sandwiches like Burt Reynolds at a cowboy bar.  When I set my mind to doing it the other day, I didn't anticipate the difficulty in getting the knuckle itself with the meat on it - most butcher shops cut the meat for stew and save the bone for stock.  I had to take my car to the shop, so I was on foot, no matter since I was close to downtown and it would be easier to hit multiple butchers than if I was driving.  I gave three of the major supermarkets a try just because they were right there - nothing.  I tried two of the "trendy" butchers - best suggestion was buy an oxtail and some stew meat.  I then hit the T&T Asian supermarket and about five butchers in Chinatown - that was a shocker, I thought one of them would hook me up for sure - no.  I made my way back to our neighborhood where we've got a couple old school butchers - I thought if I have to order it special, it might as well be close by.  

I got to the very last shop just in time - he had just split a knuckle on the bandsaw and was about to strip it for stew meat and stock bones.  Of course I saved him the work.  He was pretty excited to see me buy it as he hadn't sold one in about five years and was interested in my plans for it.  He was expecting a traditional English style roast, but was intrigued by the thought of Latin inspired pulled meat.  Butcher shops have to be one of the only places you can get a good laugh saying that your wife is in for a knuckle sandwich.  Moral of the story - order the knuckle from your butcher, but you can rest assured you are serving something your guests haven't had in a while, maybe never.  You don't need to make sandwiches (this would make a lovely terrine or presse) but if you do, I recommend getting as close to a Latin torta bun as you can - Portugese buns are closest, ciabattas are nice - I went to our local Latin bakery and got the buns they make.

smoking gun at work
Getting down to it, I made this recipe special for the occasion, and it's best done with a couple days to prepare.  I wanted something aggressive, so it's a bit spicy.  Considering what usually fuels a knuckle sandwich, it's also got coffee, whiskey and smoke in it.  I don't have a smoker, but I do have a "smoking gun", so I filled the sealed marinating bowl with smoke a bunch of times to replicate it.  A quality liquid smoke can also be added to the broth if you like.  I decided to do a traditional braise because I wanted to get a good amount of broth out of it and used my slow cooker (it can hold a nice sub 200F temperature) but I've included the methods if you choose to use the oven or sous-vide.  The knuckle has a lot of cartilage in it - it's delicious.  If you aren't used to cartilage, give it a try, you may want to eat it on it's own - I chopped it up and put it back in the mix with the meat once it was pulled.

You will need:
1                       beef knuckle (2-2.5kg / 5lbs)
4                       medium onions
2                       carrots
2                       stalks of celery
4                       cloves of garlic
2L / 8qt            beef stock
796ml / 28oz    canned tomatoes (1 can)
45g / 1.6oz       Oaxacan chocolate (it's spicier)
1                       pack Starbucks "Via" instant coffee
60ml / 4Tbs      whiskey
2                       bay leaves
to taste             kosher salt
as needed         olive oil

spice rub: (feel free to be generous, all measurements are "at least")

5ml / 1tsp          cumin
5ml / 1tsp          smoked paprika
2.5ml / 1/2tsp    cayenne
5ml / 1tsp          ground black pepper
5ml / 1tsp          garlic power
10ml / 2tsp        brown sugar
you will also need a smoker, smoking gun, or liquid smoke

Method:

 - rub the meat with a bit of olive oil
 - apply the spices evenly to all sides - massage them in
 - if you have a smoker - smoke two hours
 - julienne two of the onions
 - place the meat in the bowl with the onions and toss around for coverage
 - if you didn't have a smoker, but have a smoking gun - seal the bowl with plastic wrap and pipe smoke in  and re-seal - repeat process a few times over a few hours
 - let the meat marinate overnight
 - clean the onions off the meat (save them) and season well with salt
 - sear the meat well in a hot pan and set aside
 - unless the pan is excessively burnt, julienne the other two onions and caramelize along with the originals in the same pan
 - peel and chop the carrots and celery, mince the fresh garlic
 - when the onions are browned, set aside and caramelize the carrots and celery, adding the garlic at the end
 - return the onions to the pan
 - deglaze with whiskey
 - puree the can tomatoes and strain the seeds out
 - add the tomato puree to the pan
 - add the chocolate and coffee and dissolve both
 - add the bay leaves

Note if cooking sous-vide:  at this point, turn off the heat, cool, then add the cold stock and mix well.  Set the water bath for 183F / 84C for a six hour cook (or 172F / 78C for a 12 hour cook).  If you are pulling the meat, you can even go longer for a softer product.  Put the meat in a bag and surround it with all the vegetables and some of the broth (the rest of the broth can be reduced for sauce) and seal on a looser setting to prevent blowout.  Set the bag in the bath, cook for the prescribed time, then ice down to cool and rest one day.  Pick up the rest of the procedure after the days rest in the traditional method.

 - set the oven to 250F / 121C
 - bring the broth to a simmer
 - return the meat to the broth
 - cover and place in the oven and cook for 5 -6 hours (slow cooker was about the same)
 - check the meat - it shouldn't feel tight and the fibers should separate when squeezed
 - remove from the oven and cool on a rack in the liquid
 - rest in the liquid overnight in the fridge
 - remove from fridge and remove fat cap from the broth
 - gently warm up the broth - this helps pulling the meat apart
 - remove the meat from the broth
 - strain the vegetables out of the broth and set it to reduce to a sauce
 - separate the meat from the bone, remove the fat and set aside the cartilage
 - put the bone in some water and make a remouillage stock - there's still flavour in it
 - pull the meat apart with your fingers
 - chop the cartilage and add to the meat
 - put the meat in a pan and keep warm
 - moisten with the reduced sauce to taste and desired juiciness
 - dish out some knuckle sandwiches!

the knockout punch
note:  the final sandwich was dressed with our pickled red onions, candied poblanos, cheddar cheese and some of the adobo from Abuela's chipotles - pure goodness!